
Are you looking to add some texture to a boring fireplace or wall? Faux brick is a great and affordable solution. In this post, I’m going to show you how you can add DIY faux brick texture to a fireplace or wall using mortar (you could also use joint compound/drywall mud but mortar has more texture for a more realistic look)!
Mortar is not only the a really budget friendly option to create the faux brick look but it also gives you the most flexibility to customize the size, shape and spacing of our “brick” and allows you to create a really custom look.
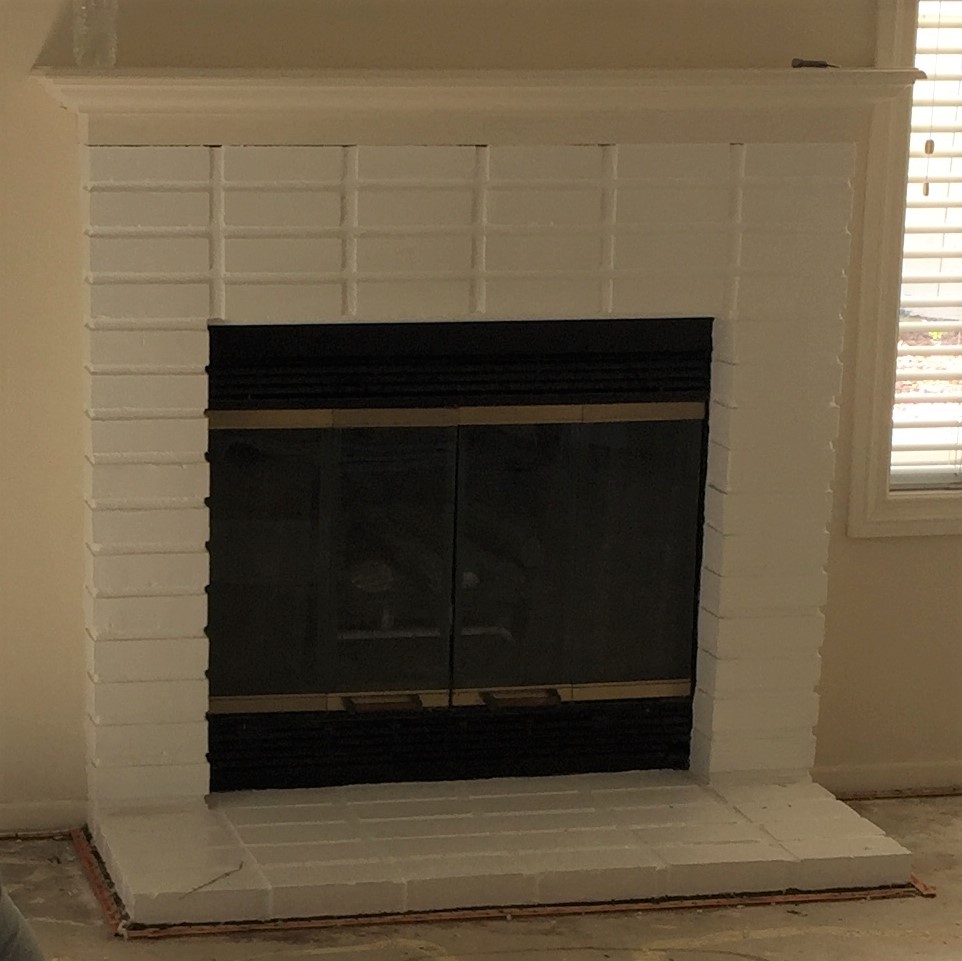
Here is what our fireplace looked like the day after we got the California Cottage house (and ripped out the old flooring):
I ended up painting the mantel but still didn’t really like the stacked brick look:

Materials
- Painter’s tape
- White mortar (I had some left over from our bathroom remodel)
- Paint
- Caulk
Tools
- Level
- Putty knife
Step 1: Plan out pattern, size and spacing
The first step was to plan out your pattern, size and spacing. I decided to go for an offset brick look and I wanted it to look as realistic as possible so I used dimensions that were close to real brick. I also made sure to plan the size and spacing in a way that would allow all rows of “brick” to be full rows without any awkward slivers.
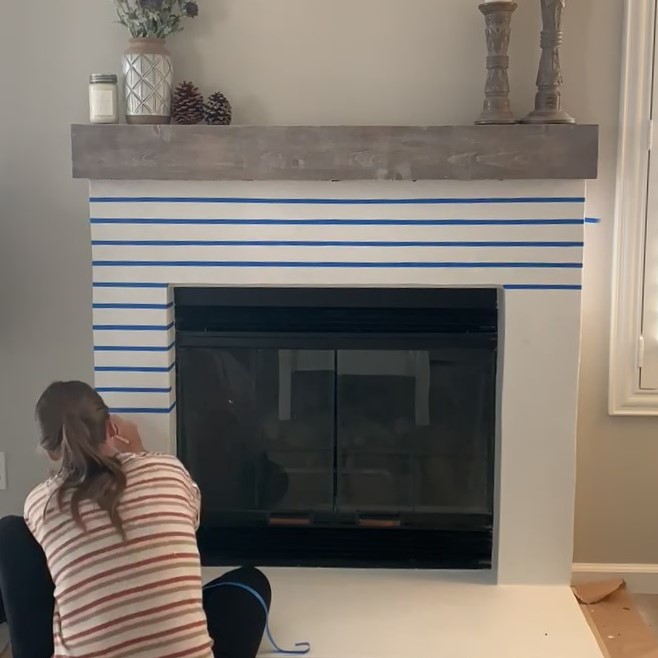
Step 2: Stick tape to fireplace or wall
Next, I started taping the layout using painter’s tape and ensuring that it was level:

You don’t have to use a laser level, a regular level will work just as well!
Then, I added additional rows while measuring the distance to ensure they were evenly spaced out:

Step 3: Add mortar
Once I had the layout outlined with painter’s tape, it was time to add the mortar. I used some leftover white mortar and mixed small batches at a time in a cup so I could take my time with this step without having to worry about the mortar drying too fast.
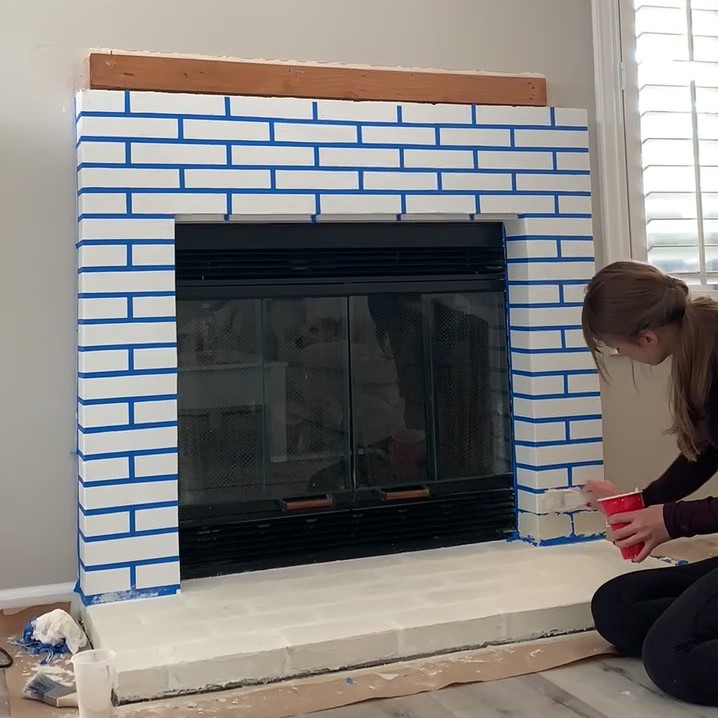
I used a small putty knife to add a thin layer of mortar to the fireplace:

It really didn’t have to be spread out perfectly smooth. A little bit of texture and small imperfections actually made the “brick” look more real.
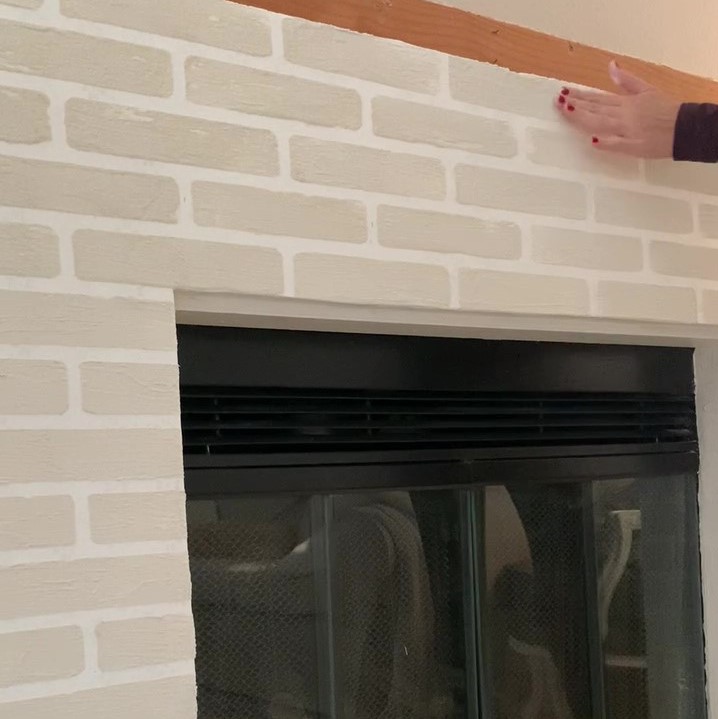
Step 4: Remove tape and adjust joint compound
Then, I let the mortar set for a few minutes before removing the tape:

Once I removed the tape, the corners of the “brick” were really square. I wanted a more natural and realistic look so I removed the mortar that was in the corners and rounded the edges of the “brick”:


I also decided to lightly smooth out any high points along the edges:

I really think these little perfecting touches helped create a very realistic brick look:
Step 5: Let it dry
Then, the mortar was ready to dry according to the instructions on the package.
Step 6: Caulk and paint fireplace
Once the mortar was dry, I caulked and painted the fireplace.
Caulk is one of the easiest ways to make a DIY project look professional:

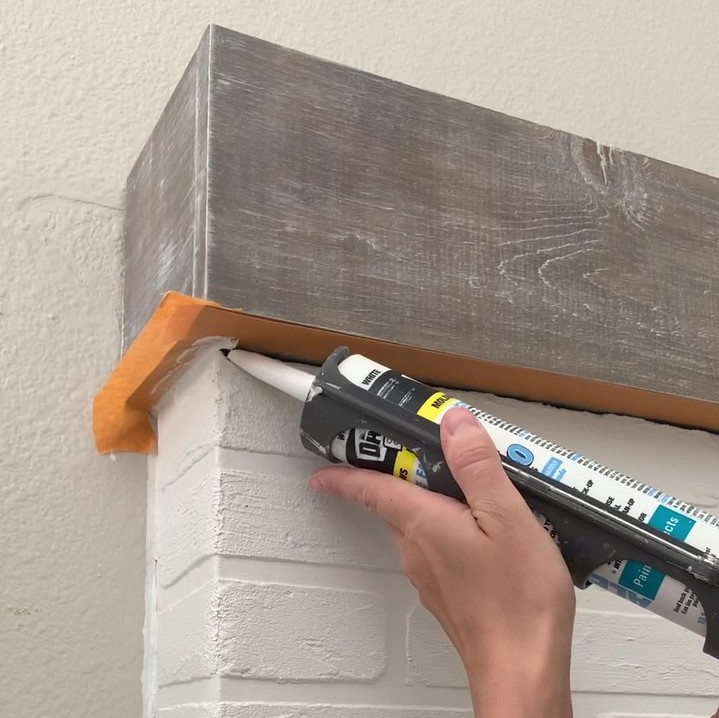

Look at that gap just disappear!
Finished DIY faux brick fireplace
Here’s the finished DIY faux brick fireplace, look at all that texture!

I hope this was helpful in showing you how you can create a DIY faux brick fireplace or wall on a budget using mortar. Let me know if you have any questions or end up trying this project!
Tina

Leave a Reply