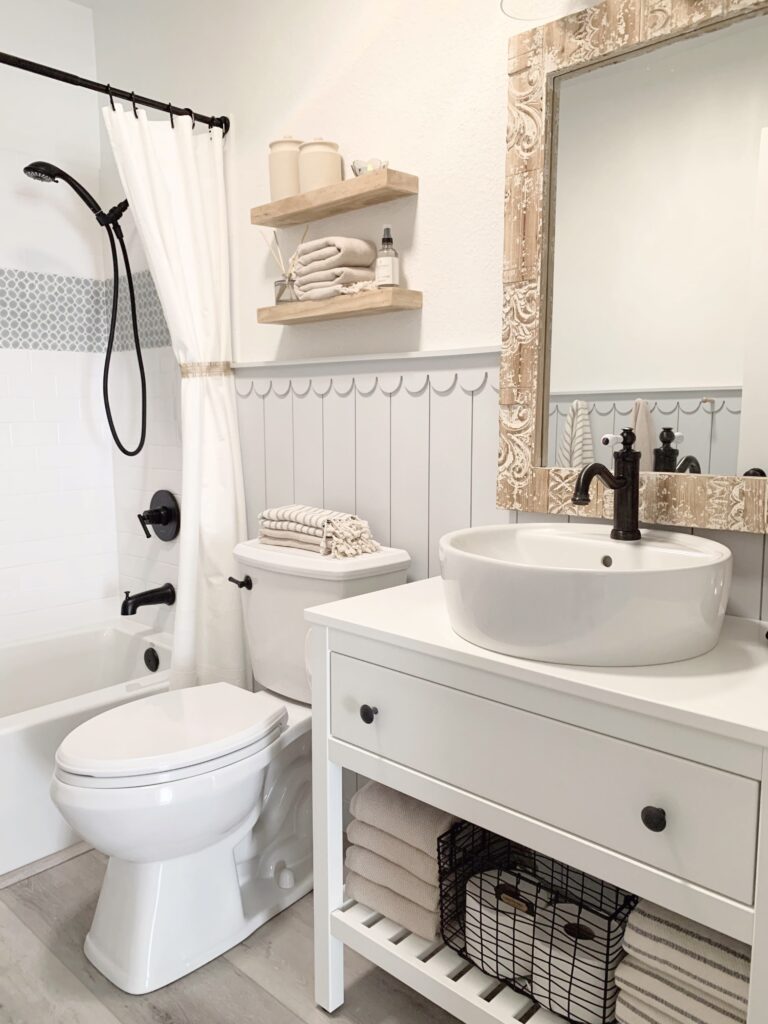
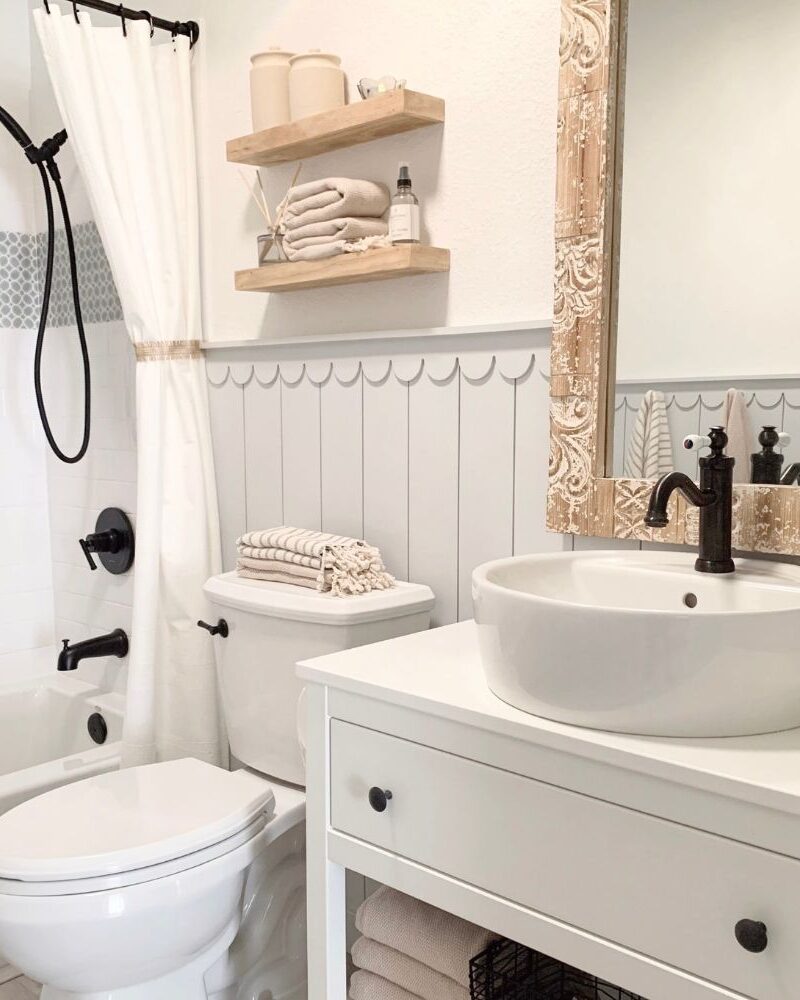
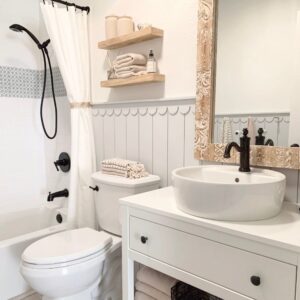
This DIY scalloped shiplap paneling was the one project I was both most excited and nervous about in our guest bathroom! I had this idea to combine vertical shiplap with scallops to turn it into a fun scalloped wall but I wasn’t able to find anything like this on the internet. I didn’t know what this scalloped wall would end up looking like but I’m so glad I gave this a try because I love how it turned out!
Note: This post may contain affiliate links, you can find more information in my disclosures here.
This was a pretty quick and easy project, so if you’re considering scalloped walls for your house and don’t want to use a scalloped wall stencil to create a scalloped painted wall, here are the steps to create a scalloped wall with vertical shiplap:
Materials:
- scalloped MDF trim
- 1″ x 6″ x 8′ primed MDF shiplap cut in half
- 1″ x 2″ primed MDF trim for the ledge
- craftsman primed MDF baseboards
- Behr Alkyd Satin Enamel paint (color matched to Sherwin Williams Olympus White that I also used for the medicine cabinet upgrade)
- wood pegs with screws
- caulk
- wood filler
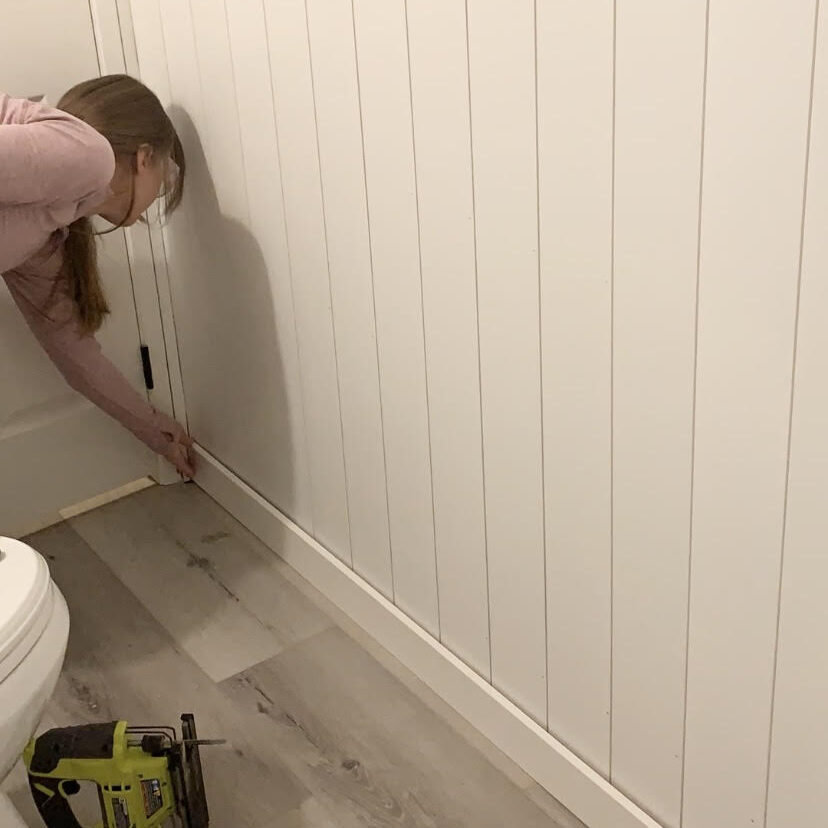
Step 1: Attach shiplap boards to wall
I started with the first shiplap board and made sure it was level.
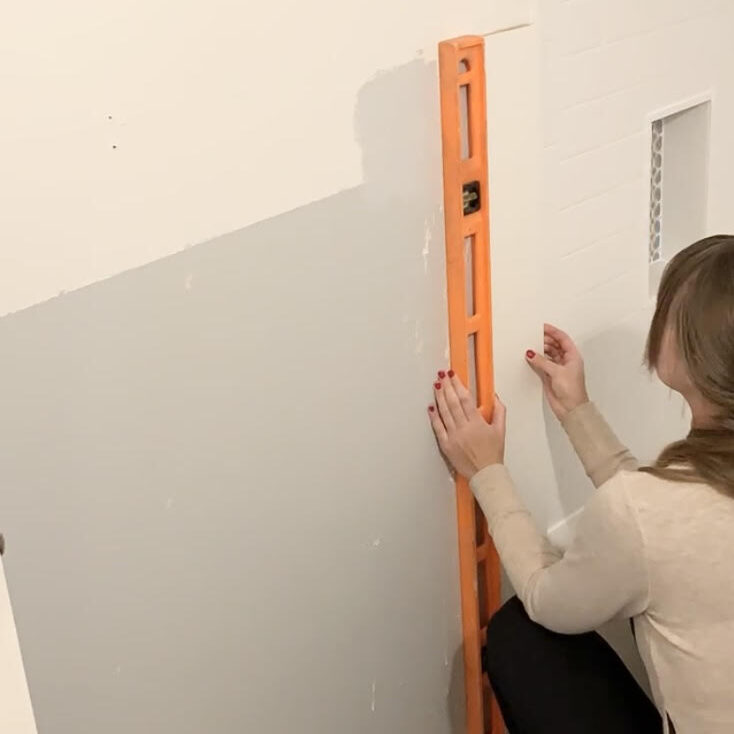
Next, I attached it to the wall using my brad nailer and kept going.
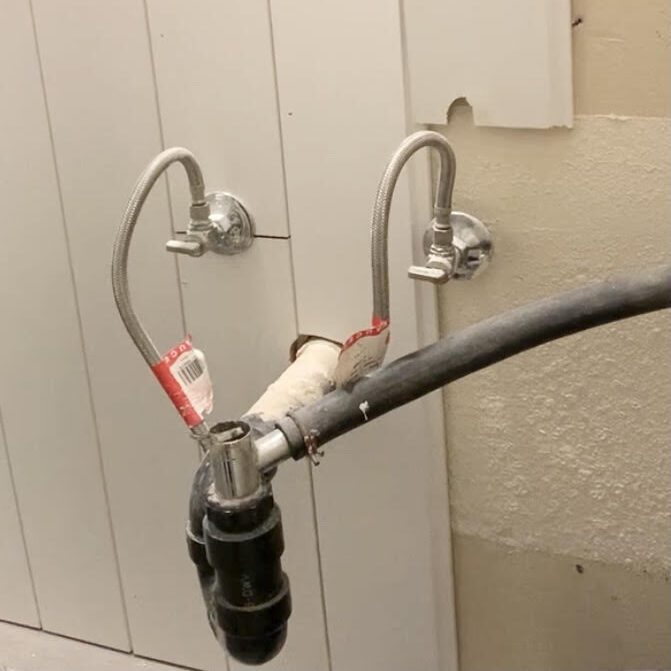
I definitely came across a few interesting obstacles like this one. Here’s how I cut the shiplap around the pipes. I wasn’t too worried about this area because it would eventually be covered up by the vanity.
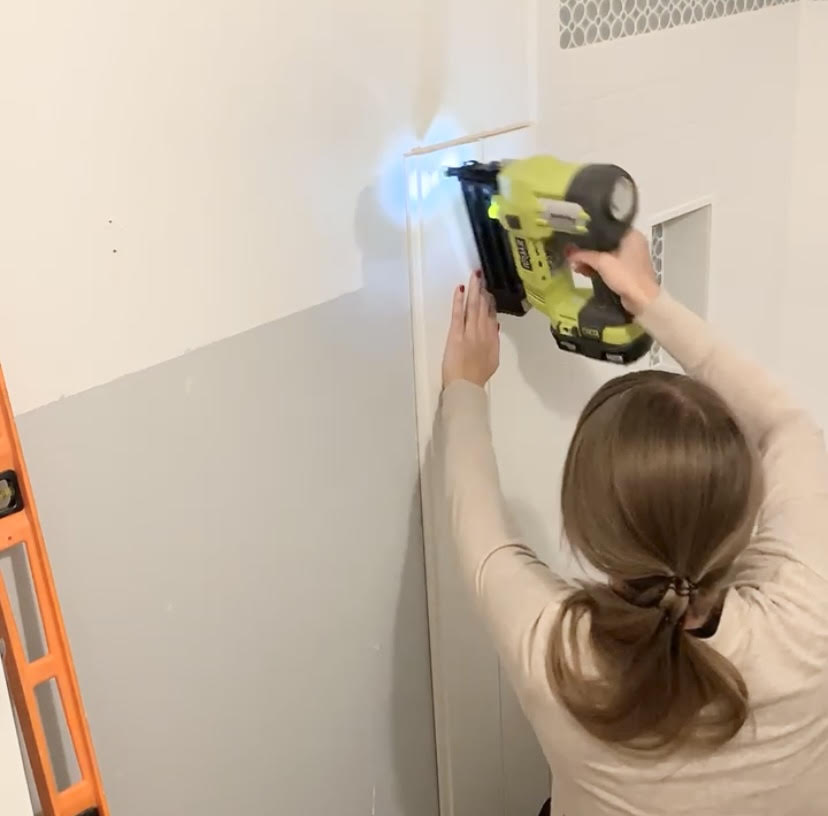
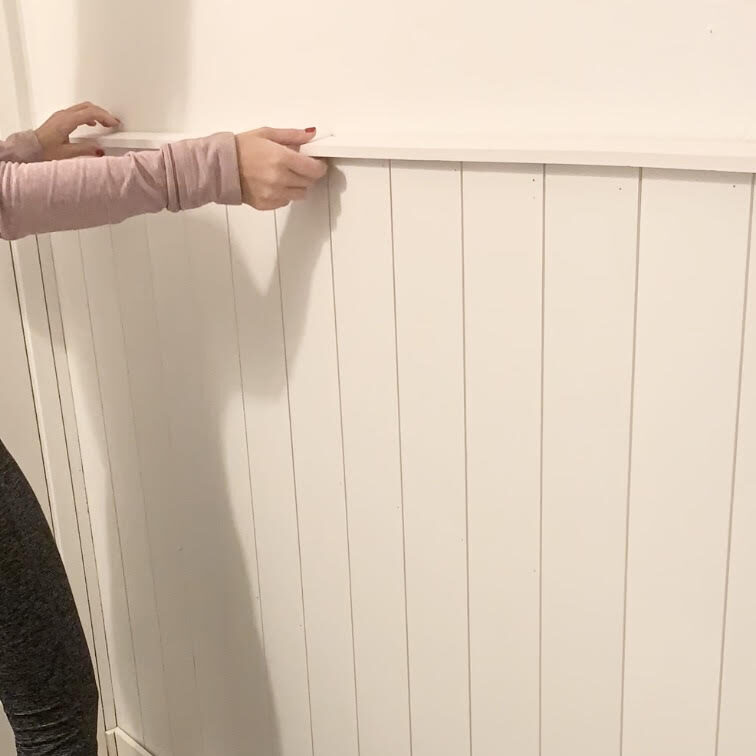
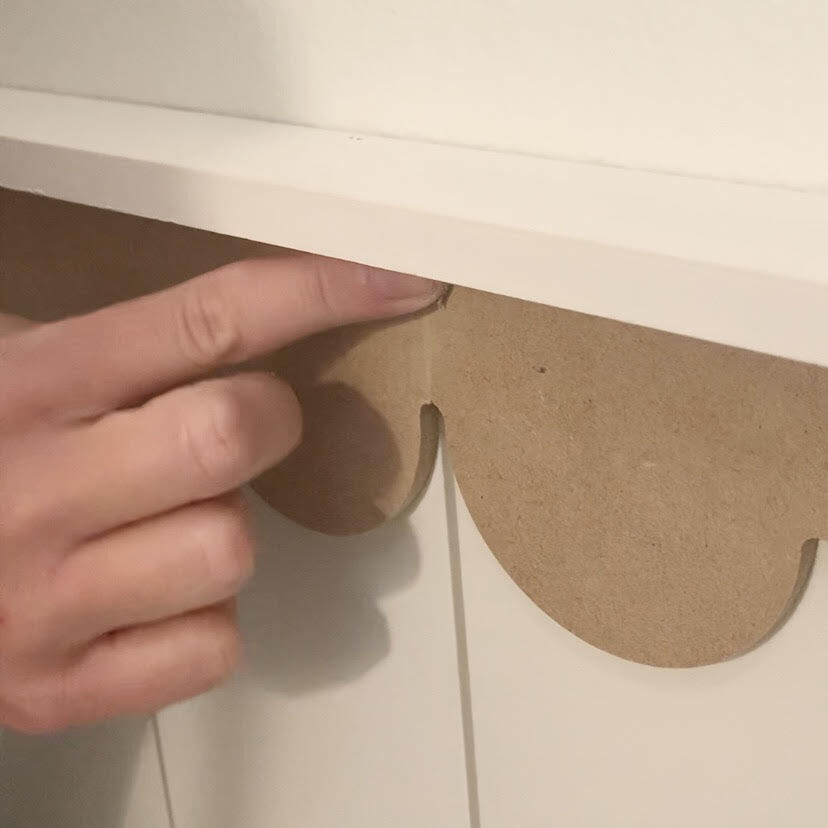
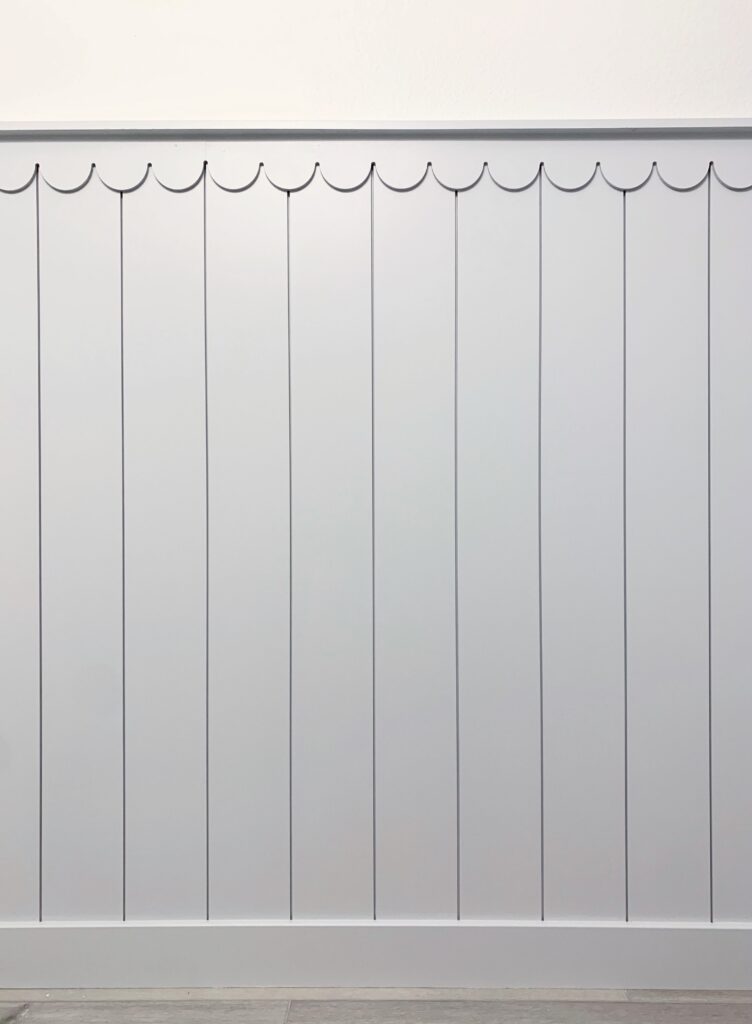
Step 2: Add baseboards, ledge and scalloped trim
Once I was done attaching the shiplap to the walls, I added the baseboards:
… and the ledge!
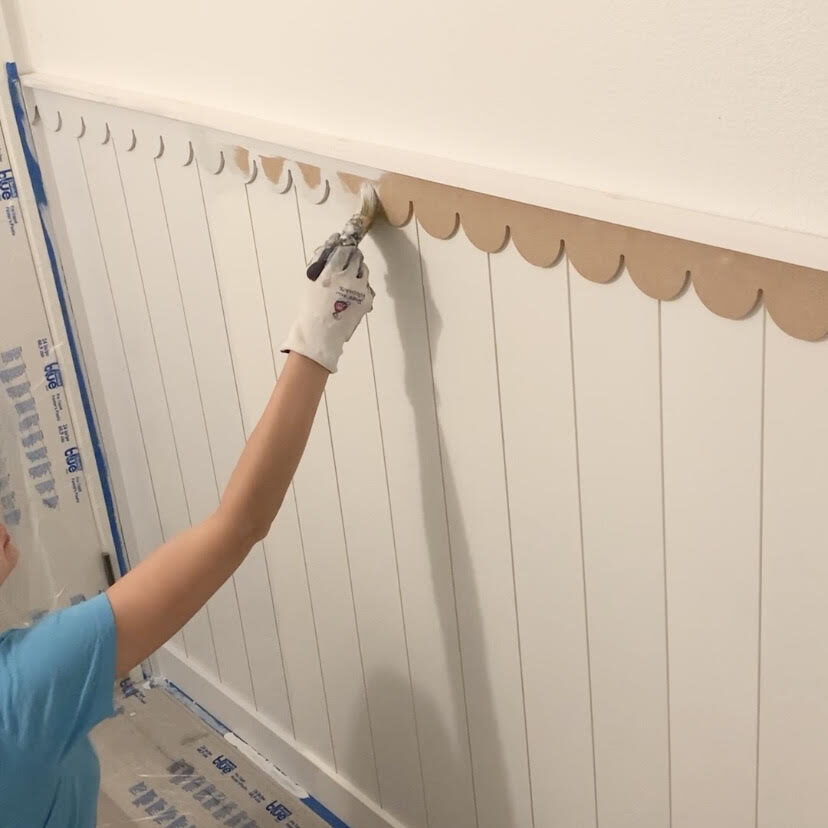
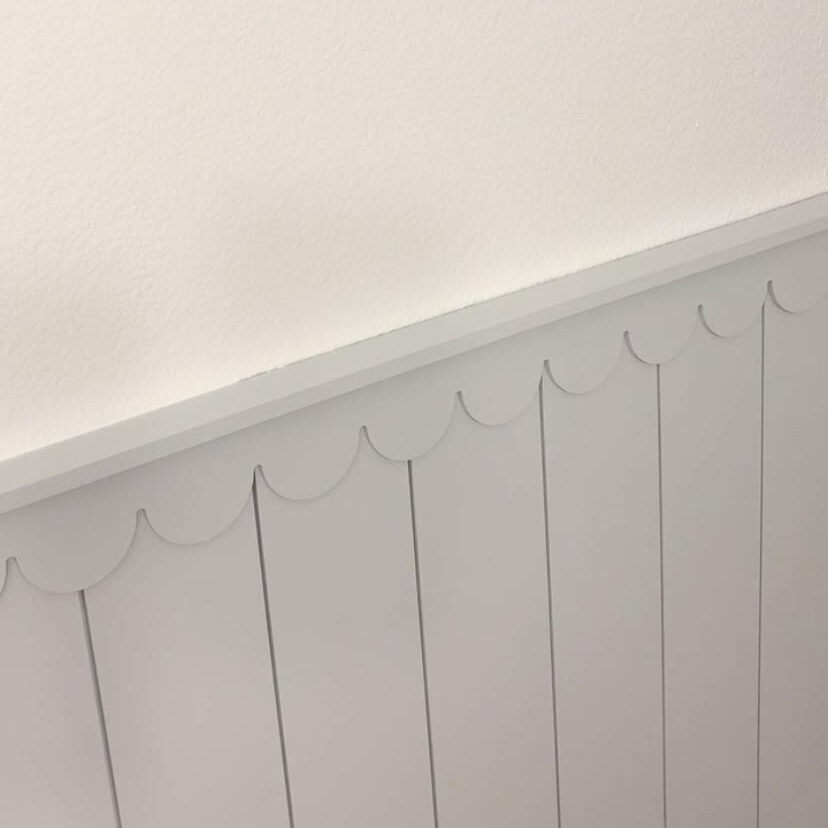
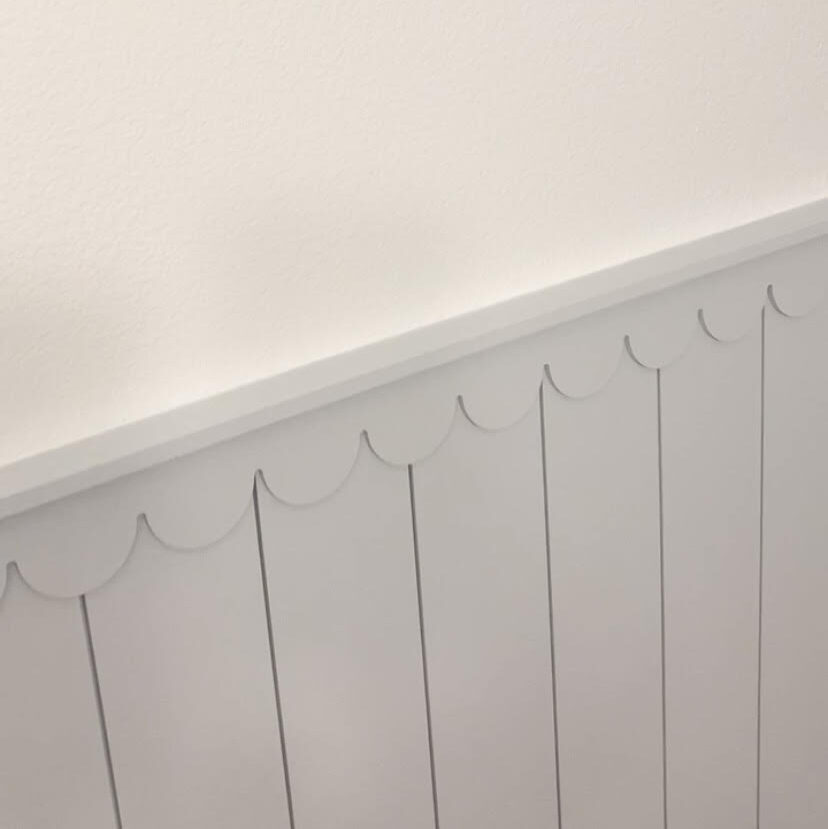
Moment of truth! I added scalloped trim and instantly knew I loved this scalloped accent wall!
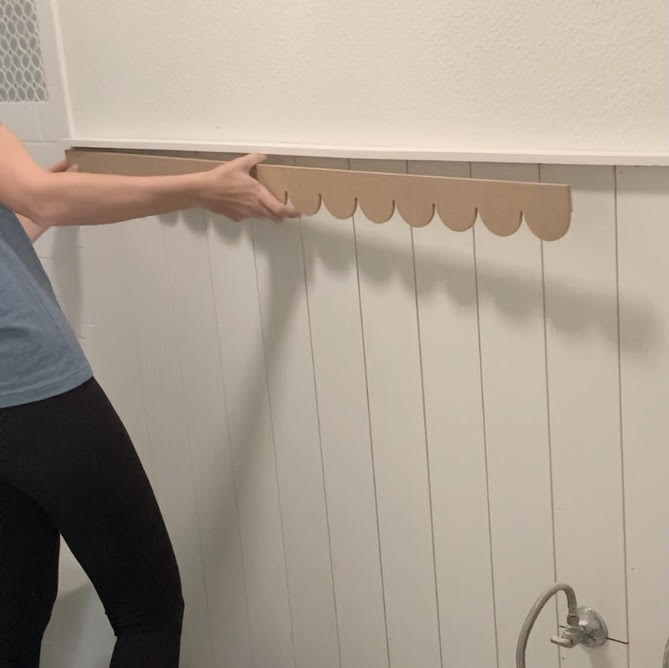
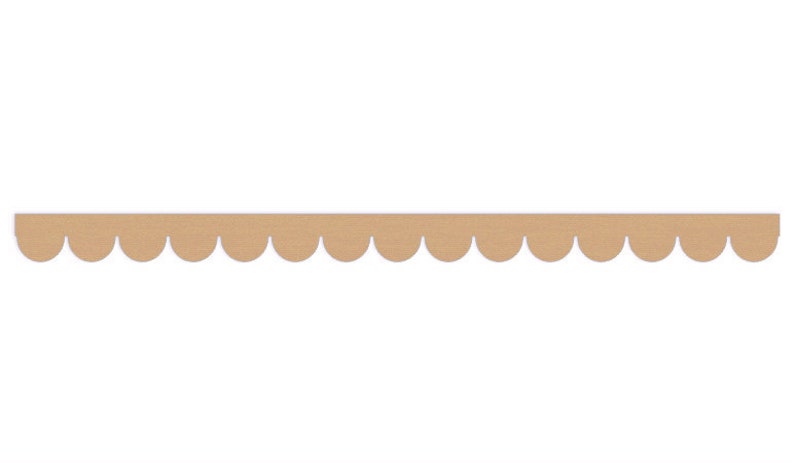
This is the scalloped trim I used for this project!
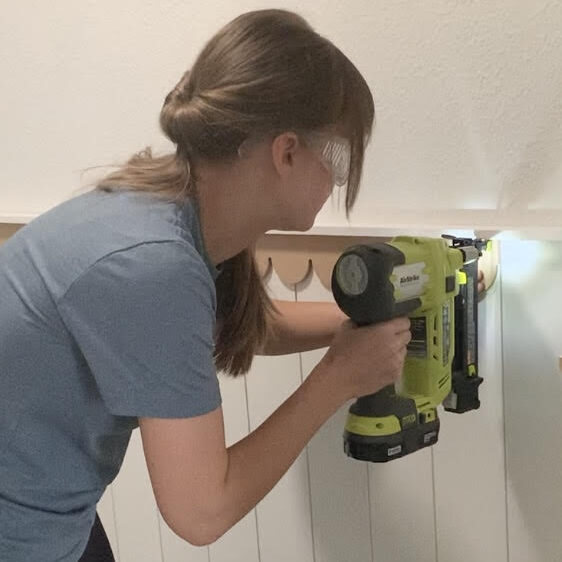
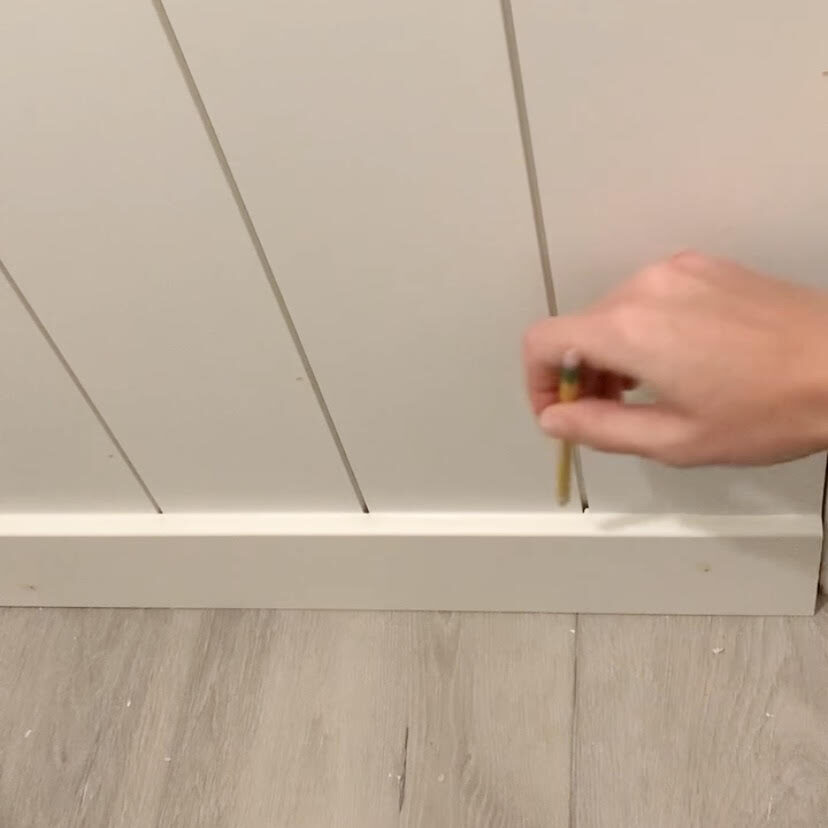
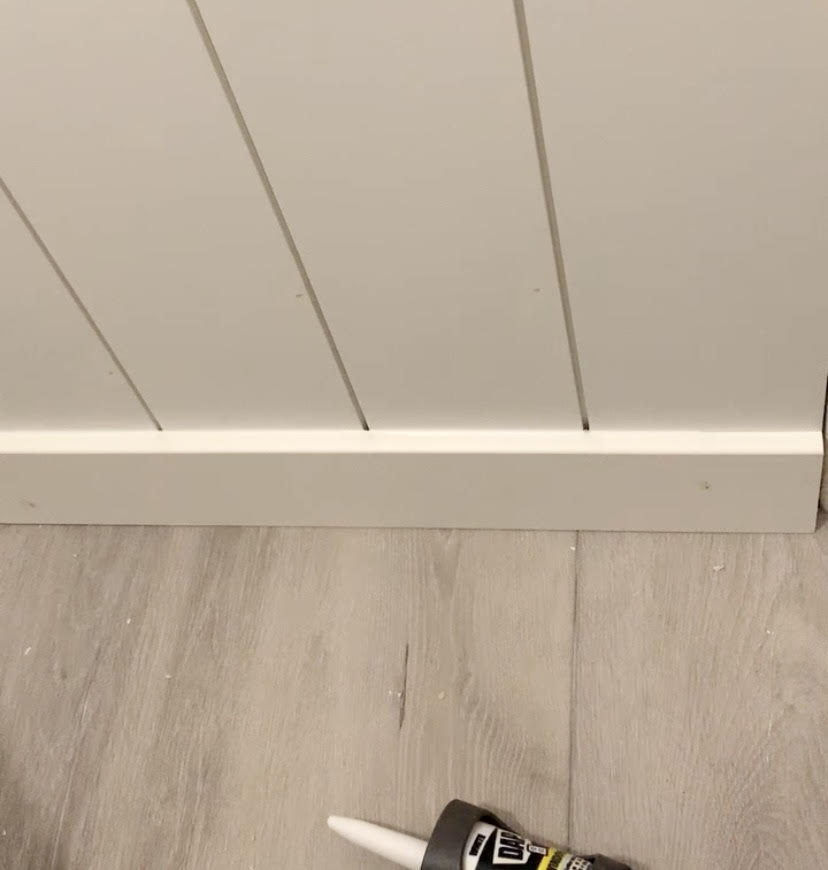
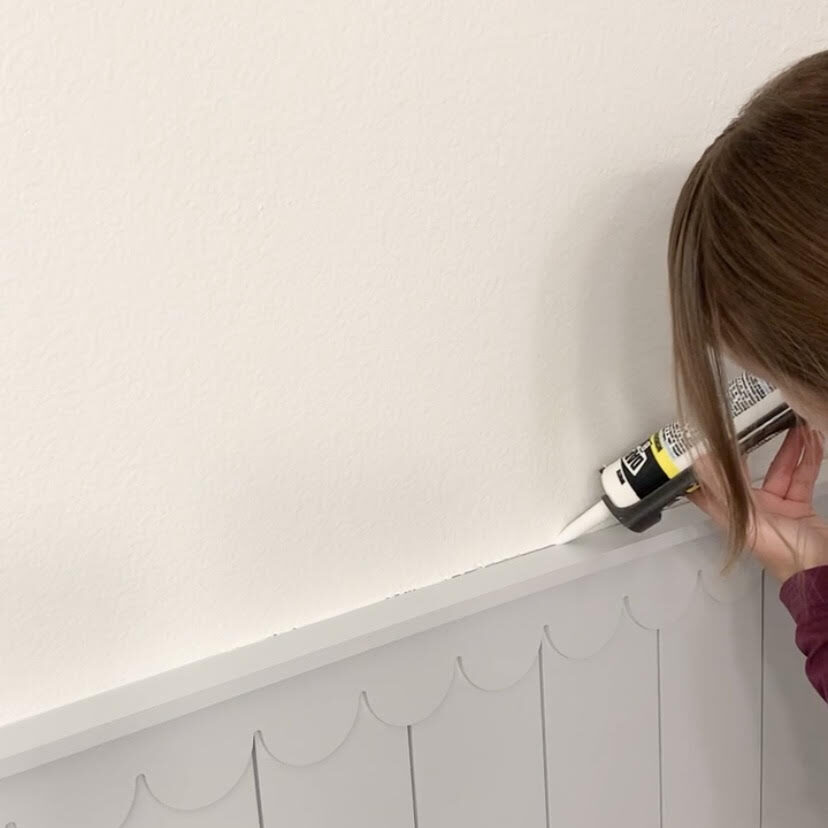
Step 3: Wood filler and caulk
After everything was attached I filled all of the nail holes with wood filler and all of the gaps (except the one above the ledge which I did after painting) with caulk. I think both of these steps really help achieve a clean finish for this scallop edge wall!

Caulking the shiplap where it meets the baseboard can be a little tricky but I just used a pencil to get the caulk out of the gap. A toothpick would work just as well!
Step 4: Paint and caulk
Once the prep work was done, I was able to start painting! I used Sherwin Williams Olympus White here and I think it’s the perfect gray/blue for our bathroom.
Once everything was painted, I applied caulk at the top where the ledge connects to the wall. I prefer doing this after painting because I can usually get a crisper line by wiping the excess off the ledge vs. trying to paint a straight line on the caulk.
Here’s a before and after:
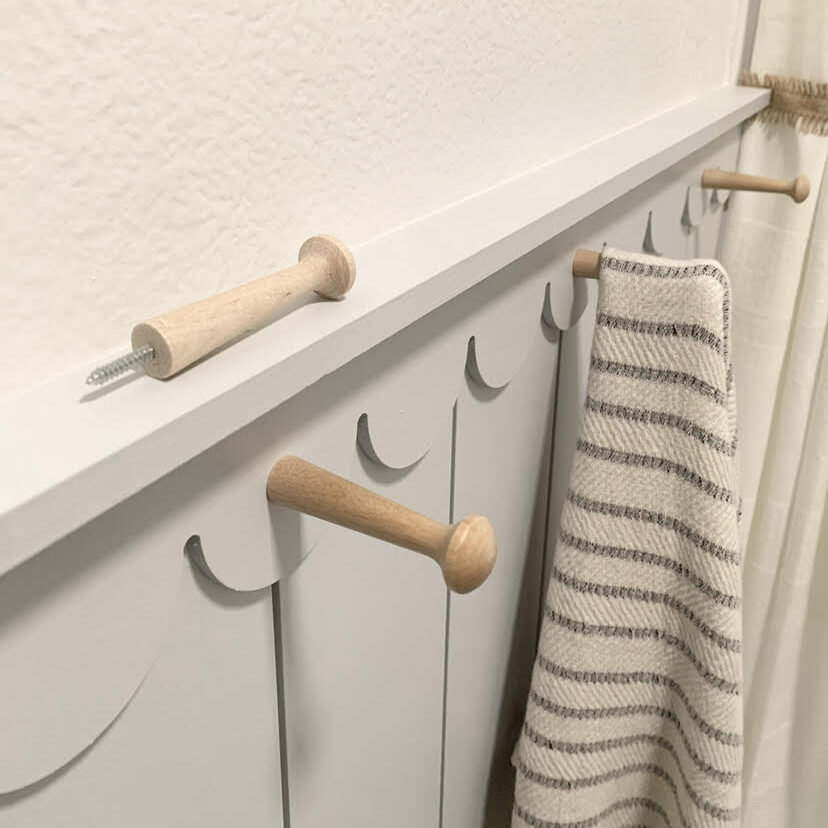
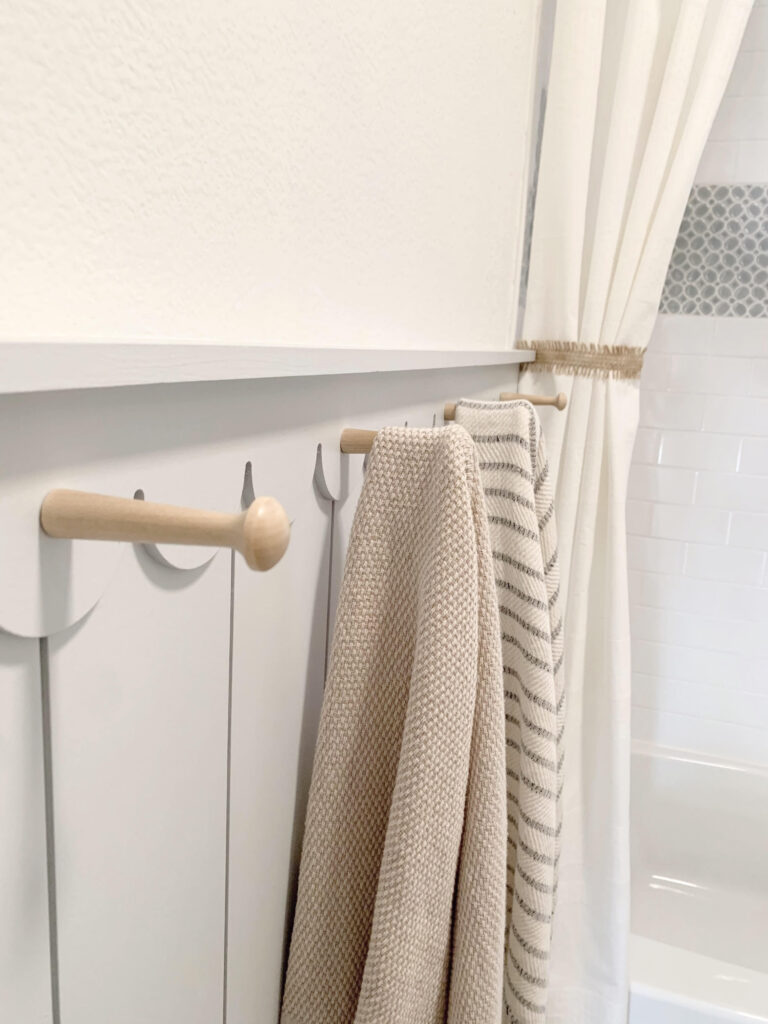
Step 5: Attach pegs
Lastly, I added the pegs to the wall to be able to hang towels. It was definitely a little scary drilling all these holes into this fresh new paneling!
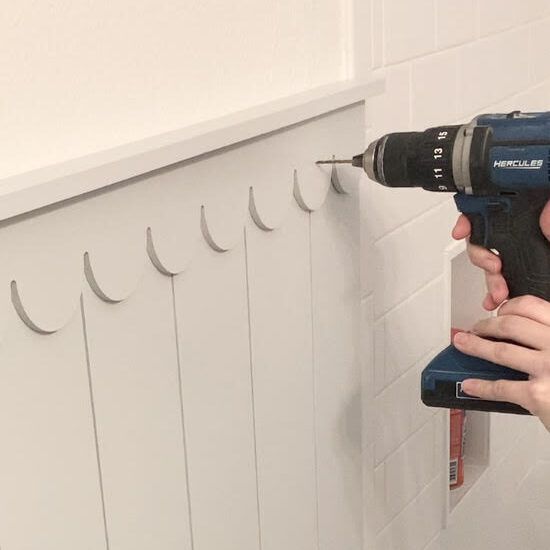
Here’s a picture of the pegs I used. They were really easy to attach because of the screw tips!
I’m so excited that I gave this DIY scalloped shiplap paneling a try, I love the way it turned out! It’s definitely one of my favorite twists on scalloped walls that I’ve seen so far.
It could be used instead of a scalloped painted wall or scalloped wall panels.
I think this would also work great in a scalloped wall nursery – a perfect little scalloped nursery wall!


This is the scalloped trim I used for this project!
You can find more pictures of our guest bathroom with this DIY scalloped wall here.
I hope this was helpful, let me know if you have any questions at all!
Tina
I adore this! You’ve inspired me to do this is my own bathroom Reno project. What color did you paint the door? Did you paint it the same color as the scalloped bead board??
Thanks so much, Kristan! I painted it white a few months before this project so I just left it alone but it would’ve probably looked great if it matched the light blue scalloped trim! I would love to see your finished project once you’re done!
How did you add the 1×2 to the wall? I am trying to brad nail it in but I keep getting pins that aren’t entirely in the board. Just wondering how you were able to get it done. Thanks in advance.
Hi Cindy!
I used my brad nailer to attach them. If your nails are not going in all the way you may need to adjust the setting on your brad nailer, there is a setting on how deep the nails should go in (e.g. all the way in vs. sticking out a bit). Let me know if you have any other questions!
Tina
Did you just attach them into the studs and not in-between the studs?
Hi Amee, I attached each of the shiplap panels, the scalloped trim and the ledge to the wall regardless of studs. All of the products I used are pretty lightweight so I wasn’t worried about hitting studs with every nail. Let me know if you have other questions!
The link for the scallop trim does not work. Could you update the post for the correct one? Thank you! Really great inspiration for my daughter’s room!
Hi Moe, thanks so much for letting me know. The issue should be fixed now!
How high does your trim go from the floor? And how high are your ceilings? I love the ratio of how you did this project!
Thank you so much! The shiplap is 4ft plus the trim piece at the top. The ceiling height is 8ft!