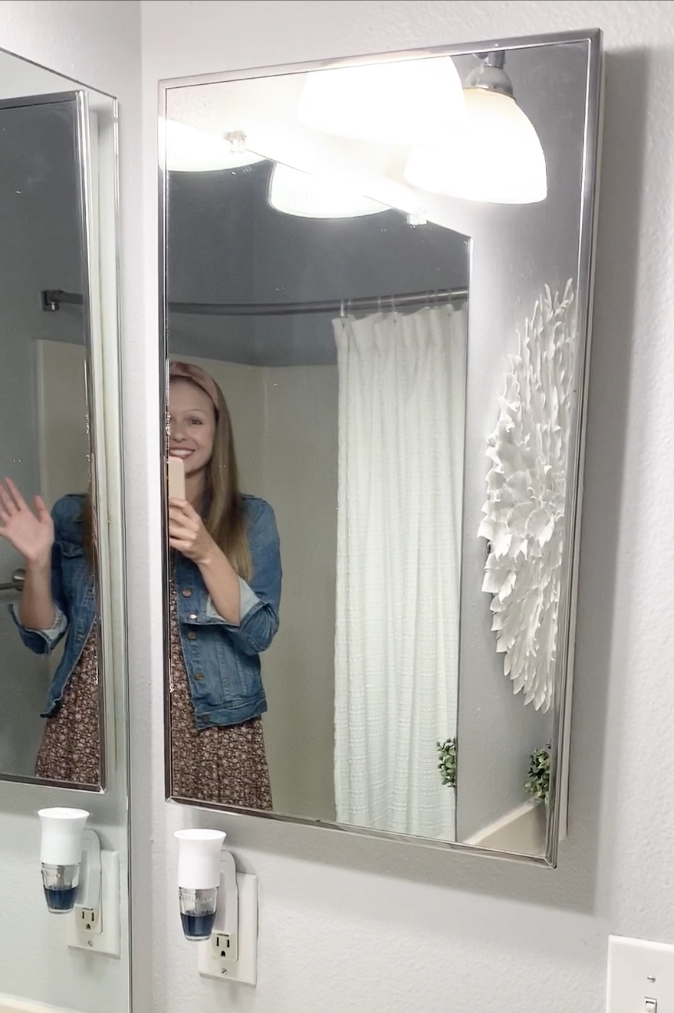
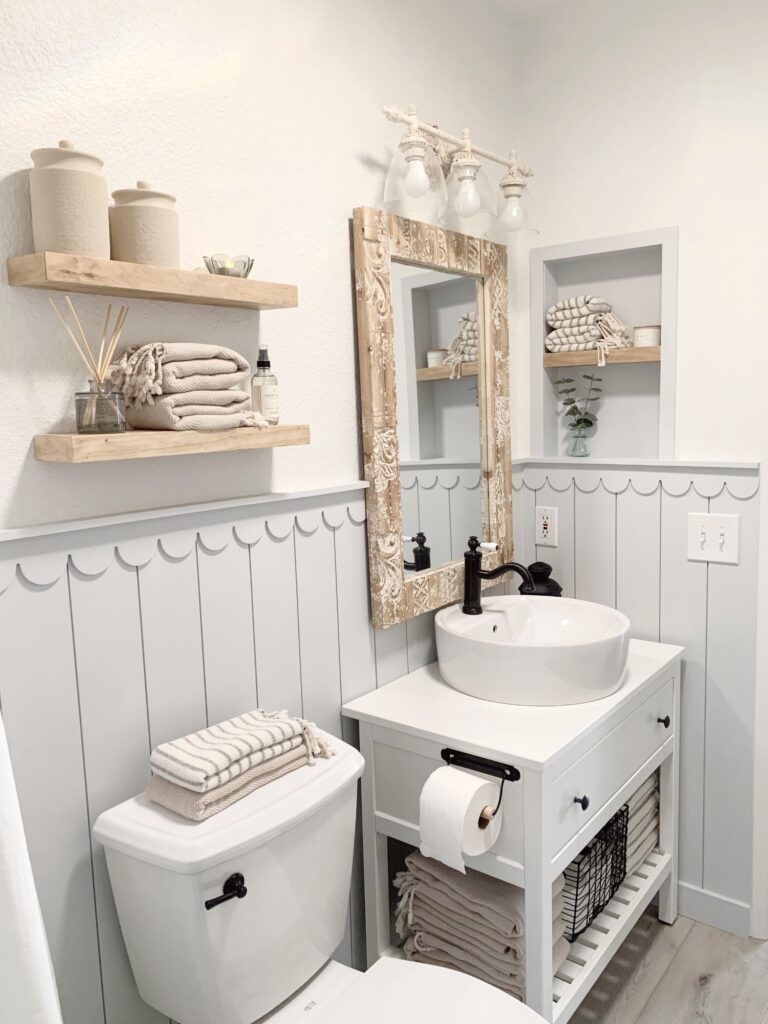
One of the projects I was really excited about as part of the California Cottage bathroom remodel was removing the old 80s medicine cabinet. I wanted to use the existing nook and transform it into something a little more modern but still practical with useful storage. I decided to turn a medicine cabinet into open shelving!
Note: This post may contain affiliate links, you can find more information in my disclosures here.
Materials:
- 2 premium pine boards (3/8″ x 3 1/2″ x 3′)
- 1 premium pine board (1/2″ x 3 1/2″ x 3′)
- 2 premium pine boards (3/8″ x 2″ x 3′)
- 1 drywall patch sheet (2′ x 2′)
- Paint
- Stain (I’ll share my exact stain mix in step 3)
- Caulk
Tools:
- Paint brush (this my favorite one that I use on all of my paint projects!)
- Paint roller
- Caulk gun
Step 1: Remove medicine cabinet
The first step was saying goodbye to the old 80s medicine cabinet and ripping it out. It’s easy to remove a medicine cabinet: Four screws and a yank – that is all it took to take this ancient thing out!
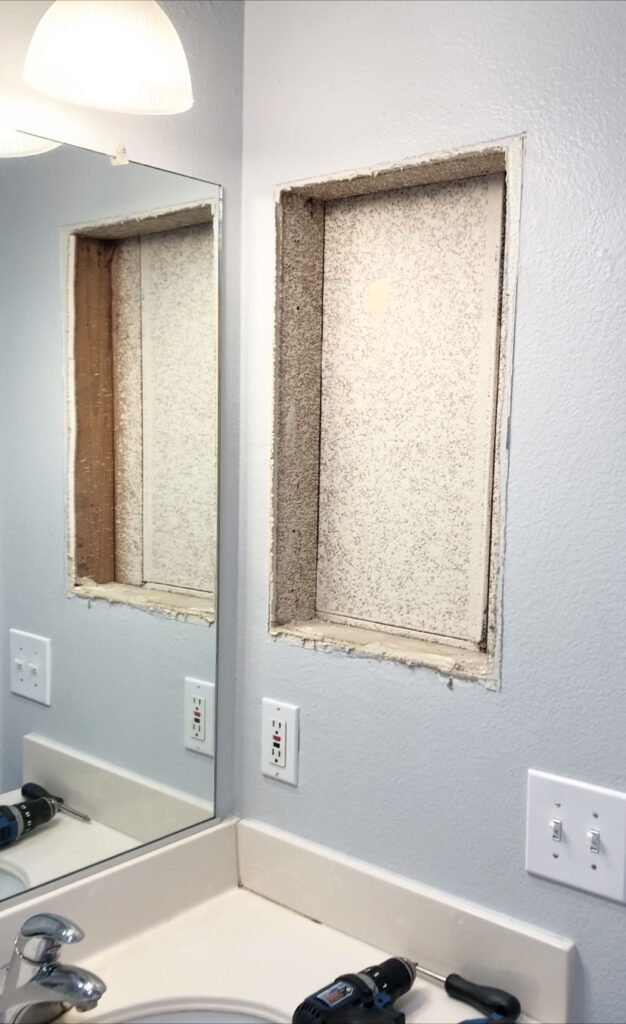
Step 2: Measure nook size for open shelving
I was left with this hole in the wall on demo day. After completing most of the other projects in this bathroom, this little nook was one of the last projects I tackled in here and it was so satisfying!
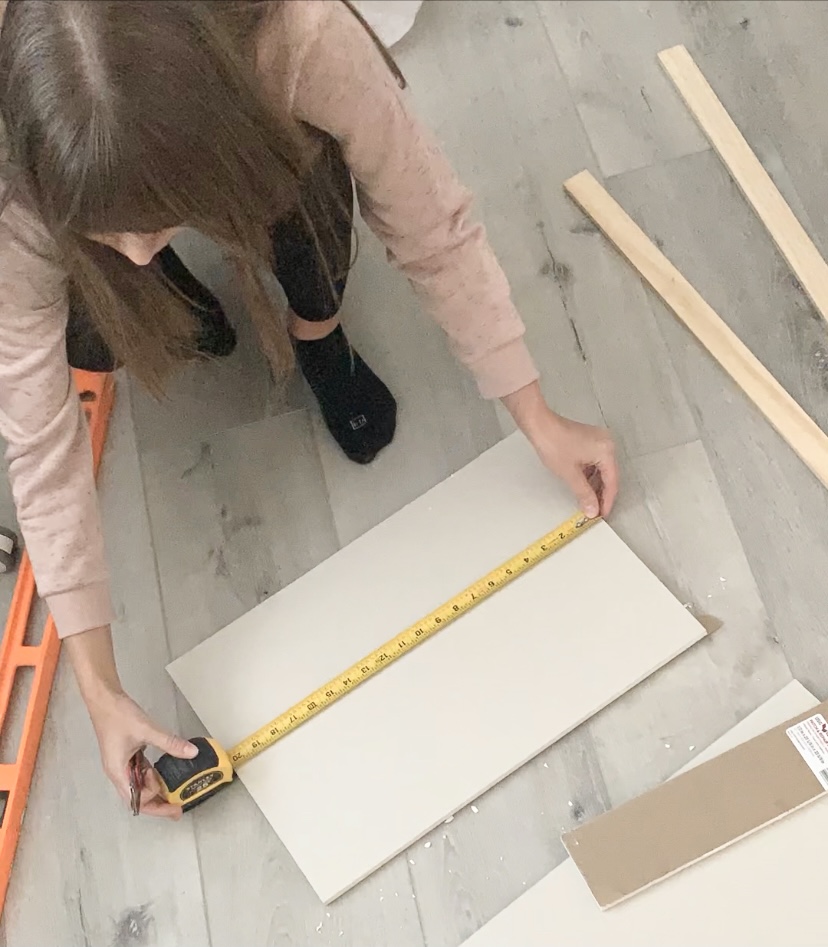
I started by measuring the space and figuring out the materials I needed to build this out. Our nook was approximately 14″x22″.
Step 3: Cut and paint/stain the wood
I cut the boards to size and painted/stained the parts that would be visible later:
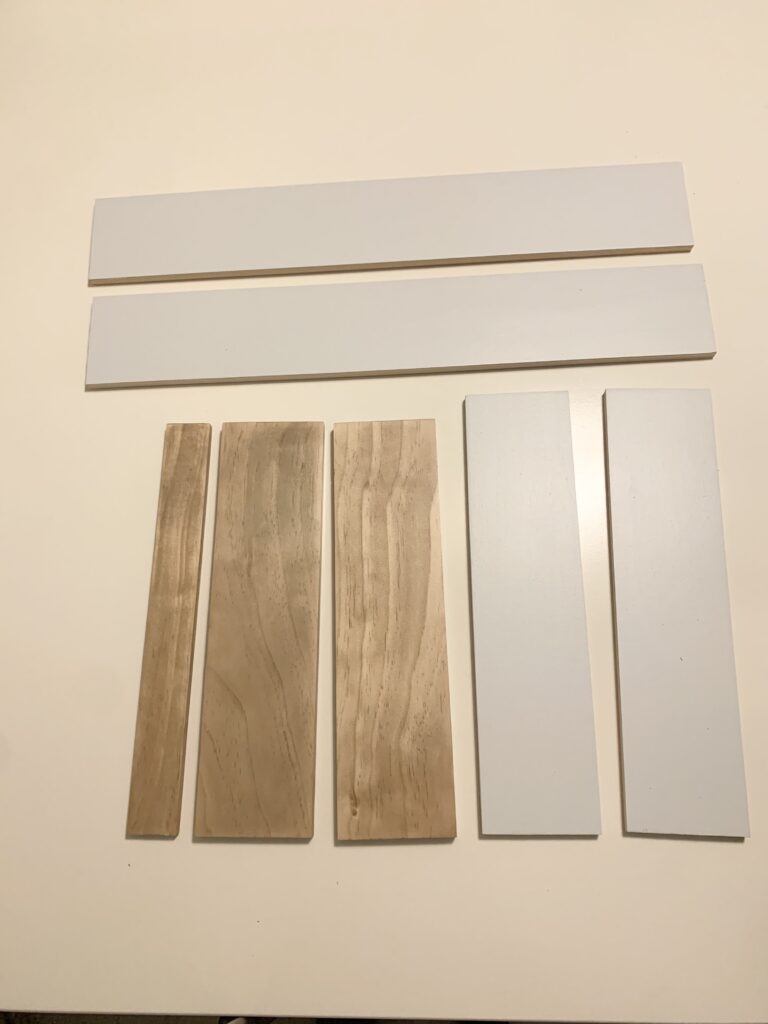
The light blue boards were for the sides and the stained pieces were for the shelf in the middle.
I used a different stain combo for this project than for the side table and entry table. It definitely took me a few tries to get the stain right and here is what I did to achieve this color:
- Wood Conditioner
- Minwax Early American stain
- A little bit of Minwax Weathered Oak stain
- After letting it dry, I sanded most of the stain off for a lighter and more distressed/beachy look
- Sealed it with Satin Polycrylic (I love the spray one, it just makes it so easy!)
Step 4: Build the DIY open shelving
Next, I used my brad nailer to create the outer box with the light blue pieces:
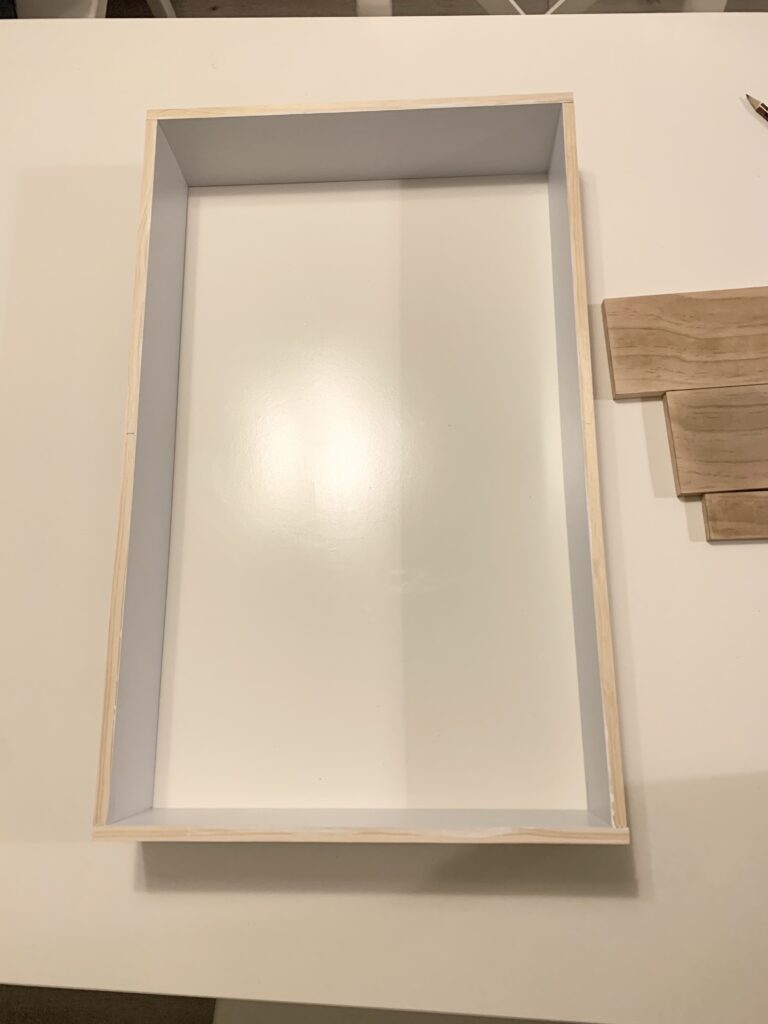
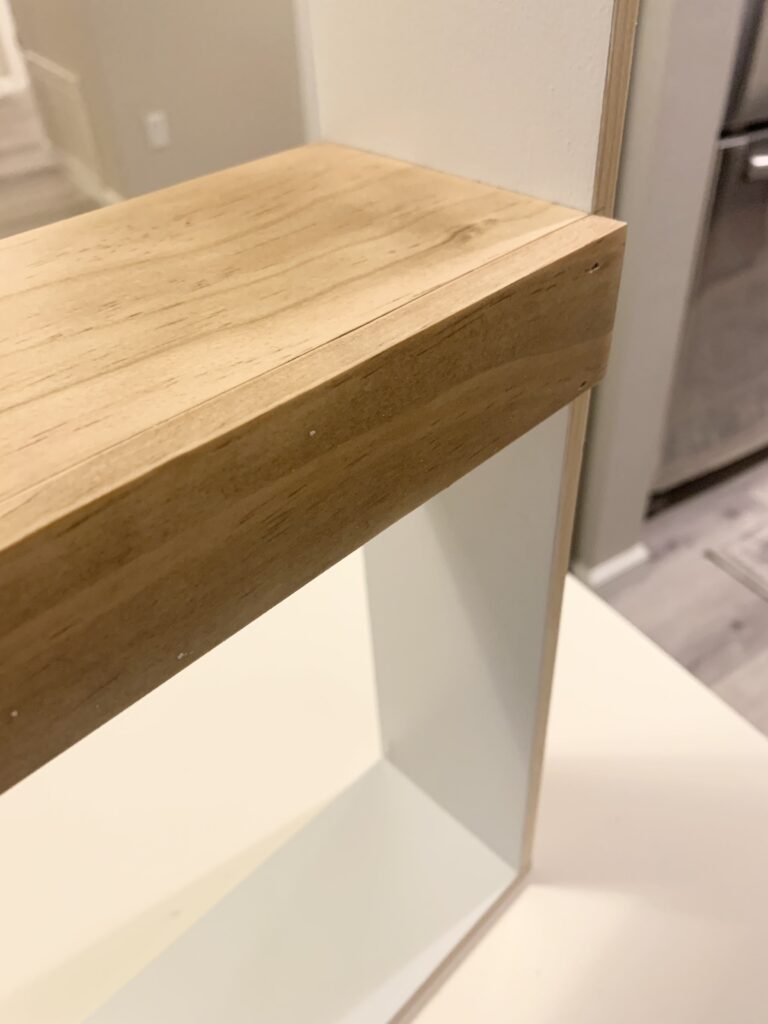
After that, I added the shelf portion using the stained wood pieces. Here is the back side:

Here is the front of the shelf:
Step 5: Add drywall
After that, I cut the drywall to size, painted it and attached it to the back of the wooden box:
You could definitely use wood for the entire project but I opted for drywall in the back because I had a large piece left over.
Step 6: Attach new DIY open shelving to wall
Once the box was done, I attached it to the studs surrounding my little hole in the wall!
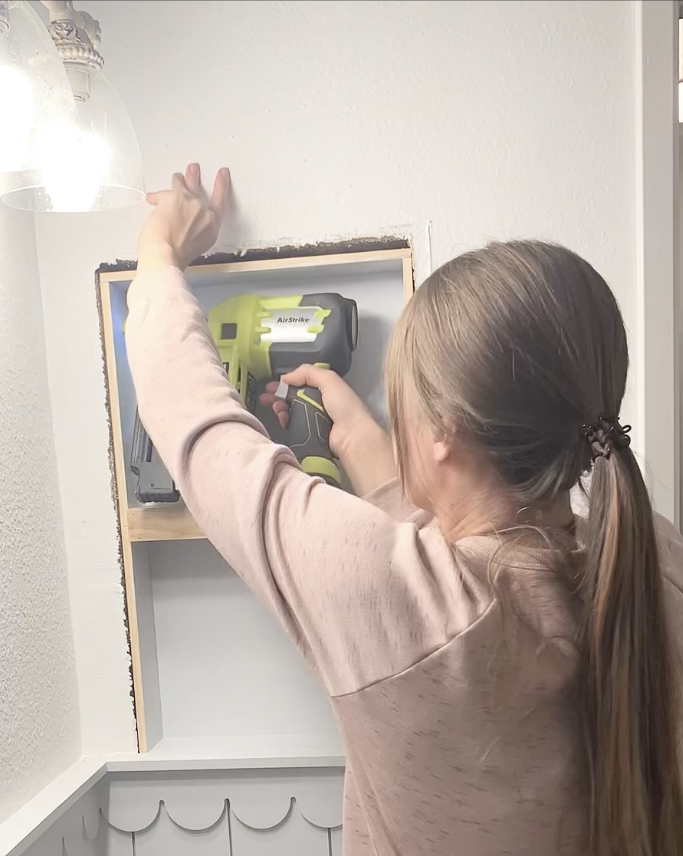
I made the box a little smaller than the hole in the wall for some wiggle room to ensure the bottom of it would be flush with the ledge of the shiplap paneling.
Step 7: Add decorative frame
The next step was to frame the box to get a nice finish. I measured the space and cut the 2″ pine boards to size.
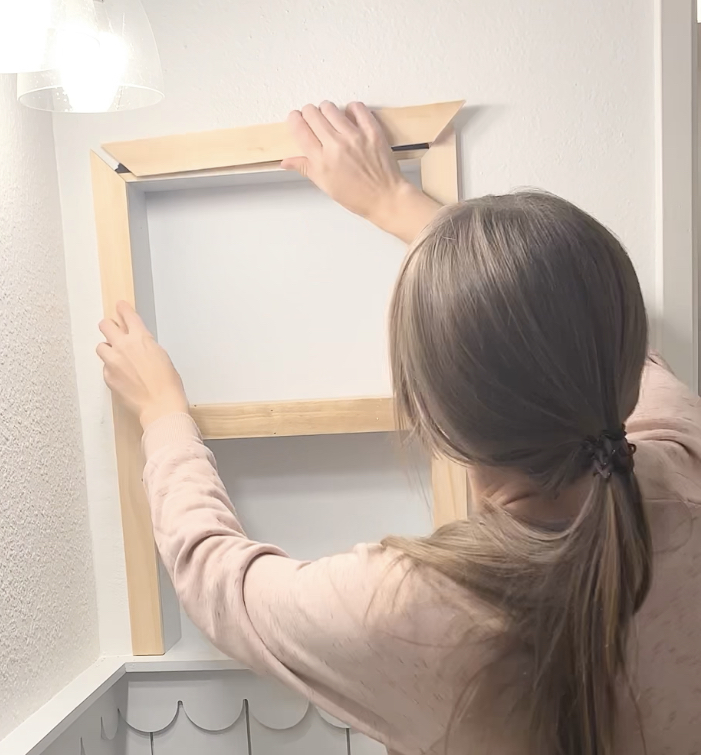
Once they were attached and secured, I filled any gaps with caulk or wood filler. I find that this step always makes such a big difference, it really helps with getting a smooth finish.
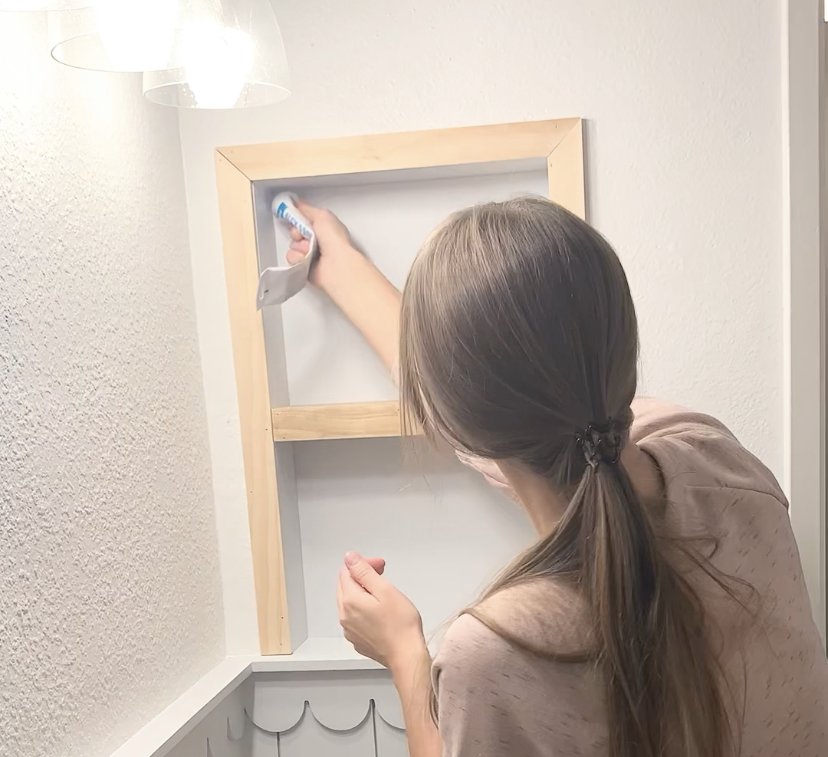
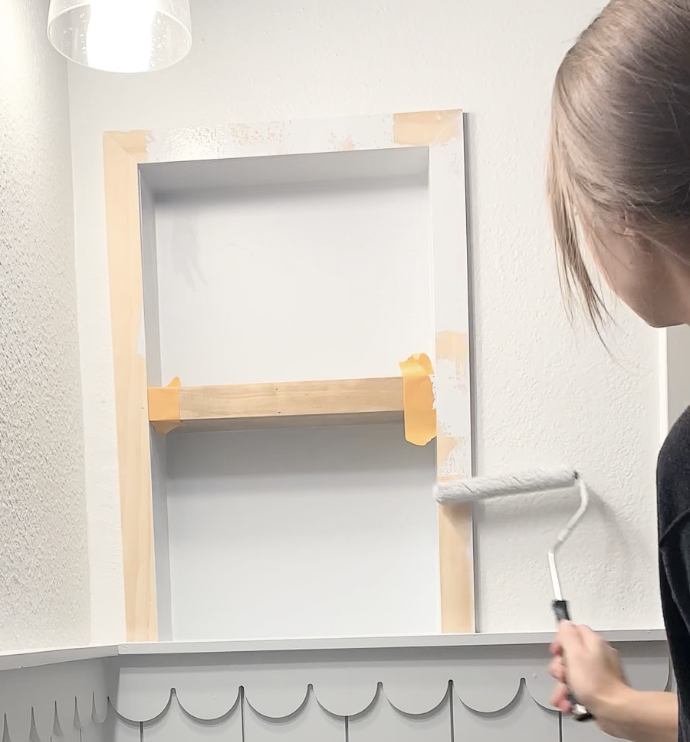
Once the caulk and wood filler were dry, I painted the new cabinet. I used Olympus White by Sherwin Williams, in my bathroom. It’s the perfect light blue/gray!
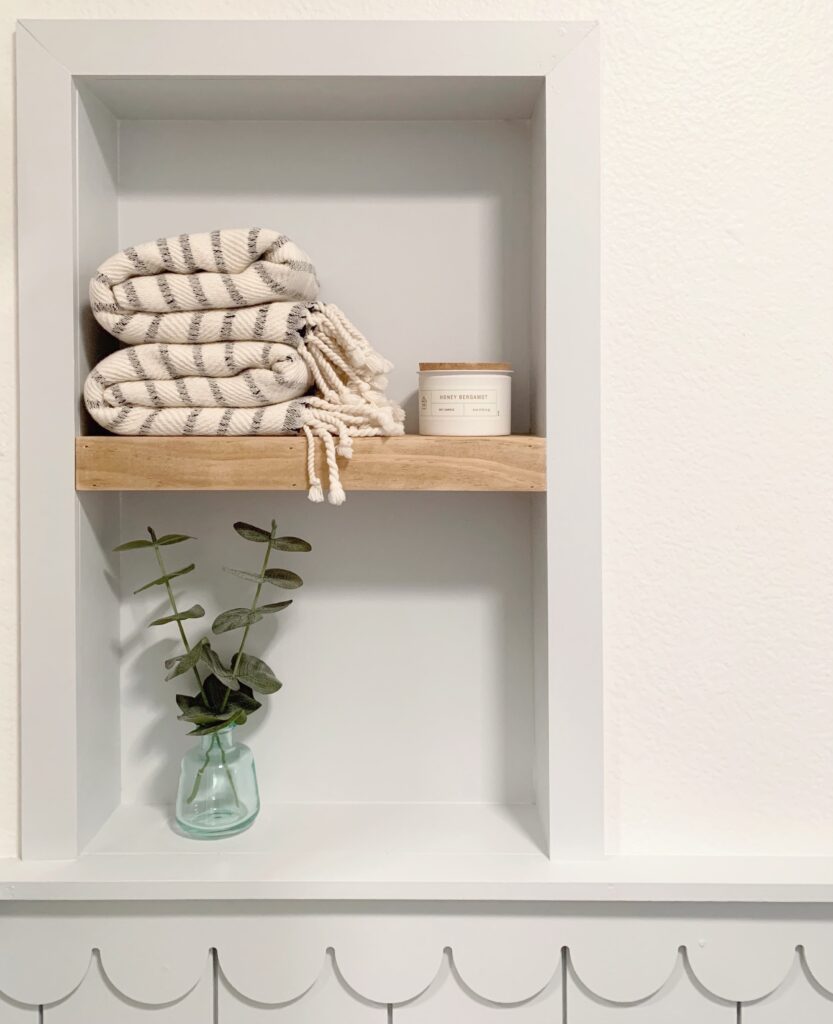
Step 8: Decorate the new DIY open shelving
Once the paint was dry, I decorated the space and got it ready for some pictures!

This whole project took me one evening and I think this medicine cabinet upgrade made a huge difference. Here is a before and after:
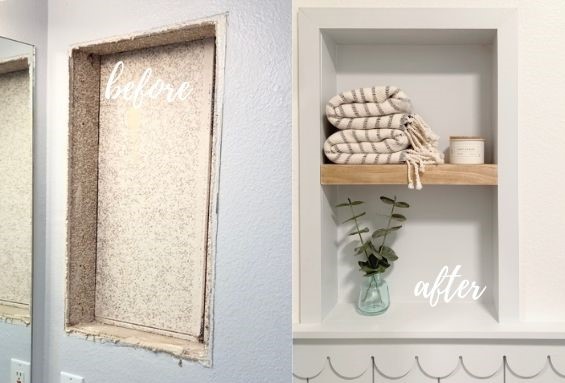
I’m so glad we decided to turn medicine cabinet into open shelving, it really helped pull together the guest bathroom!
I hope this was helpful, let me know if you have any questions!
Tina


Hi there. I’ve been endlessly searching for a way to recreate the space for my medicine cabinet and just came across your step by step…. Would you be willing to share with me about what the cost to do this was? I’m trying to decide over purchasing a premade niche or doing it myself.
Thank you!!
Hi Sonya, I didn’t track the cost at the time and I know the price of wood has also changed a lot since I’ve completed this project. I think it would depend on the size of your niche and how important it is to you to have a custom niche based on your design vision vs a premade niche. Would love to know what you decide to do either way!