Do you want to save time on a budget-friendly kitchen update? Consider painting your kitchen cabinets without having to sand them first! In this post, I’ll share my special technique to paint cabinets without sanding that will save you time and help you update your kitchen on a budget!
Note: This post may contain affiliate links, you can find more information in my disclosures here.
Can You Paint Over Cabinets Without Sanding?
The short answer is: yes!
A few years ago, I discovered the best paint for kitchen cabinets for a smooth factory finish. Since then, I’ve painted countless cabinets and pieces of furniture with it and have developed a technique that gives me consistently impressive results without having to sand first.
I’ll show you how to get a smooth finish when painting kitchen cabinets so you can easily make your kitchen dreams come true too!
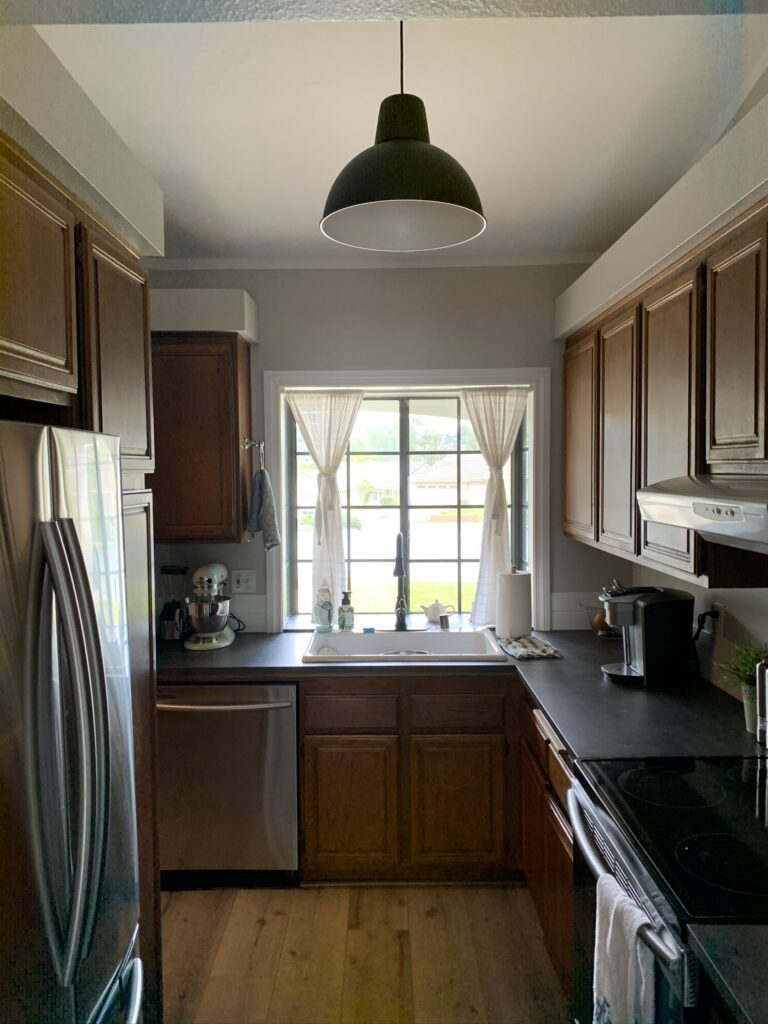
We thought about gutting our kitchen at the California Cottage and getting all new cabinets but the cost of a complete kitchen remodel seemed daunting.
My dad ended up convincing me to try out painting our cabinets instead. He said if we didn’t like them painted we could always replace them down the line but it was at least worth a try.
I’m so glad we gave it a try because to this day, it’s one of my favorite transformations!
You can find details on how we shortened our kitchen cabinet to install the new microwave here.
Spoiler alert: we never ended up replacing the cabinets because we love how this kitchen turned out!
My goal with all of my DIYs is for the finished product to look professional and not like an obvious DIY. Whether you are painting raw wood unfinished cabinets, or looking to repaint existing kitchen cabinets, getting the right paint and supplies for the job is essential.
What is the best cabinet paint?
My personal preference for cabinets and furniture is the Sherwin Williams Emerald Urethane Trim Enamel paint.
The one negative point of this type of paint is the price but it’s worth every penny! It’s formulated for cabinet, trim, and door application (I’ve also used it on our baseboards!). It’s the perfect Sherwin Williams cabinet paint!
It has a self-leveling property that helps eliminate the appearance of brush and roller marks. Once it cures, it has a very hard, smooth, enamel-like finish. It’s so beautiful!
I recommend using either the semi-gloss finish (which is what I used in this kitchen) or satin finish (which is what I used in the Hills House kitchen).
If you’re considering painting kitchen cabinets white: One of my favorite white Sherwin-Williams paint colors is Pure White, I think it’s the perfect neutral white for cabinets and walls! It’s not stark at all or and not too warm either, the perfect kitchen cabinet paint. I love it so much!
If you’re looking for a budget-friendly alternative to Sherwin Williams Emerald Urethane Trim Enamel paint, I recommend Behr Urethane Alkyd Enamel. It performs very similarly but is significantly less expensive. However, I still think Sherwin Williams Emerald Urethane Trim Enamel paint is the best type of paint for kitchen cabinets.
Do you have to spray cabinets for a smooth finish?
You can but you don’t have to! I actually prefer rolling over spraying because it find it more relaxing and less stressful. I’ll show you exactly what to use to get a smooth finish on your kitchen cabinets without a paint sprayer!
Should you paint the inside of your cabinets?
It’s really a matter of personal preference but it’s best practice to do it especially if your cabinets are older. Painting the inside of your kitchen cabinets gives them a clean and fresh feel, inside and out! It’s worth the extra time.
Now that we got the basics out of the way, let’s dive into my special technique to paint cabinets without sanding that will save you time and help you update your kitchen on a budget!
Materials
Tools
- Painters pyramids
- Paint brush
- Paint roller
- Handy roller cup
- Painters tape
- Old blanket, piece of fabric or similar to protect the surface you’ll be painting on
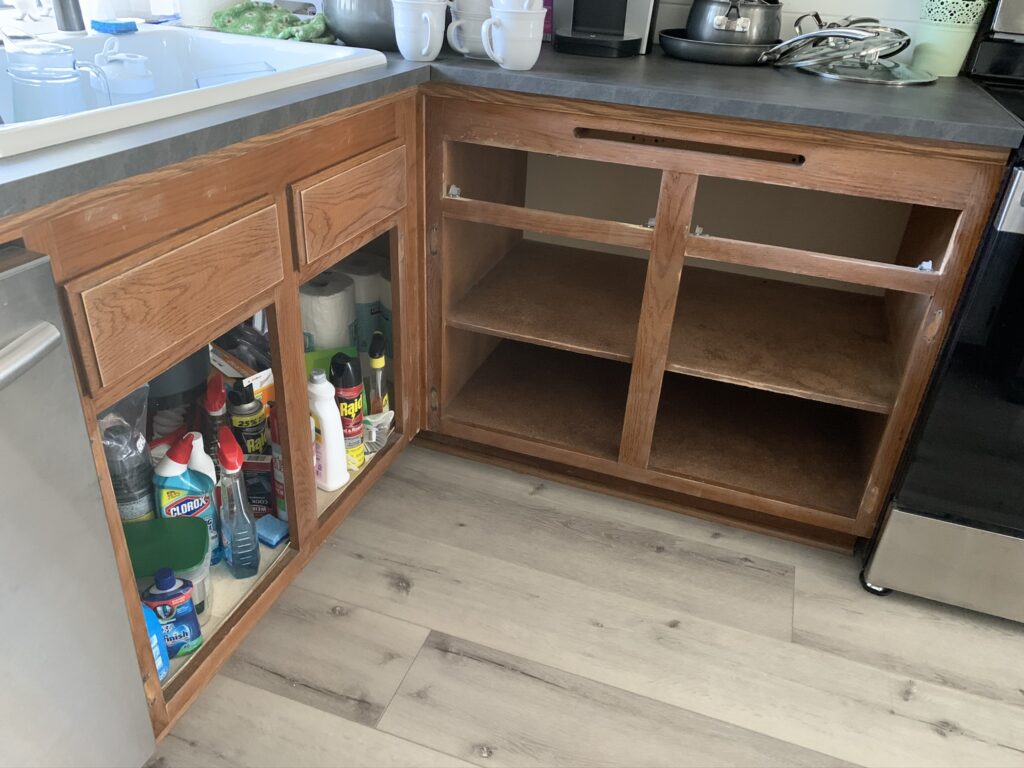
Step 1: Empty cabinets and remove cabinet doors
First, empty the cabinets you’re going to paint. I actually decided to paint our kitchen in five sections. I them painted separately so that we could continue using our kitchen during this project. This allowed me to let the paint dry and harden appropriately without using the cabinets prematurely.
Next, remove all cabinet doors and label them so you know where each door goes once they’re all painted.
Step 2: Clean cabinet doors and frames
Then, clean all your cabinet doors and frames thoroughly, paying extra attention to greasy spots. I like using soapy water or even Clorox wipes. After that, apply liquid sandpaper. Liquid sandpaper serves as a degreaser and deglosser, perfect to prep your cabinets for primer and paint!
Step 3: Mask off the area and stage the cabinet doors
Make sure you mask off any areas in the kitchen you don’t want to get paint on.
Then, set your cabinet doors up on your painters pyramids. I used our dining table as my work area:
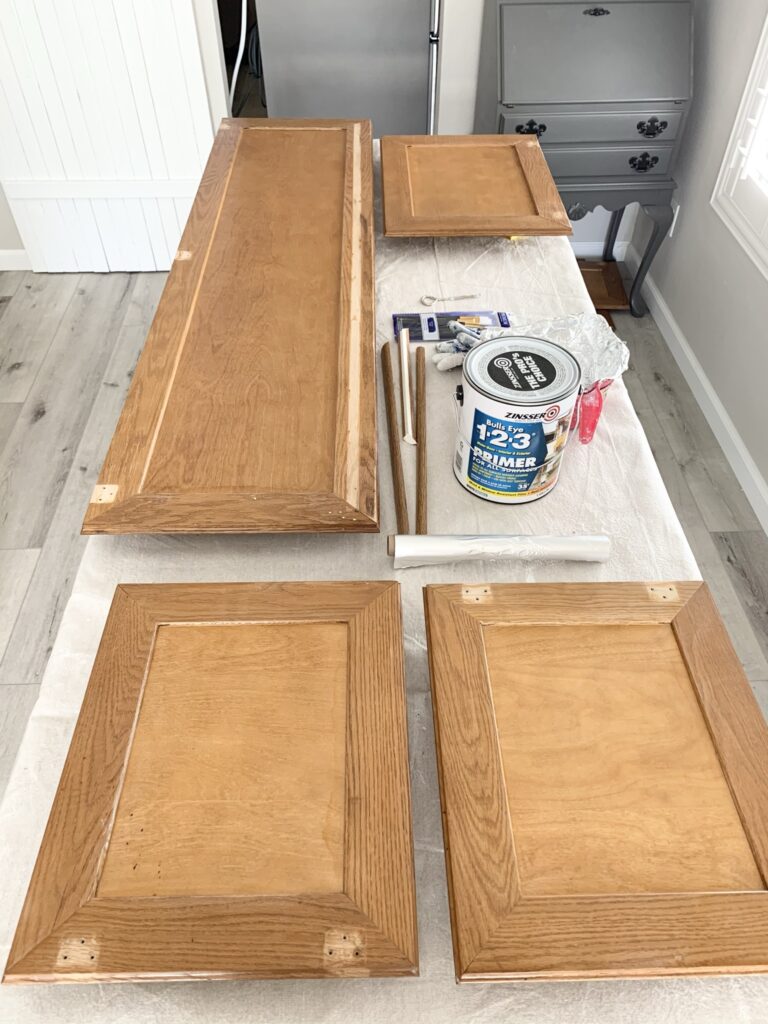
Step 4: Apply primer
Apply at least one coat of primer using your brush and roller.
I like to paint as few surfaces with the brush as possible and go over as many surfaces as possible with the roller (that can also mean painting some spots with the brush first and then going over them with the roller). I find that the roller provides a smoother finish than the brush.

You can apply a second coat of primer if you notice that the previous paint didn’t get covered well or if you see the wood stain bleed through the primer.
Optional: If some dust particles, fibers or brush strokes are visible on your primer after it dries, you can lightly sand them off between coats.
Step 5: Apply paint
Next, apply the paint. By now, you may have figured out a good technique for your doors on how to smooth out brush strokes with the roller.
The good news is that Sherwin Williams Emerald Urethane Trim Enamel paint is self-leveling so the painted surface will actually smooth out a little as it dries. Take a time lapse video, it’s really fun to watch afterwards!
I typically apply about 2-3 coats of paint. Let the paint dry according to the instructions in between coats and once you’re done.
With the Sherwin Williams Emerald Urethane Trim Enamel paint there is no need for a top coat. This paint dries with a beautiful enamel finish, so in that sense it’s an all-in-one paint!
Step 6: Install cabinet doors
Next, put hinges back on and reinstall cabinet and drawer fronts. I decided to buy new matte black cabinet hinges so I installed those before reinstalling the cabinet doors and drawers.
Step 7: Install new cabinet hardware (Optional)
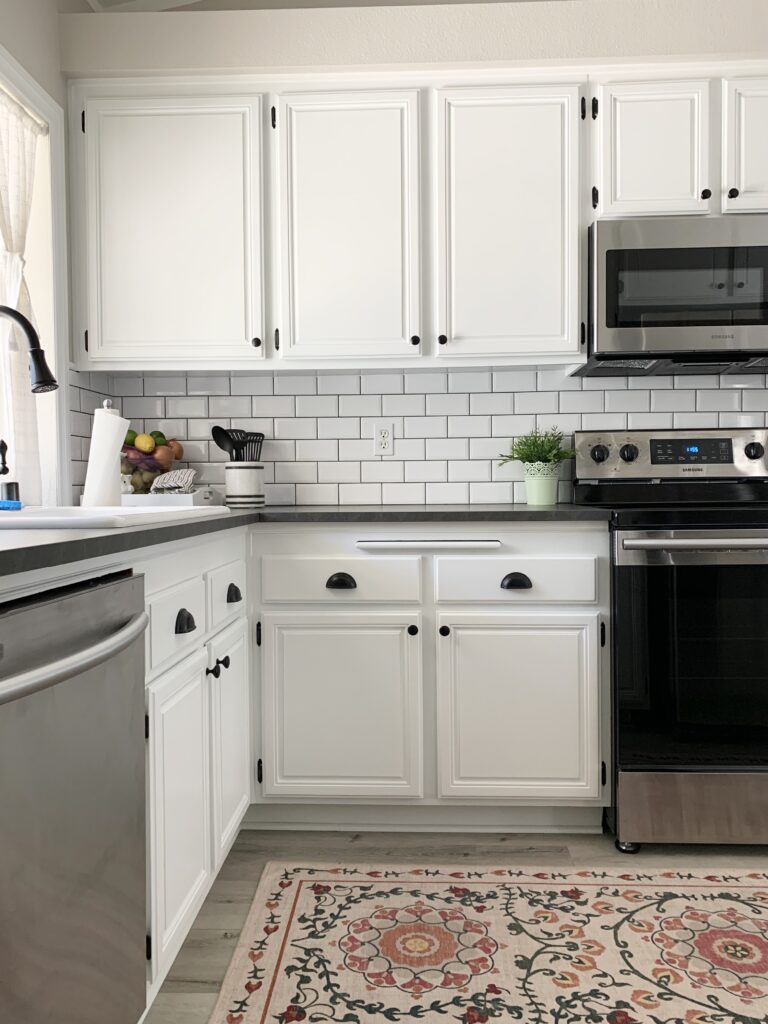
Our kitchen cabinets didn’t have any cabinet knobs or pulls so I decided to add cute matte black cabinet knobs and matte black cup pulls. They made such a huge difference in our kitchen, I’m so glad I added them!
I think the black hardware really brings it all together:
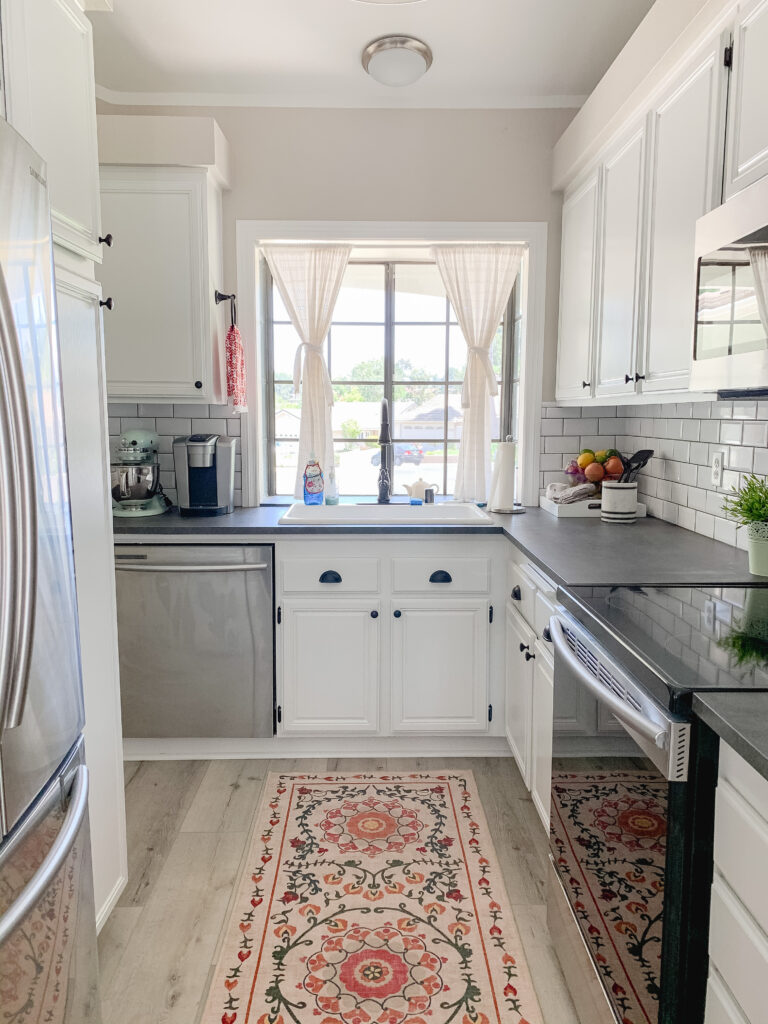
Finished Painted Kitchen Cabinets Without Sanding
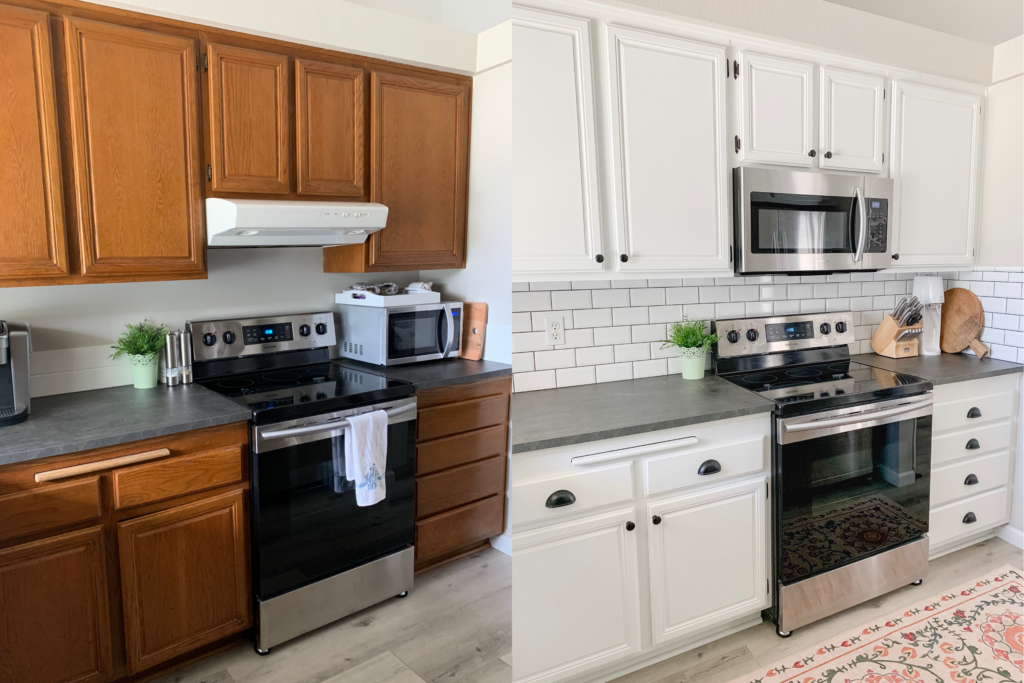
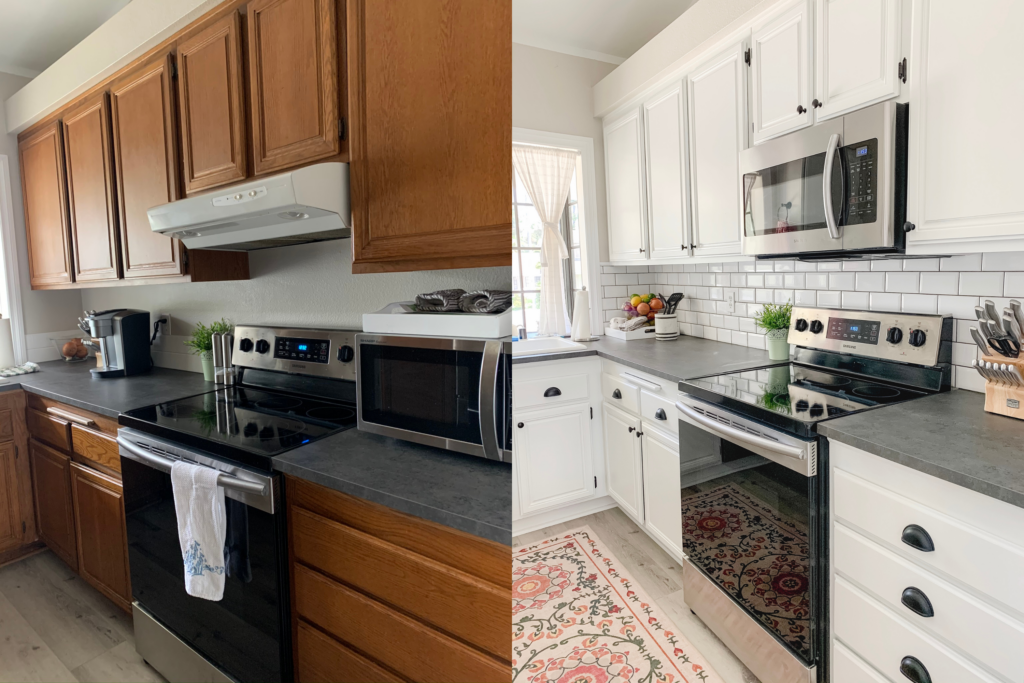
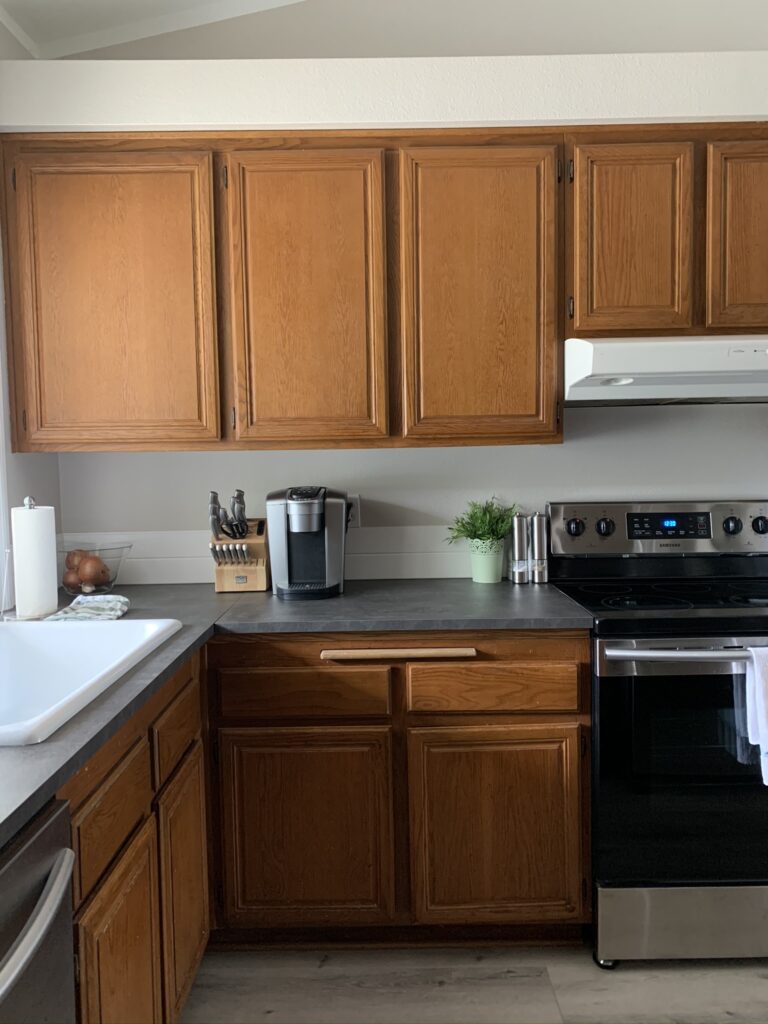
I love how this budget-friendly kitchen update turned out and it was so easy to paint our kitchen cabinets without having to sand them first!
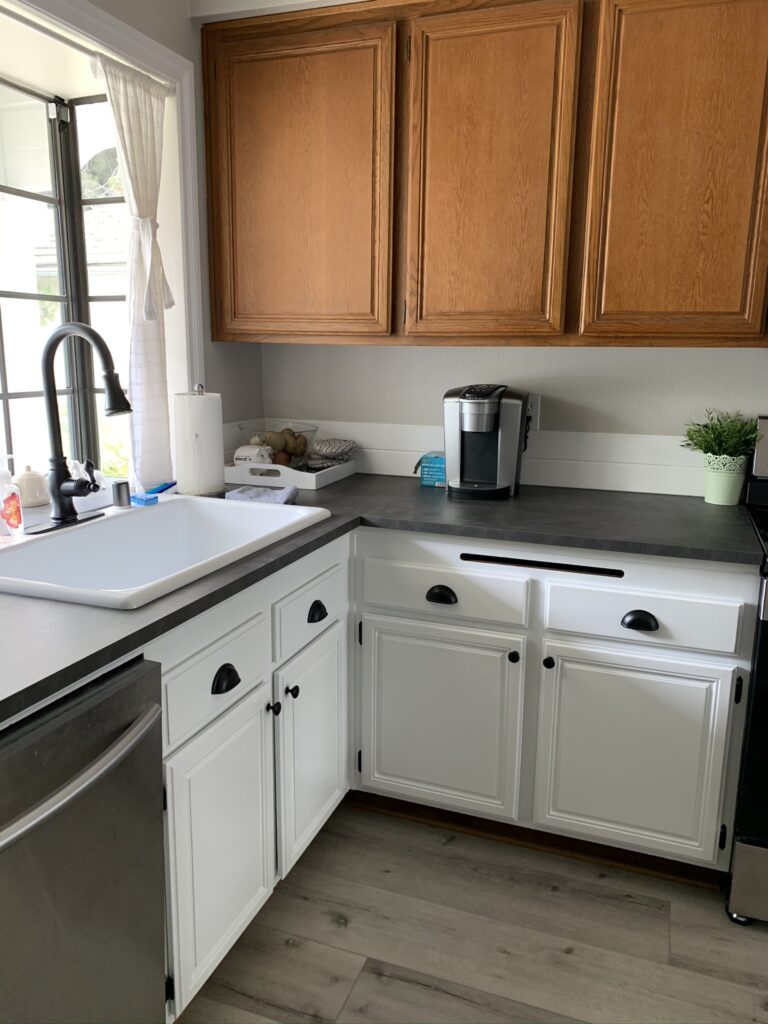
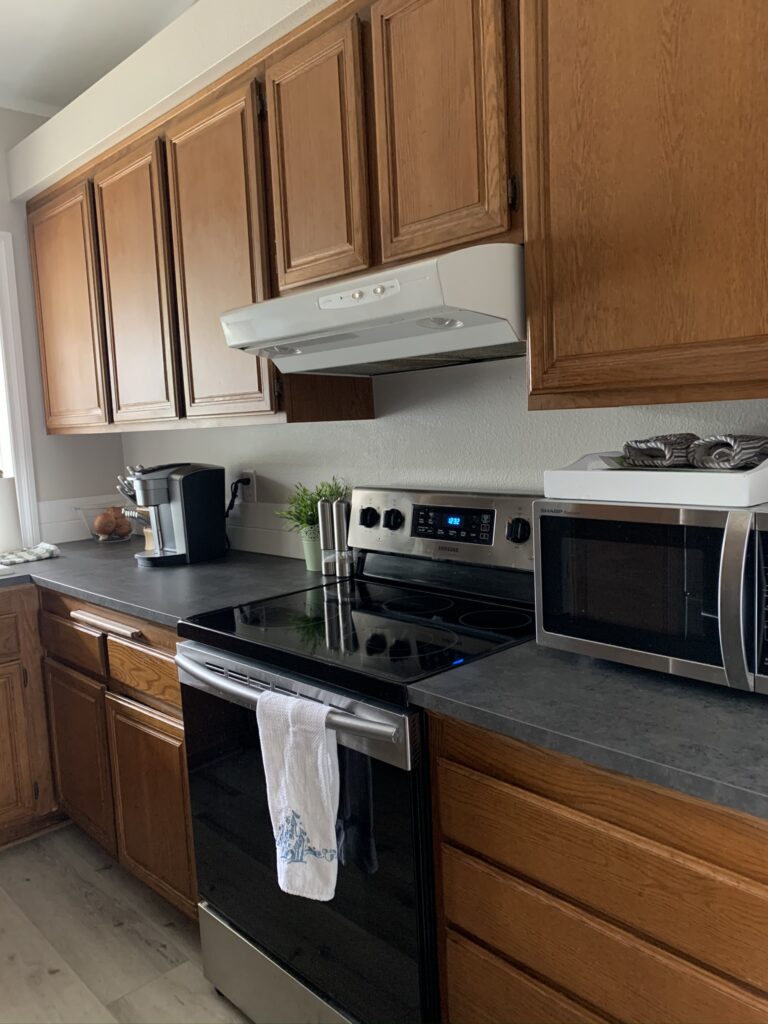
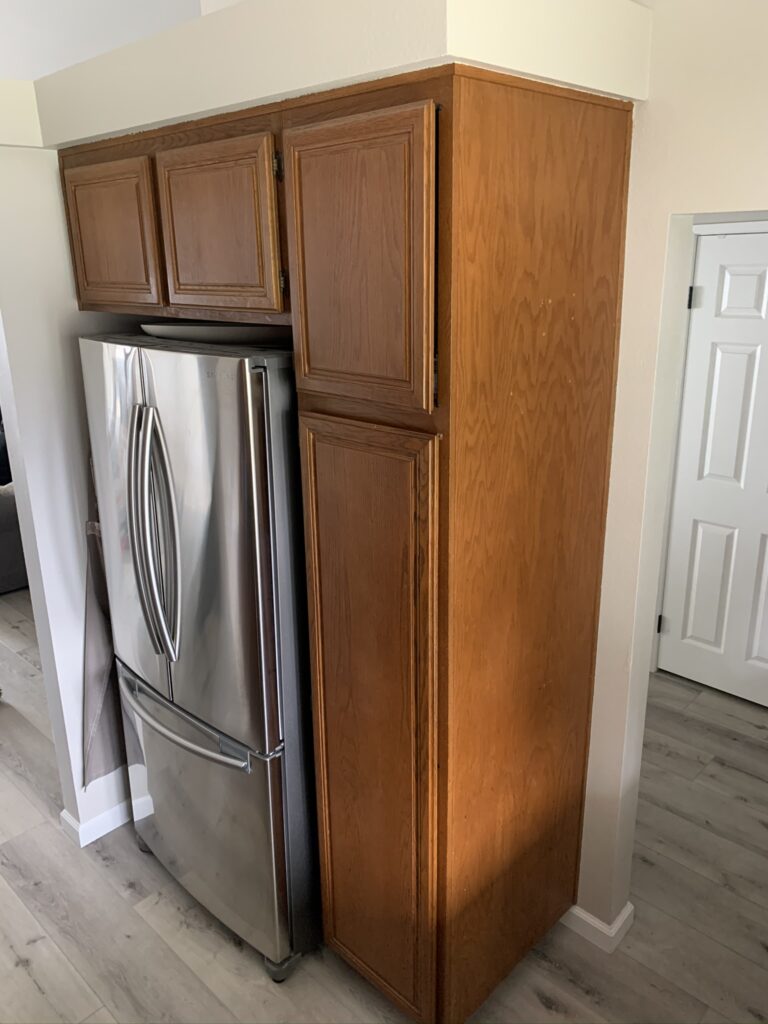
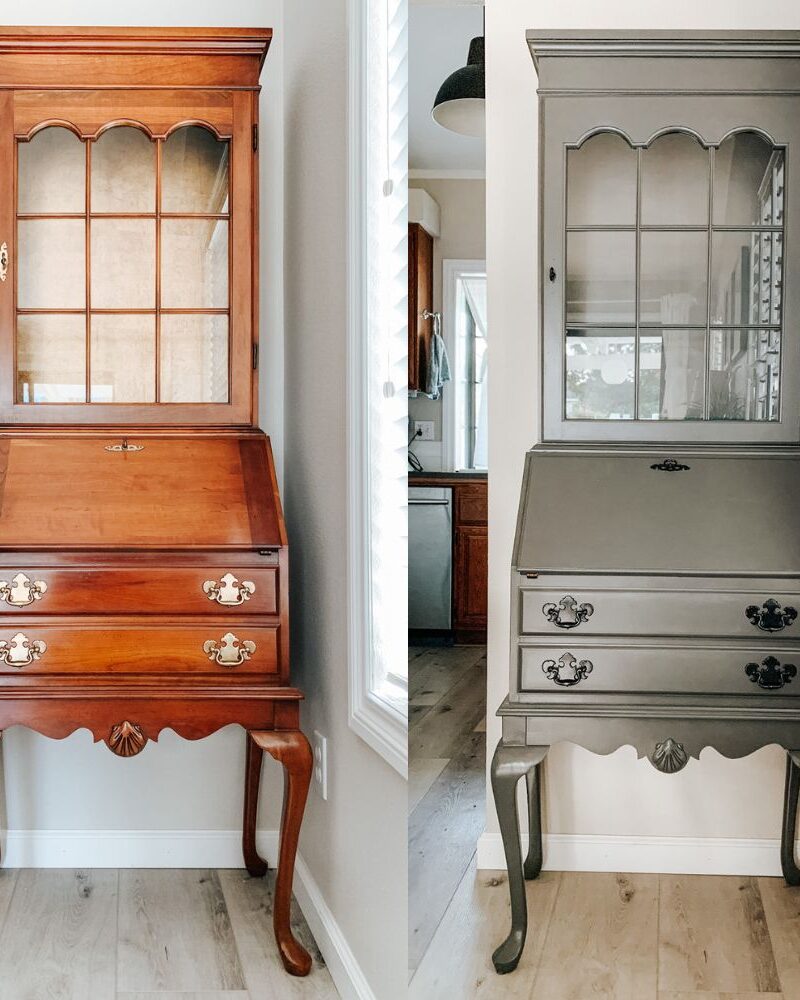
Here are the before and after pictures:

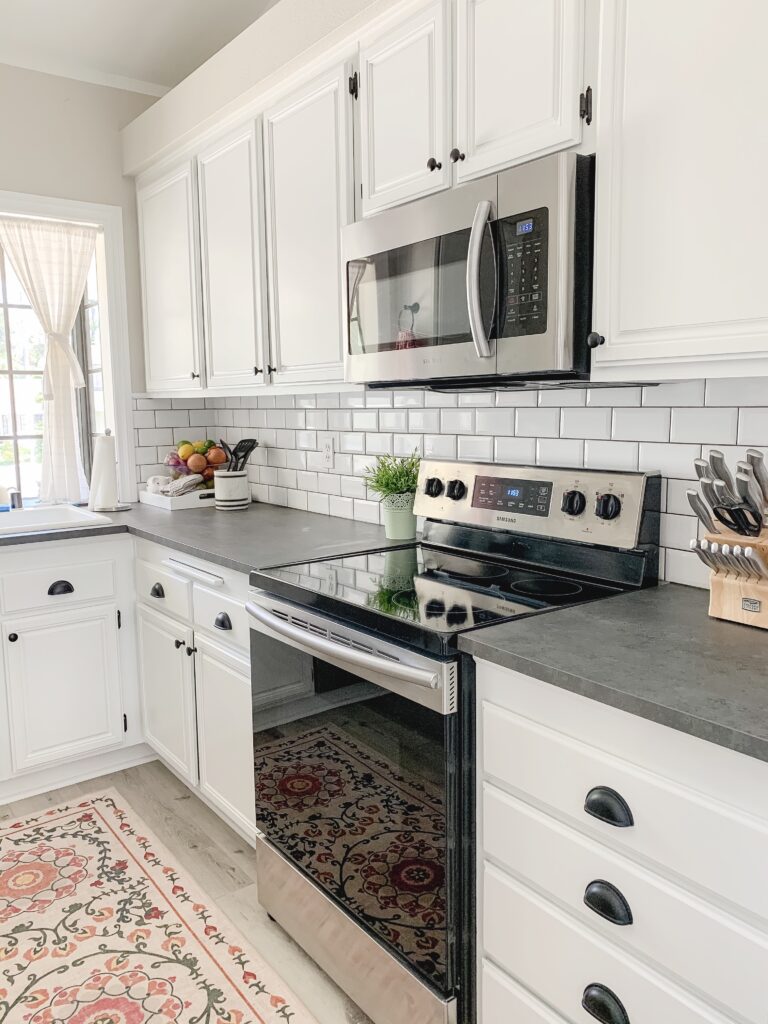
We shortened the cabinet to install the new microwave!
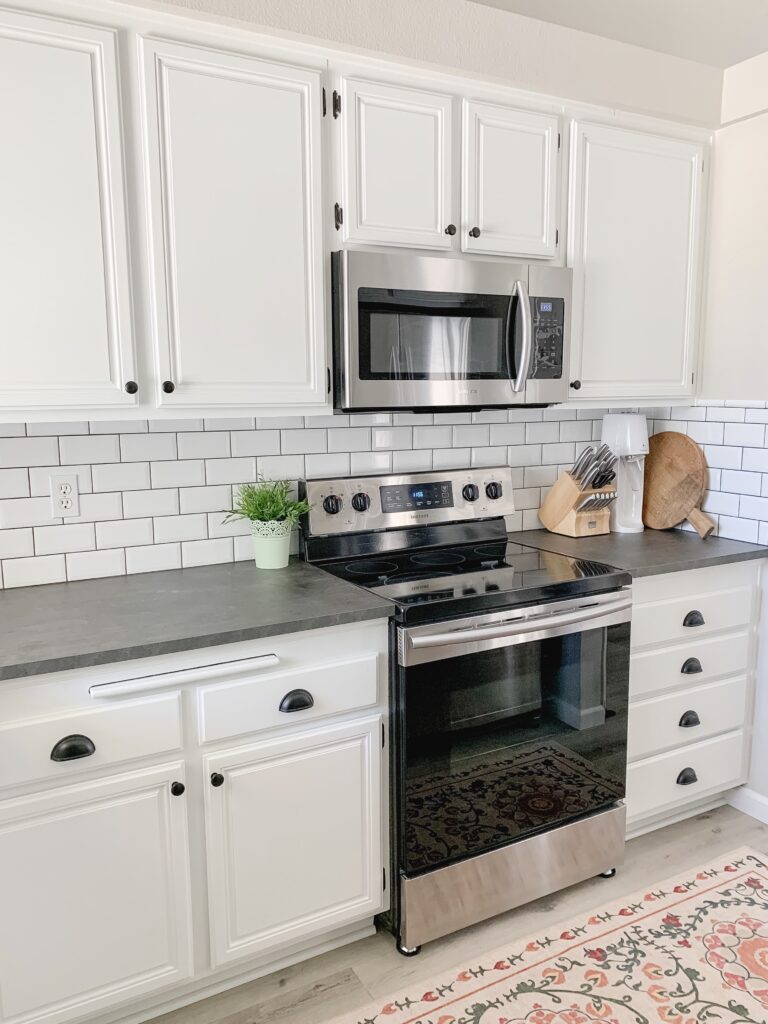
Note that I also updated the backsplash:
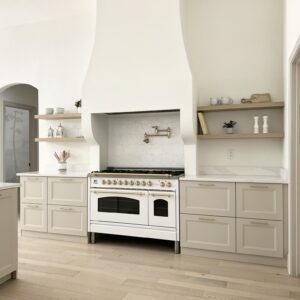
Here is another view of the area with the stove:
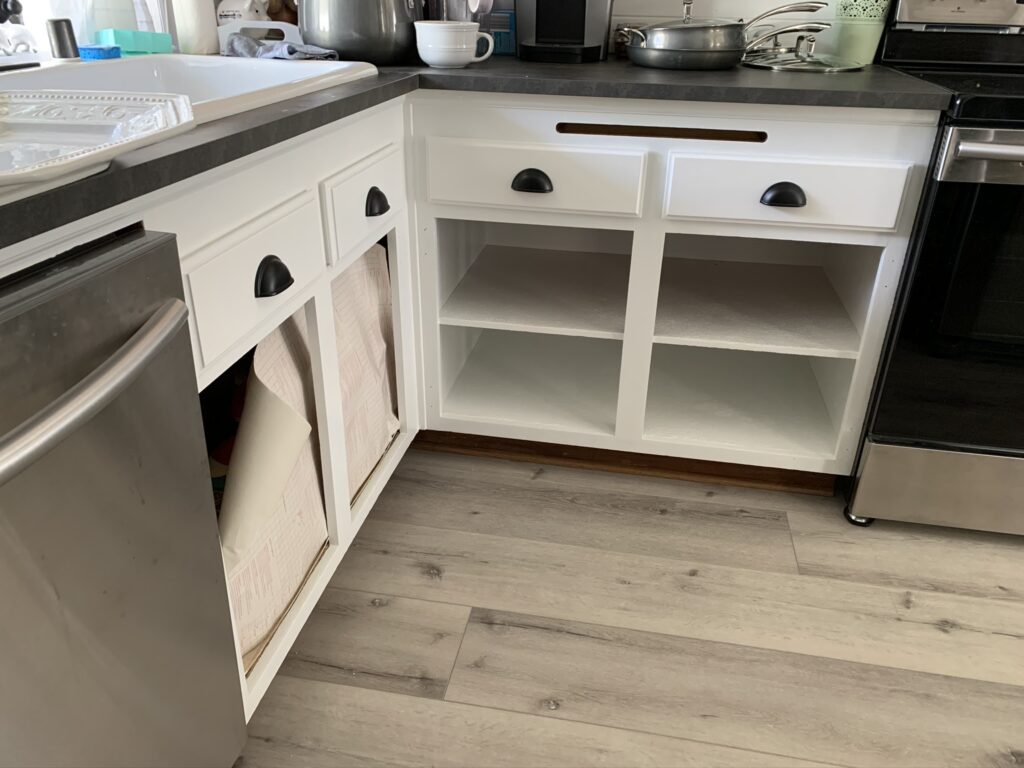
Here is a before and after of our pantry:
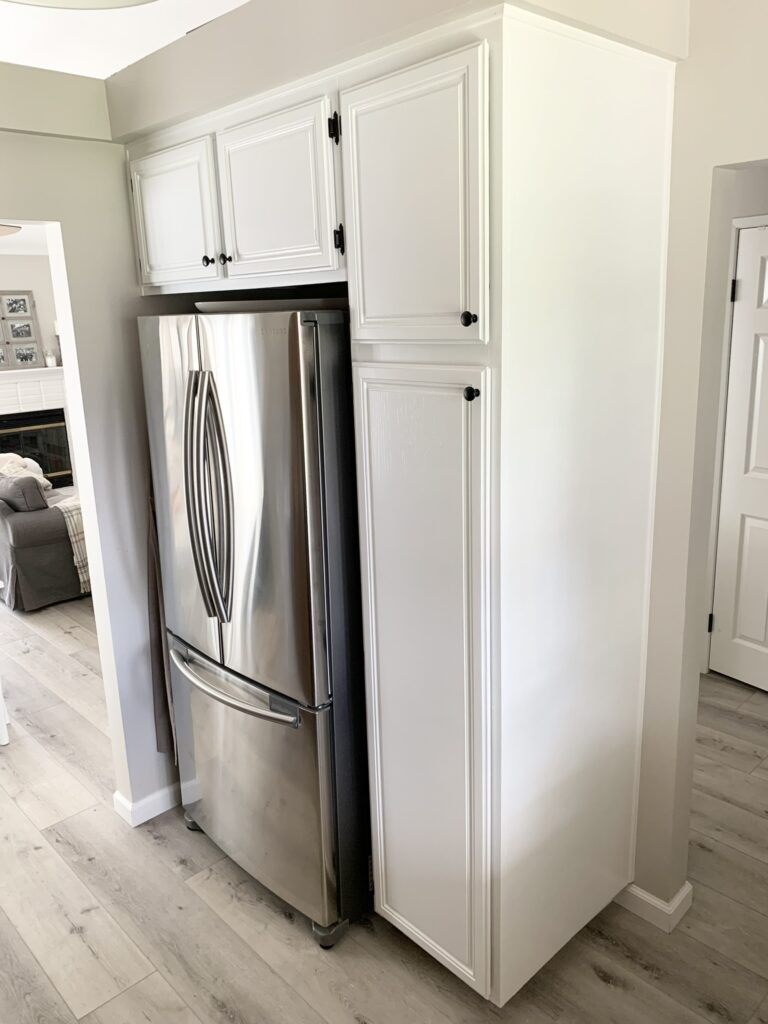
The new paint and the new matte black hinges, knobs and pulls made such a big difference in this budget-friendly kitchen remodel and I’m so glad I added them.
Update: I just used the same method to update the kitchen cabinets at our new house without replacing them. Check out my post to see more before and after pictures of painted kitchen cabinets!
I also used the same method on our repainted front door!
Let me know if you end up trying this technique to paint cabinets without sanding to update your kitchen on a budget. I would love to see your transformation!
Tina
How do you clean cabinets after you have painted? What products do you use? Also, does it smear or goes the color fade after each cleaning?
Hi Carolyn, I’m usually pretty rough with the cleaning products I use, haha! I just use Windex or Chlorox wipes. I haven’t noticed any change to the paint. In my experience, it’s very durable once it has fully cured.
Hi Carolyn, I recently painted my kitchen cabinets in the same manner. I used a deglosser and did not sand them. We put a small piece of painters tape where the hole was to be drilled for my new cabinet knobs. When we pulled the tape off after drilling the hole, the paint and primer pulled off with it. Any thoughts would be greatly appreciated as I have 23 more cabinets to put knobs on & I’m afraid to drill the holes.
Hi Jodi,
I typically drill my holes before painting. Sometimes, I’ll drill the holes after paint has dried.
How long did you let the paint cure for before taking the tape off? What primer and how many coats of primer and paint did you use?
Tina