In 2020, I decided to remodel our guest bathroom at the California Cottage and replace our builder-grade 1980s tub and shower surround with a brand new tub and DIY shower tile. If you’re considering a bathroom makeover and want to learn how I went about this tile DIY shower remodel, this post is for you! I’m excited to share with you the exact steps I took to DIY this shower remodel on a budget along with the exact cost breakdown!
Note: This post may contain affiliate links, you can find more information in my disclosures here.
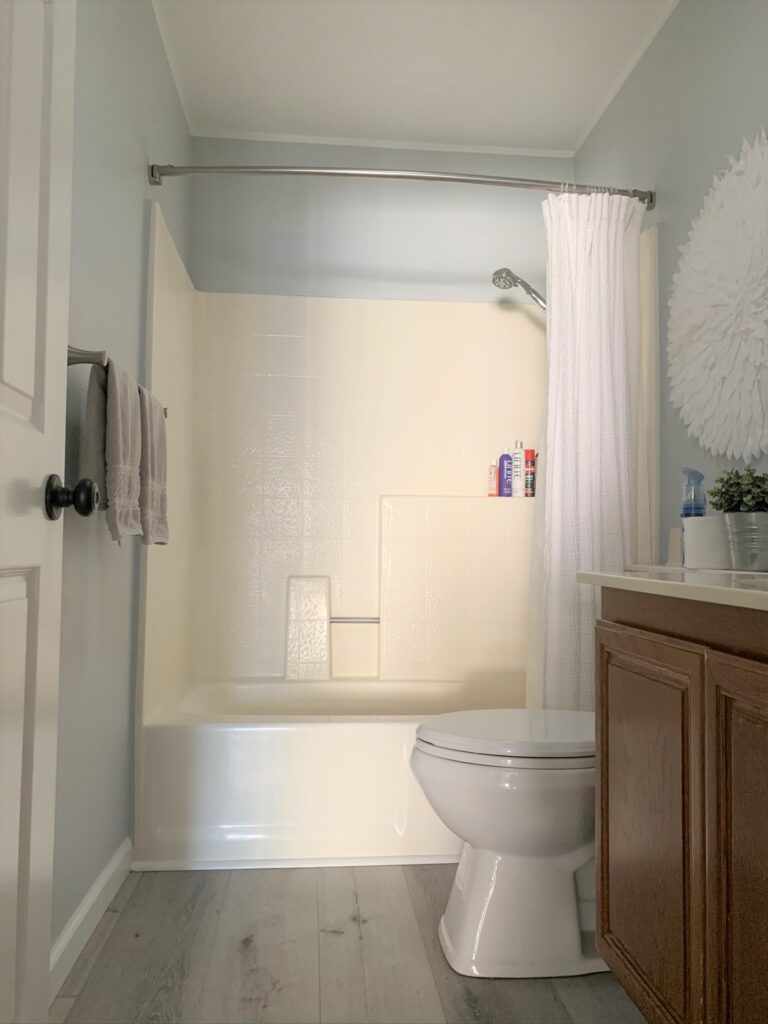
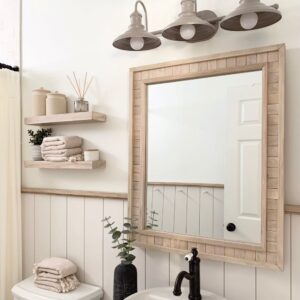
Before tiling our shower
Here’s a before picture of our bathroom to give you an idea of what we started with. There was nothing wrong with it functionally, it was just getting older and I was ready to remodel it for a fresh new look!
We started this bathroom makeover by removing the old shower surround (if you want to learn more about how to demo a bathroom, I have a separate post about that here):
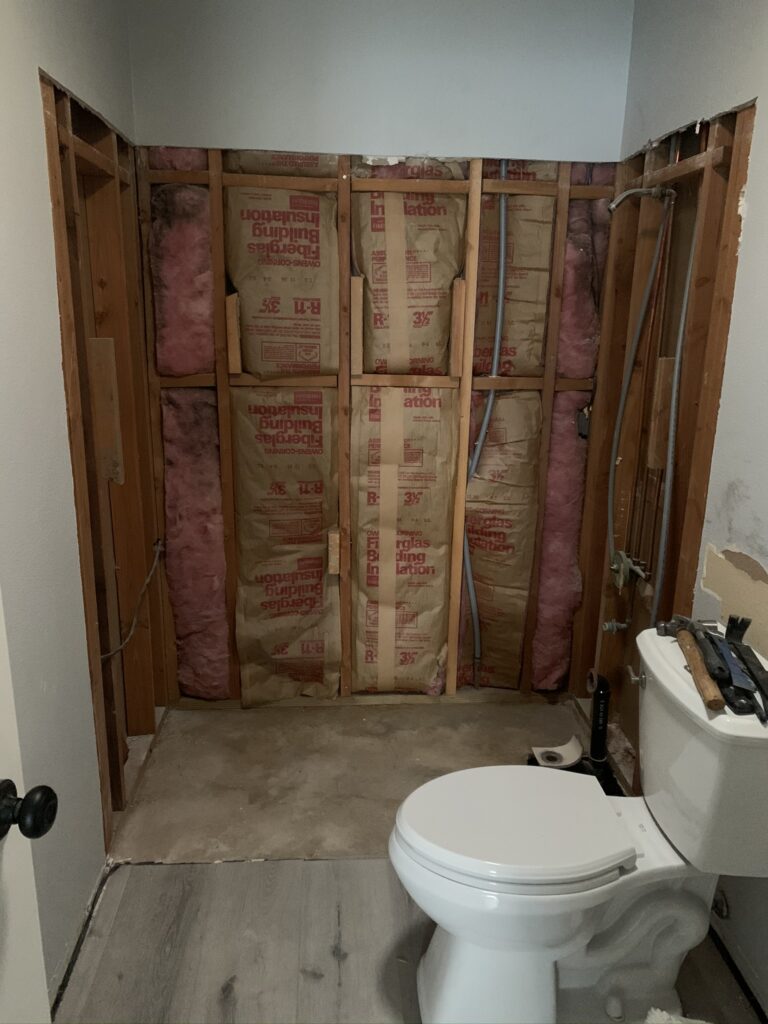
We also removed the bathroom vanity and temporarily removed the toilet. Additionally, we laid some additional flooring where the vanity used to be:

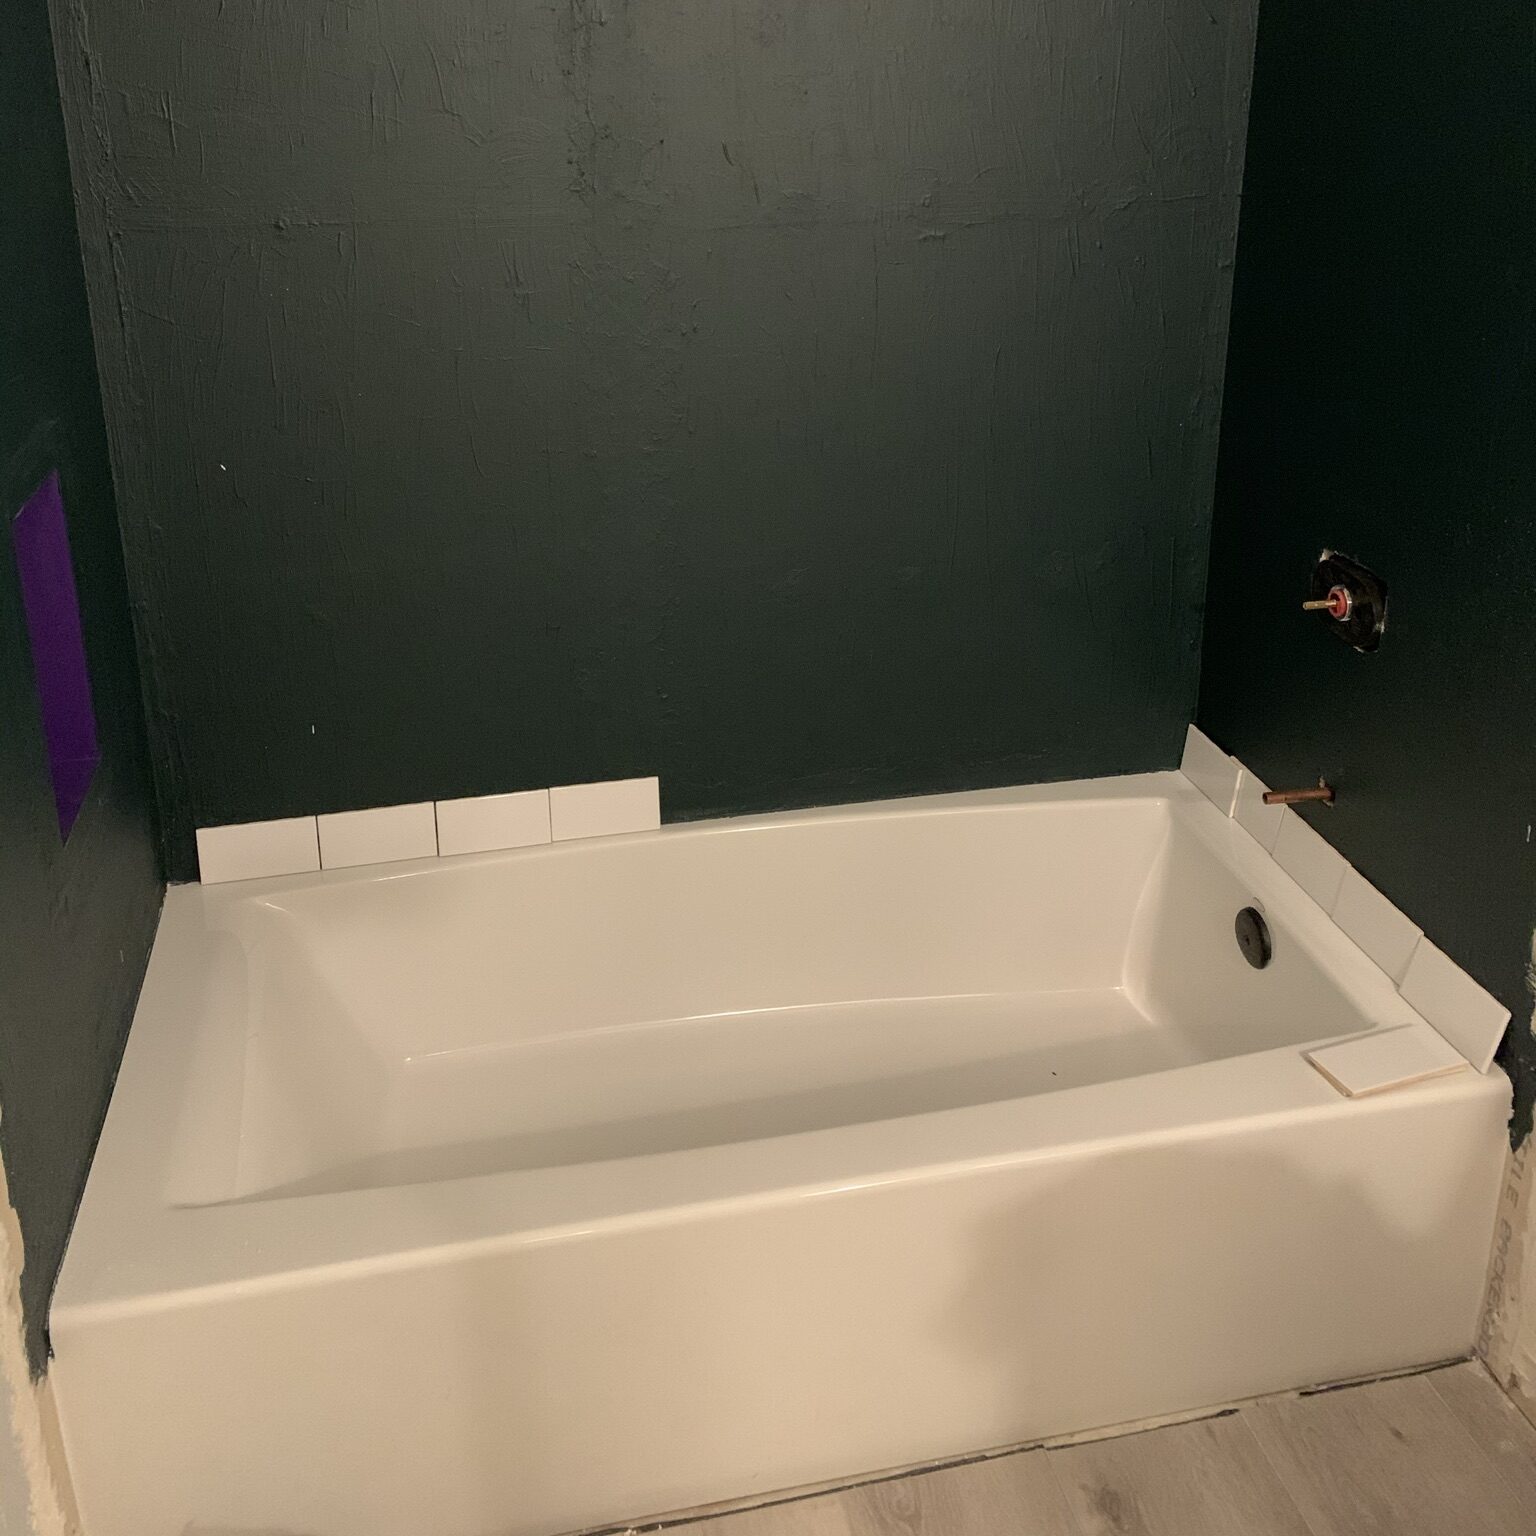
After that, we replaced the old shower surround with a new bathtub. A new bathtub is one of those bathroom remodel ideas that sounds good in theory but it was so difficult to get the new bathtub perfectly in place in such a tight space! The new bathtub looks beautiful but it was definitely one of the most difficult parts of this bathroom remodeling project!
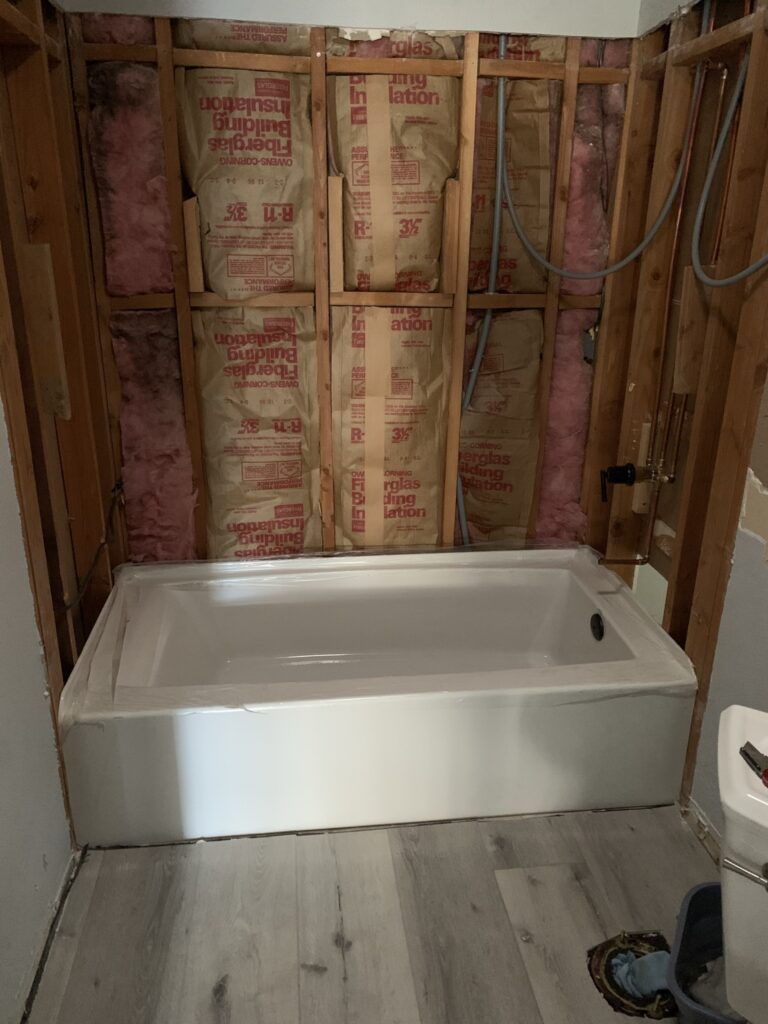
Followed by getting the new plumbing in place. Those two were the most time consuming and frustrating parts of this whole DIY bathroom remodel. I would definitely try to avoid replacing a bathtub and the plumbing in the future if they’re both in good shape! That’s actually what we did in our new home, the Hills House.
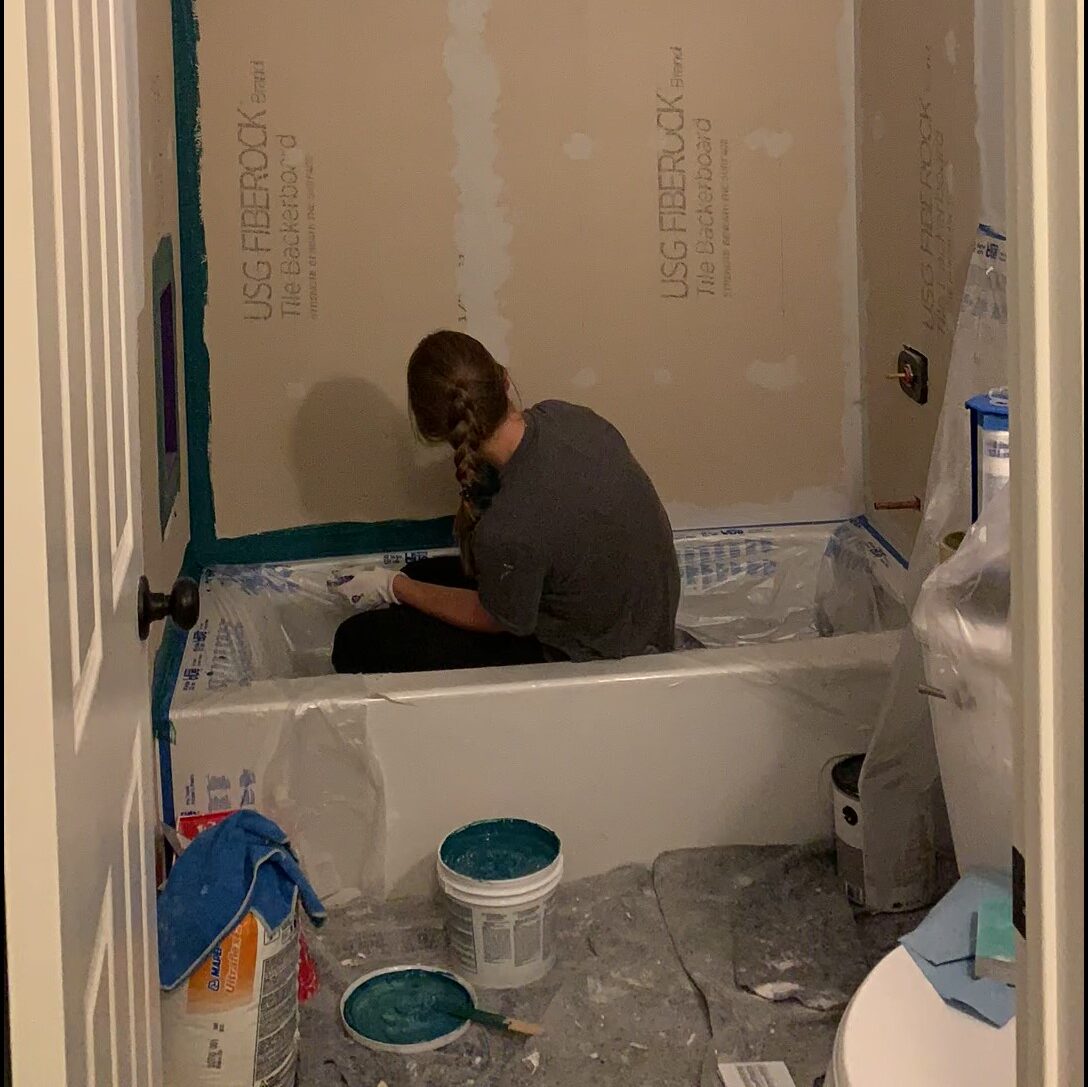
Once we installed the new bathtub and plumbing, we put the walls back up and used tile backer board (USG Fiberock) instead of traditional cement board for that. It was really easy to work with!
Now, let me show you how I tiled our shower on a budget!
Materials
- Mapei AquaDefense
- Subway tile
- Mosaic flower tile (discontinued)
- Mortar
- Grout
- Caulk
- Silicone
- Masking tape with plastic
- Old blanket or something similar (to protect tub and floor)
Tools
- Tile spacers
- Snap and score tile cutter
- Nippers
- Putty knife
- Notched trowel
- Grout float
- Grouting sponge
- Small bucket
- Dremel (optional depending on tile)
- Diamond wheel (optional depending on tile)
Step 1: Mask off and protect surrounding areas
The traditional tiling process with mortar can get a little messy so I wanted to make sure I didn’t get any mortar on the floor or the bathtub and avoided scratching up our new tub. I masked off the tub to protect it and covered part of the bathroom floor.
Step 2: Waterproof the shower walls
This step is really important because whenever water is involved in DIY projects, things can get costly if not done right.
For our guest room shower I used a product called Mapei AquaDefense and it can be applied with a roller and brush like regular paint. To me, Mapei AquaDefense resembles liquid rubber. It acts as a moisture barrier to prevent water from penetrating into the wall or its cracks later. You can think of it as a greenish rubber glove that protects your walls!
Step 3: Plan and dry fit your tile layout
It’s so important to spend a little bit of time to plan out and dry fit your tile layout before getting started.
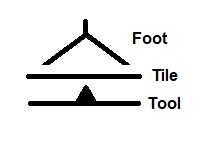
Especially if you have obstacles to keep in mind such as soap dishes or shower hardware like the shower head. I recommend trying to avoid awkward cuts or tiny slivers of tile and ensuring the layout is nice and symmetrical. Here’s an example of what to avoid:

Planning things out and dry fitting beforehand helps a lot!
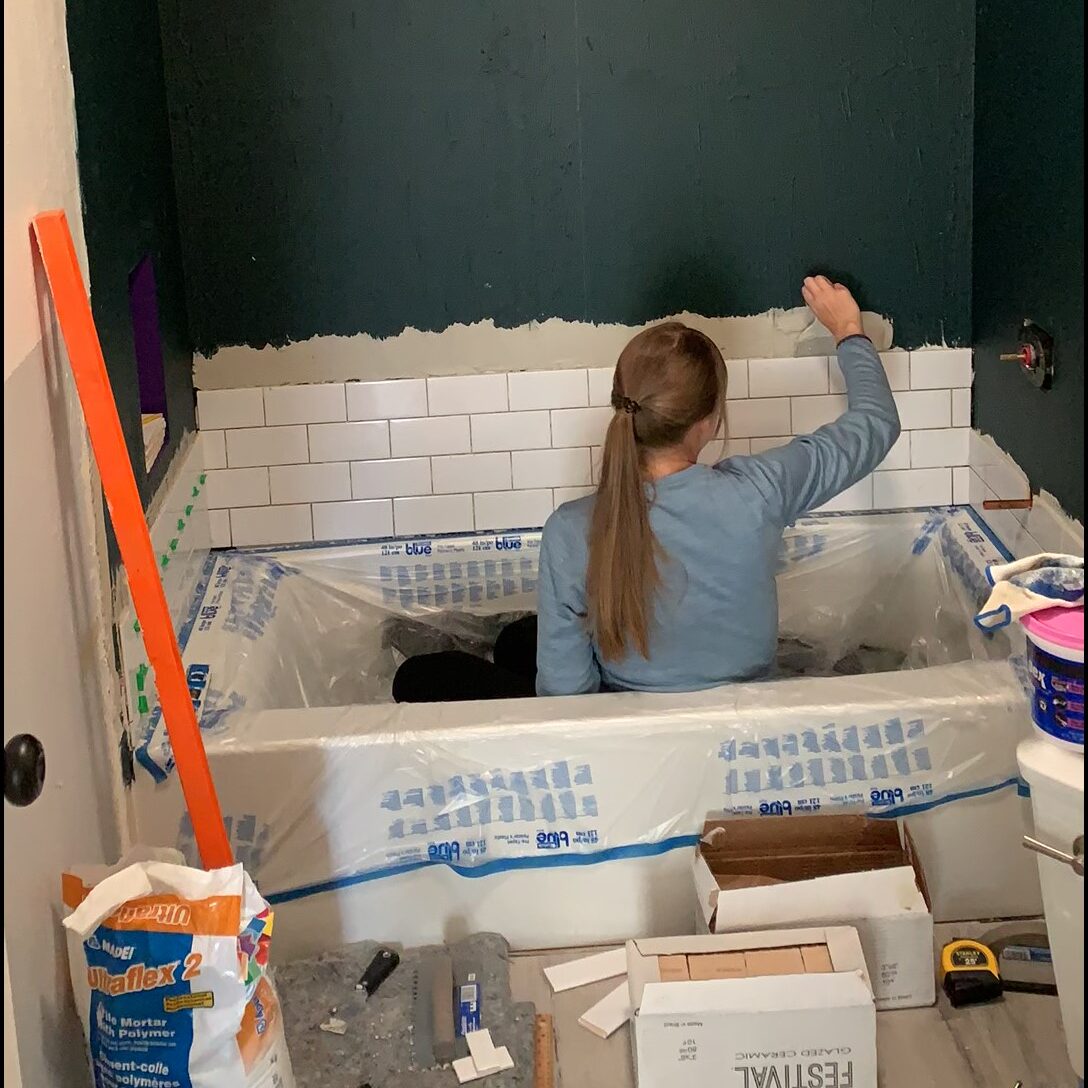
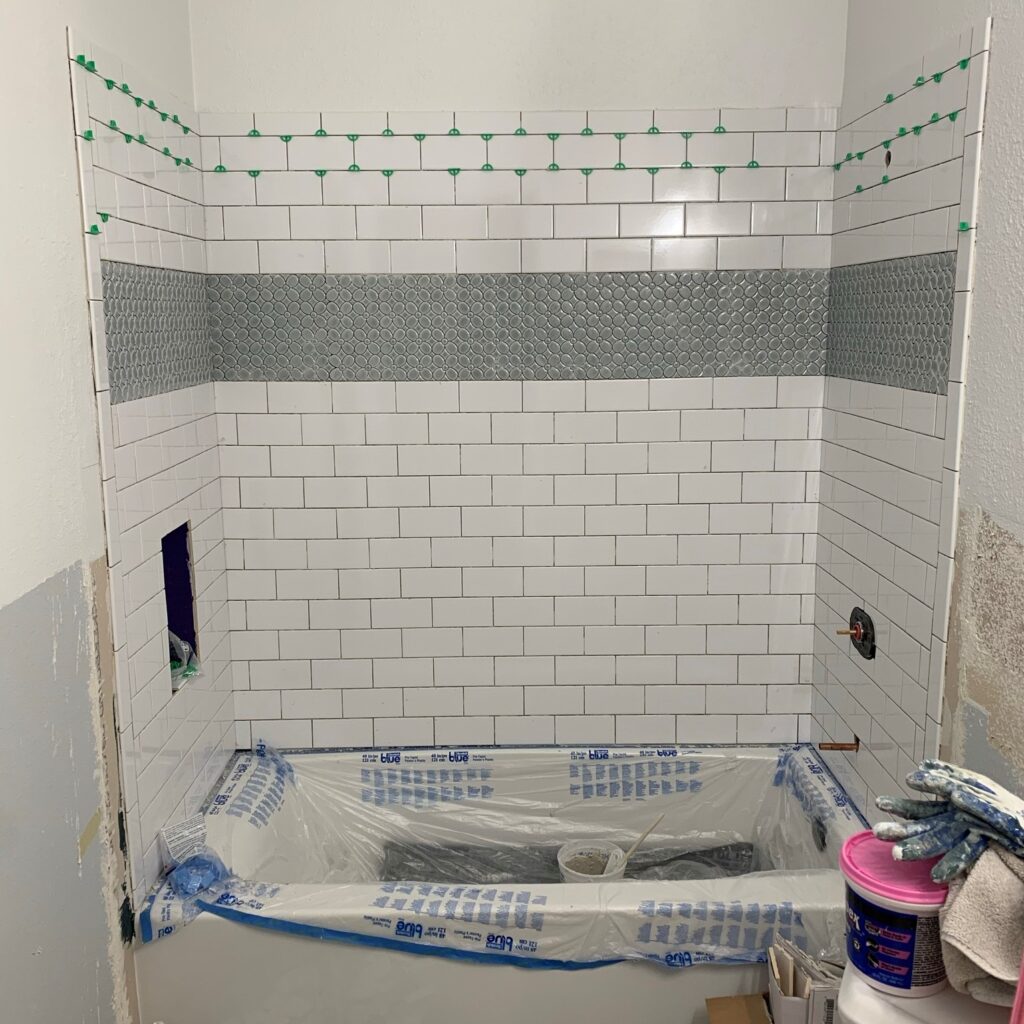
Step 4: Tiling the shower wall
I HIGHLY recommend taking your time with this first row and not rushing it. I believe the first row is the most important step because it all starts with that first row of tile! Ensuring that first row is perfectly level and placed correctly is key because the rest of the shower will be based on this first row.
Applying mortar
Tip: I only mixed a small amount of mortar at a time in a small bucket so that I could take my time tiling without having to worry about the mortar drying out.
I actually used a putty knife to spread the mortar because I found it easier to maneuver and control but still used a regular trowel to create the notches.
I decided to spread enough mortar for one row of tile at a time.
My recommendation is to back butter the tile (applying mortar to the back) because this helps it adhere better.

I used tile spacers (1/16 T spacers) and really like how the spacing turned out with this subway tile.

To prevent lippage, I pressed in any tiles that ended up sticking out which pushes out the extra mortar from underneath and evens it out.
Cutting tile
Cutting ceramic subway tile
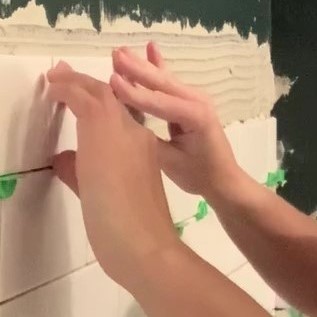
I decided to use a score and snap tile cutter (this is my new one), which is less messy than a traditional wet saw and it worked great! This tool cuts tile by scoring the tile with a little wheel first

and then applying pressure to snap it.
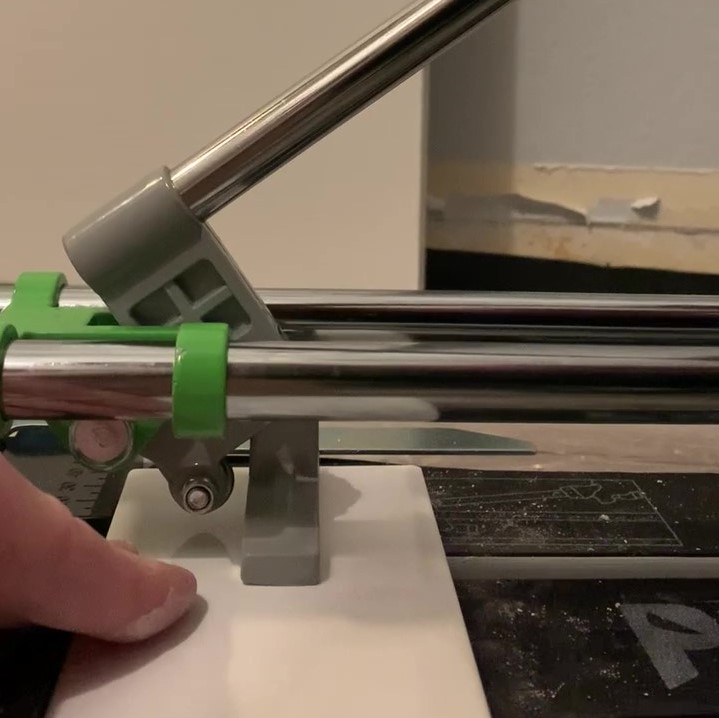
Here’s a quick visual of how it works:
I used the nippers below to cut the tile around obstacles.
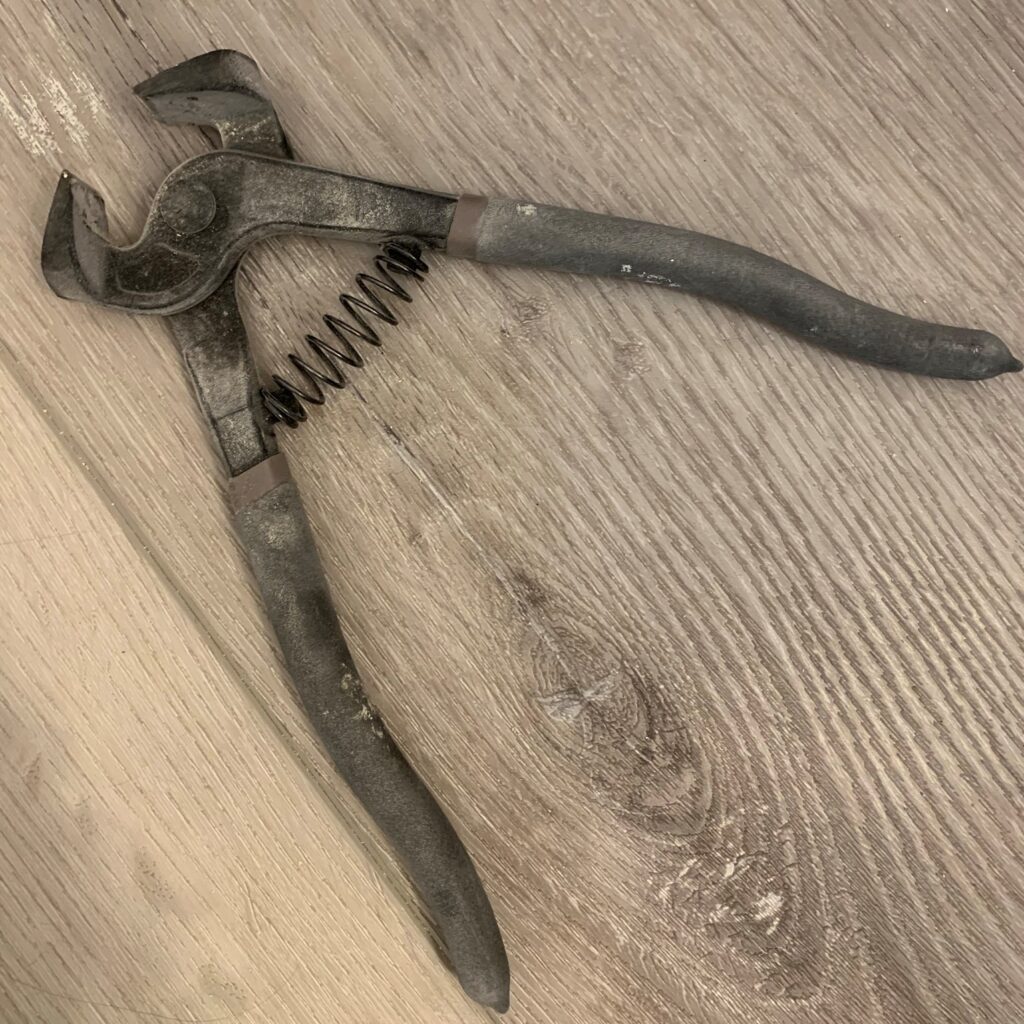
These cuts don’t need to be perfect because they’ll ultimately be covered up by the shower hardware.
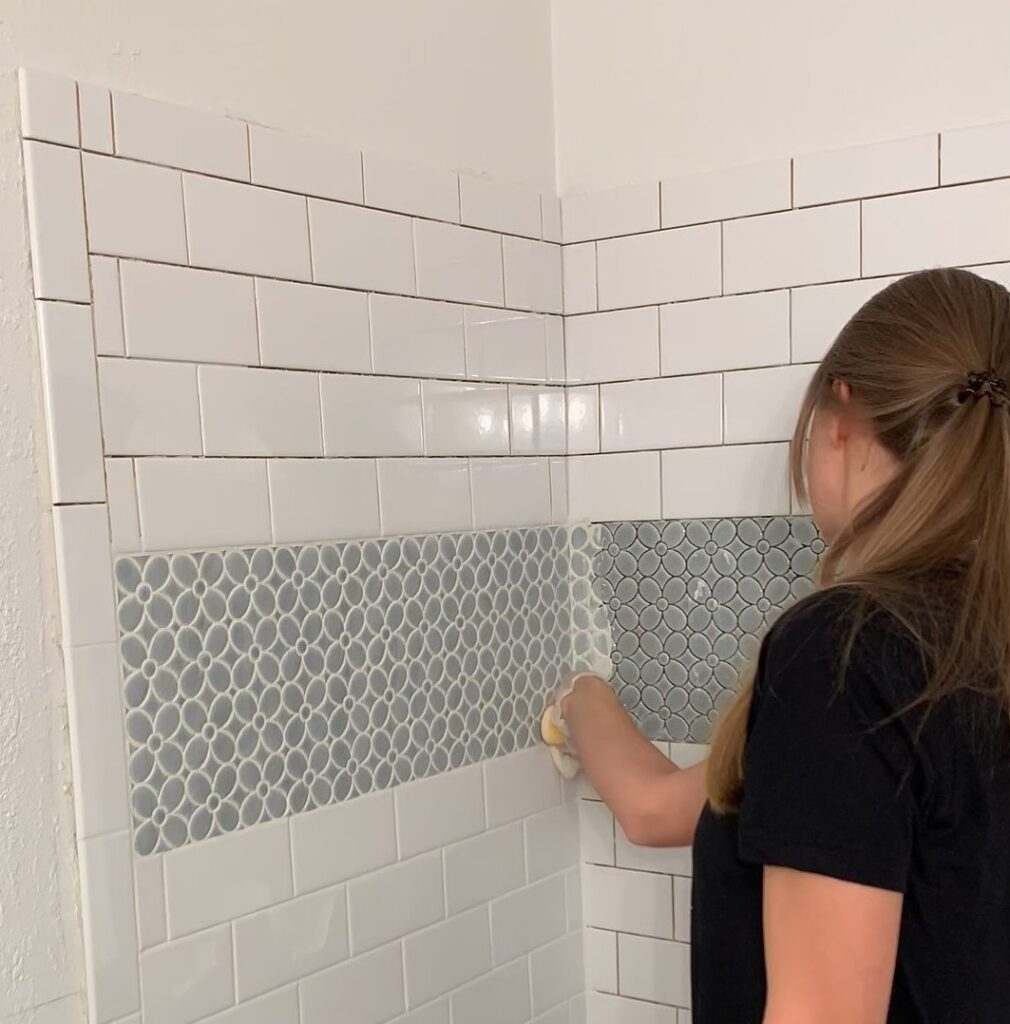
Cutting porcelain mosaic tile
The mosaic flower tile was a little trickier to cut because it’s porcelain and the individual flower pieces were pretty small and very thick. I cut them by marking a straight line first and then scoring them with a Dremel using a diamond wheel:
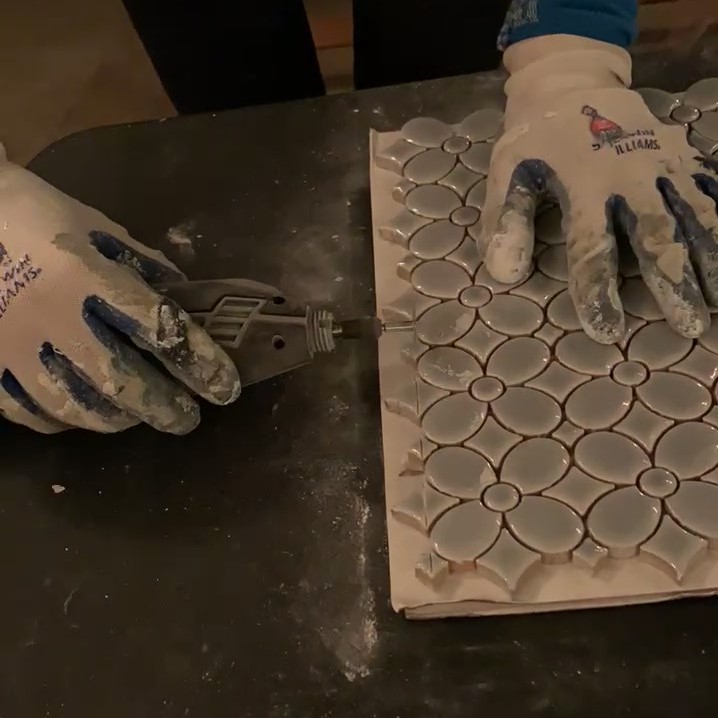
Then, I broke them off with nippers:
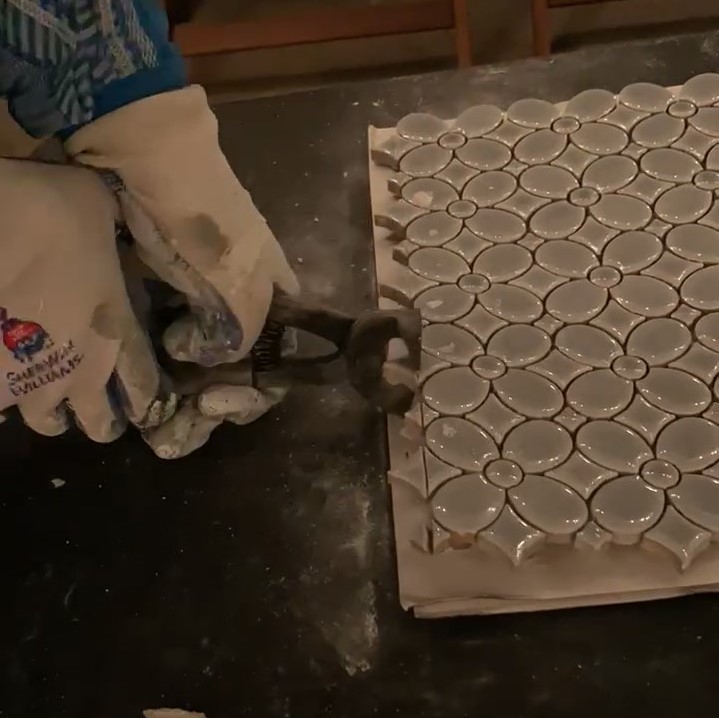
I ended up with a straight cut line:

Even though the cutting of the mosaic tile was a little more time consuming, laying the mosaic tile was definitely easier and faster than laying the subway tile because I could lay one large sheet at a time compared to multiple smaller subway tiles.

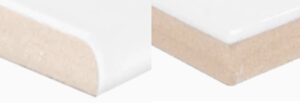
Adding trim
I added bullnose trim pieces to frame the sides and the top for a nice finish:
Bullnose trim has a rounded edge compared to the straight edge on the remaining tiles, here’s how they differ:
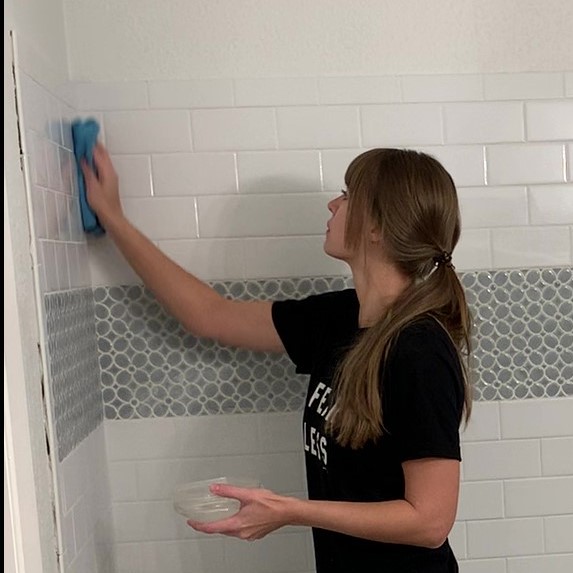
Step 4: Applying grout
I used Mapei Ultracolor Plus FA in the color Avalanche. To grout, I mixed the grout in small batches (so I could do one small section at a time), applied it with a grout float and let it sit according to the instructions.

Then, I used a small bucket with water and a sponge to wipe off the excess.


I’m always amazed at the difference once the grout is finished!
Step 6: Finishing work
Lastly, I removed any remaining grout haze with some water and a microfiber cloth. I’ve found that microfiber cloths work really well to remove grout haze.
I also caulked the outer edges with paintable caulk. The reason I used caulk vs silicone because it’s touching the painted wall and it’s not really a wet area. I did use silicone on the edge where the tile meets the tub as that part is most definitely coming into contact with water! I let everything set and dry for a few days (just to be safe) before using it for the first time.
Finished shower tile
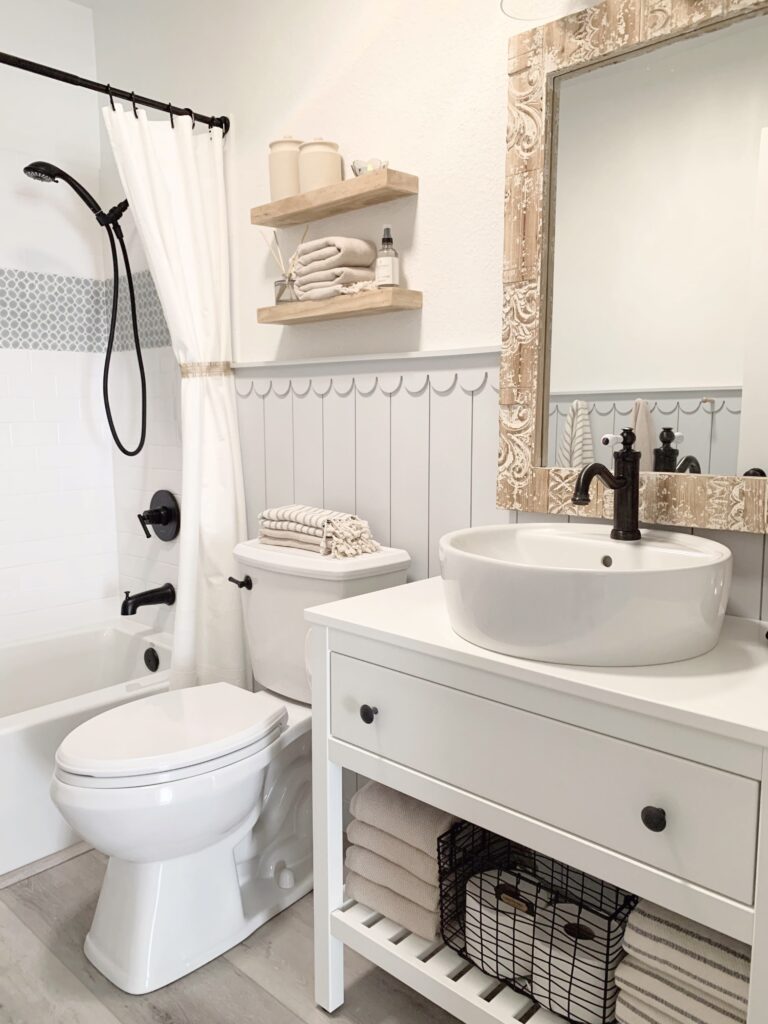
I’m so excited about how this DIY shower tile on a budget turned out!
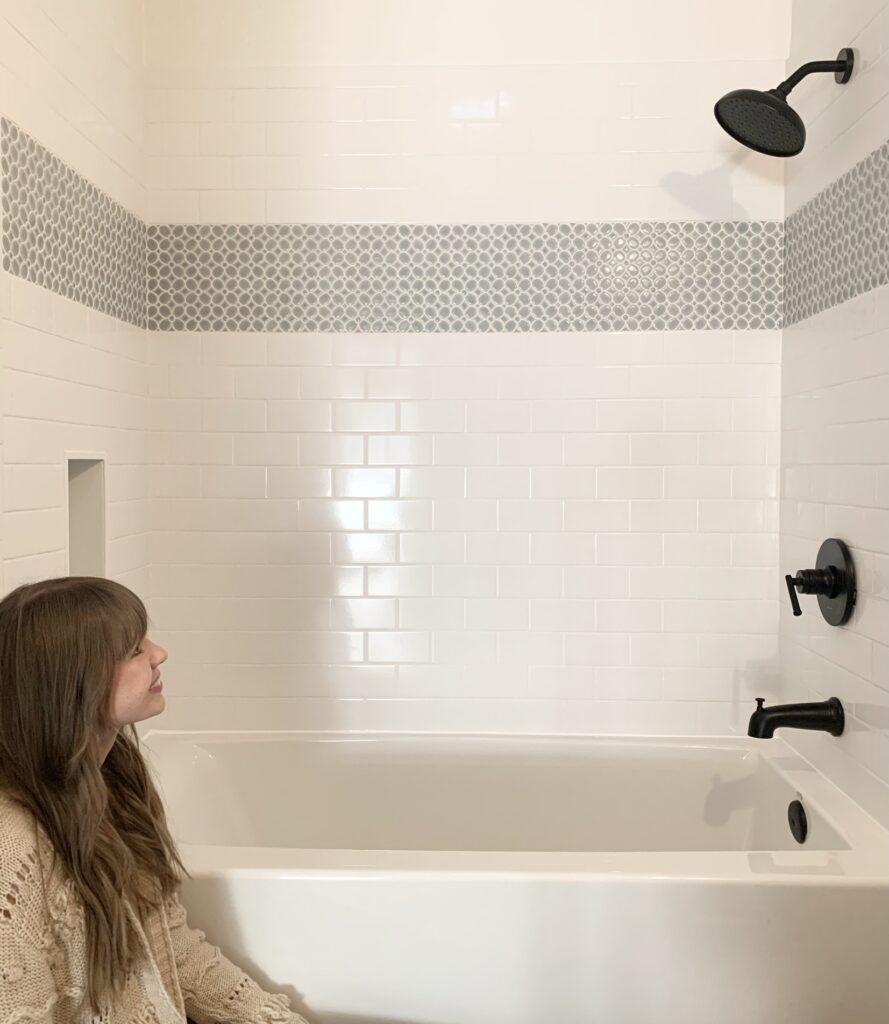
I really love the blue flower mosaic tile, it’s definitely the star of the show and makes this tile shower feel unique!

DIY shower remodel cost
Let’s get to the shower remodel costs! The total for the tiling and the shower came out to just over $1,100.
Since there were really two parts to this DIY shower remodel, let’s also break down the cost that way!
Part 1: Shower cost
The first part was the shower itself which included things like the new bathtub and the tile backer board. The total for that came out to just under $700 with the bathtub being the most expensive part:
| Item | Cost |
|---|---|
| ABS coupling ABS cutter ABS pipe All purpose cement Bath gasket Bathtub Bathtub wrench Cement screws Cement tape Construction screws Overflow gasket Shims Shower fixture Silicone Taping knives Tile backer board Truck rental Tub drain ABS Tub floor trim | $1.82 $17.51 $2.51 $6.11 $2.96 $295.50 $10.59 $9.52 $7.77 $7.76 $2.66 $2.88 $144.50 $4.17 $2.88 $47.68 $50.66 $29.68 $34.10 |
Part 2: Tiling cost
The second part was the tile shower remodel cost, so the cost of the actual tiling (which is what this post was mostly about). This included things like the ceramic shower tile and grout. The total for that came out to just under $450 with the flower mosaic tile being the most expensive part. Here is the detailed cost breakdown:
| Item | Cost |
|---|---|
| 5 Quart Bucket AquaDefense Bullnose tile Caulk Clear bucket Flower tile Flower tile shipping Grout Grout Float Grout Sponge Masking tape with plastic Mortar Shower niche Shower niche frame Shower niche tile Small level Subway tile Tile corners Tile cutter Trowel | $2.14 $49.55 $44.26 $8.07 $2.12 $118.96 $28.32 $19.33 $5.11 $2.04 $8.63 $22.08 $32.31 $6.13 $7.69 $4.84 $53.17 $2.55 $23.64 $3.01 |
Note that the shower remodel cost I outlined here was in 2020. The cost of a tile shower would likely be a little higher now but I hope this is still helpful in showing you what types of costs I incurred during this DIY shower remodel!
Bathroom remodel
You can find more pictures of this DIY small bathroom remodel on a budget here and if you would like to learn how I installed the custom shower niche, I have a separate post saved here.
Are you considering a DIY bathroom remodel on a budget and are looking for more small full bathroom remodel ideas? Check out my other bathroom remodel projects here.
As always, let me know if you have any questions at all!
Tina


Leave a Reply