Note: This post is part of a paid collaboration with Lowe’s and may contain affiliate links, you can find more information in my disclosures here. All opinions are my own.
The guest bathroom remodel is officially finished and I’m so excited to share the final reveal with you!
Let’s start with a project recap. This bathroom is not only our guest bathroom but it’s also our only bathroom downstairs. This meant that we wanted to wrap this remodel up as quickly as possible but also keep the bathroom as functional as possible during the remodel.
Before the bathroom remodel
Our house was built in the early 2000s. However, the guest bathroom was not entirely builder grade/original to the house. Parts of it were remodeled at some point like the shower and the floors.
Before moving in, we got the whole house painted Alabaster by Sherwin Williams. The contractors accidentally broke the previous mirror so I replaced it with a mirror I already had and added a new shower curtain to make the bathroom fully functional:

I think the new paint, mirror and shower curtain already made a big difference!
Guest bathroom design plan
When I started thinking through the initial design for the guest bathroom, I knew I wanted to try out something a little different and unique in here. Here is a rough mock up of the design for this guest bathroom:

The main design element is the shower with a unique arch to create somewhat of a separate space. The floral wallpaper is also a design element I’ve never added to any of my previous spaces so I was excited to incorporate that!
During the bathroom remodel
Let me walk you through the actual remodel!
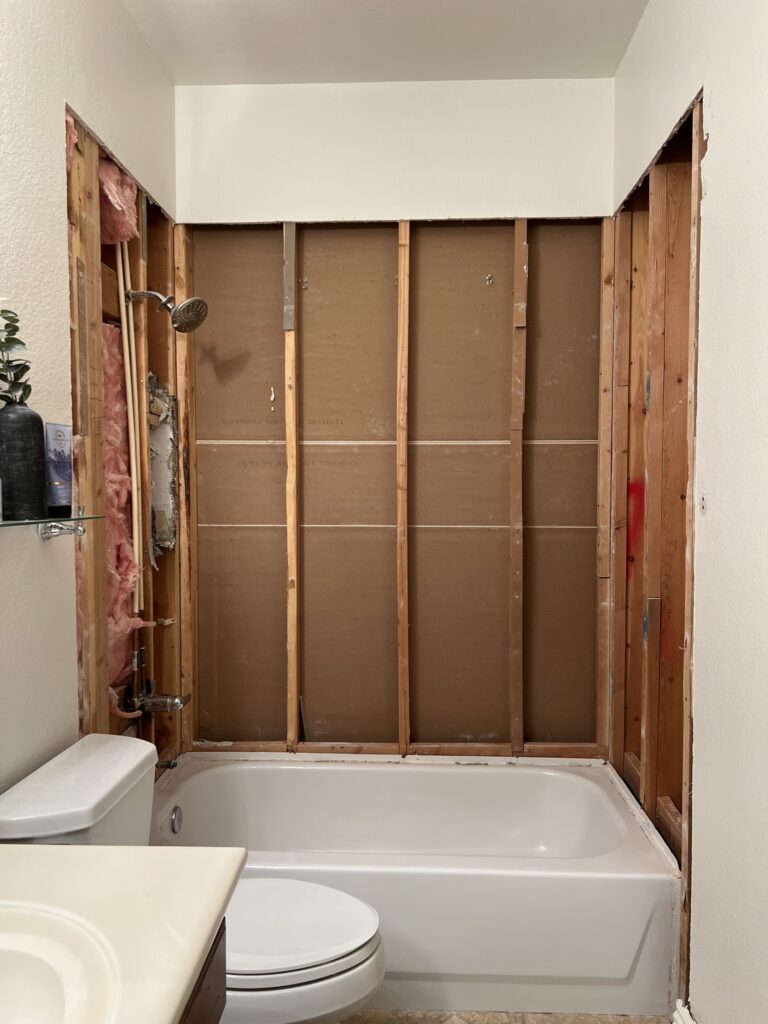
To keep our only downstairs bathroom functional for as long as possible, I decided to focus on the shower first and removed the shower tile while keeping the vanity and toilet in place:
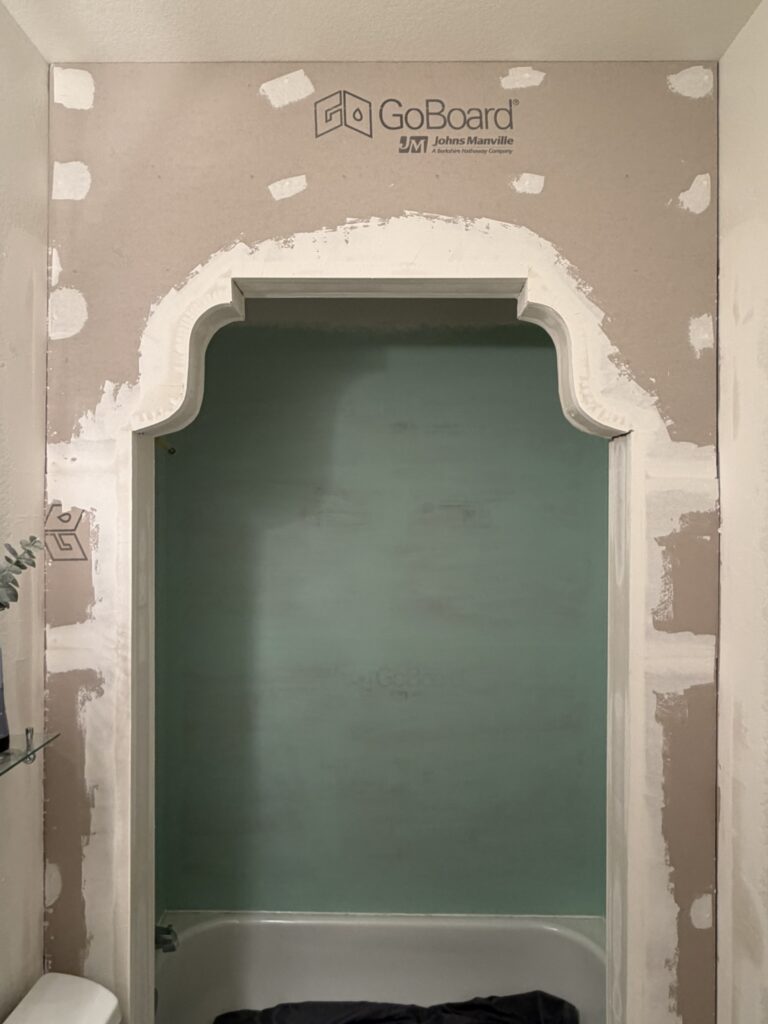
Then, I built the arch for the new shower:

I will do a more detailed post on the process for this soon, stay tuned!
Next, I got the inside of the shower ready for tile:
Once the shower tile was done, we finally took out the toilet and vanity:

I love how the shower arch turned out with the white tile!
Next, I prepped the space for the new floor tile.
I decided to go with a gray hex tile and warm gray grout:

Next, I installed the floral wallpaper.

I really love the design of this wallpaper!
From there, it was time for the finishing touches like new lights, vanity, mirror, toilet and all the little things to really bring it all together.
Finished guest bathroom
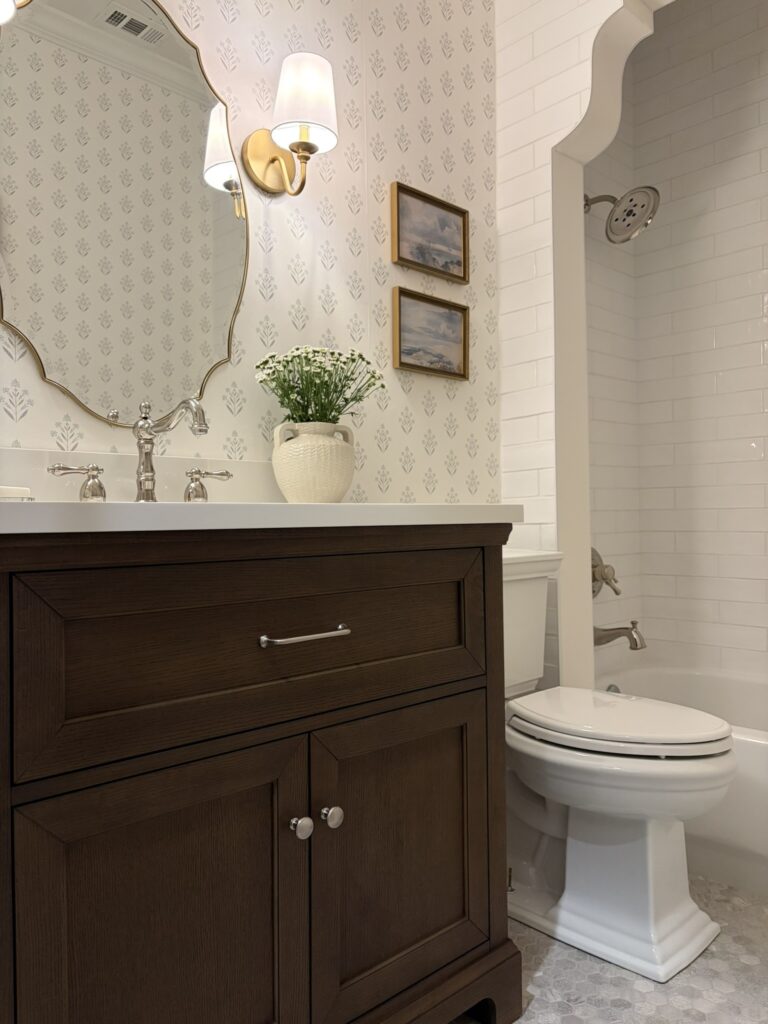
Without further ado, here is our finished guest bathroom!

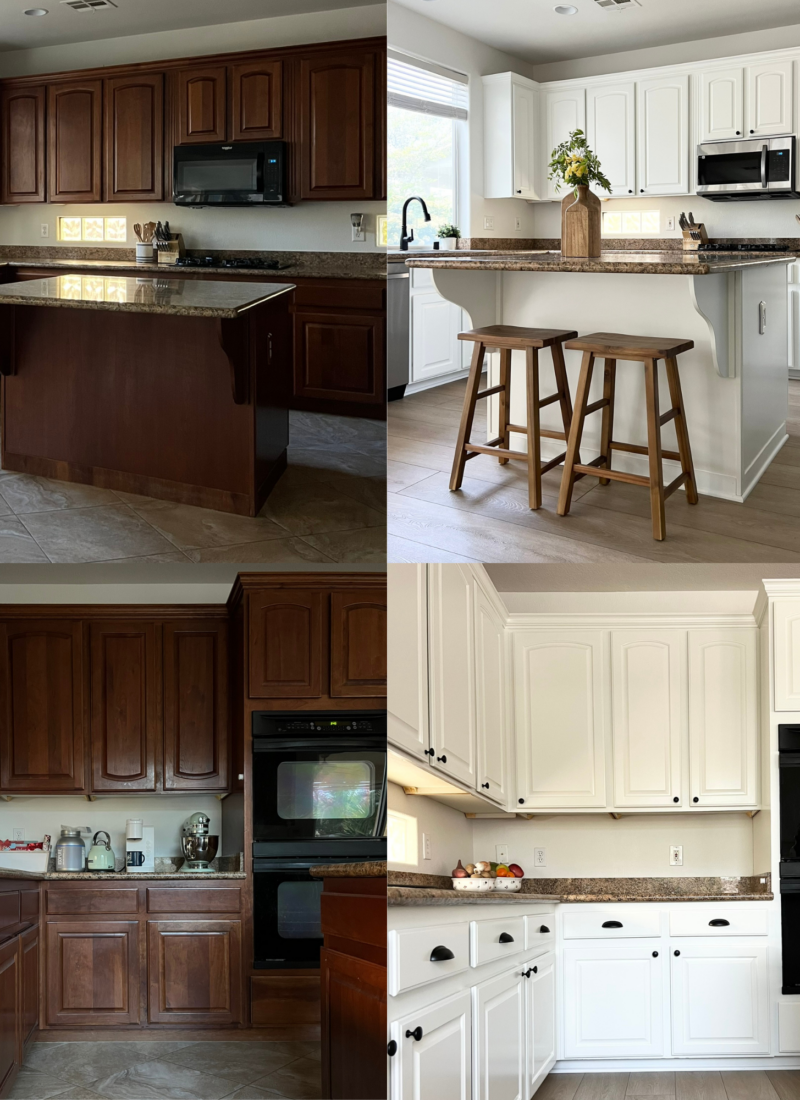
The polished nickel faucet was one of the first things I picked for this bathroom remodel. It’s actually from the same company as the faucet I used in the Hills House kitchen! They really make beautiful fixtures.

I decided to mix metals by adding gold accents to the polished brass like this gold bathroom mirror:

I love our new vanity, I’m so glad I went with a darker one to balance out the remaining light elements in this bathroom!

I feel like the pictures don’t convey the quality and how beautiful this vanity looks in person!


The two projects I was most excited about in this bathroom was the shower arch and the floral wallpaper, here are both of them in one picture:

To decorate the space, I printed some free vintage art and used these beautiful vintage frames I got at a recent estate sale:

Here is a closer look at the beautiful wallpaper:

When the wallpaper samples arrived, this one was the clear winner for me!

I’m so excited about how the arched shower turned out!

In person, the arched shower makes the bathroom look bigger and taller than before which is surprising to me because it’s technically taking space away. But it’s a nice unexpected bonus of adding the arch here!

I love how simple but beautiful the white shower tile is, there’s a lot going on in this bathroom already so I really wanted to add something more neutral. It’s also a larger tile and I think the scale looks great here:

For reference, we have 9 ft ceilings in this bathroom.
I also added polished nickel shower fixtures to match the faucet in the sink!

I used my favorite grout color with the white tile!
The toilet came with a chrome lever so I switched it out for a polished nickel one, it was a quick and easy but impactful little update!

Here is a view of the new floors:

I love how this gray tile turned out with the warm gray grout!

My husband helped turn one vanity light above the the mirror into two sconces on either side of the new mirror, I think it adds to the cozy feeling in this bathroom!

I’m so excited about how this bathroom turned out! I’m aiming for “cozy” and “charming” designs for the new house and I think this bathroom fits right in:


You can find all the products I used for this remodel in my Lowe’s Storefront.
I can’t wait to share more details about the arched shower with you soon!
Let me know if you have any questions in the meantime,
Tina


Leave a Reply