Note: This post is part of a paid collaboration with Lowe’s Home Improvement and may contain affiliate links, you can find more information in my disclosures here. All opinions are my own.
Do you want to upgrade your builder-grade kitchen cabinets on a budget? Here’s how to update kitchen cabinets without replacing them in a few easy steps! In this post, I’ll share my recent budget-friendly kitchen refresh that completely changed the look of our kitchen without spending a fortune on it.
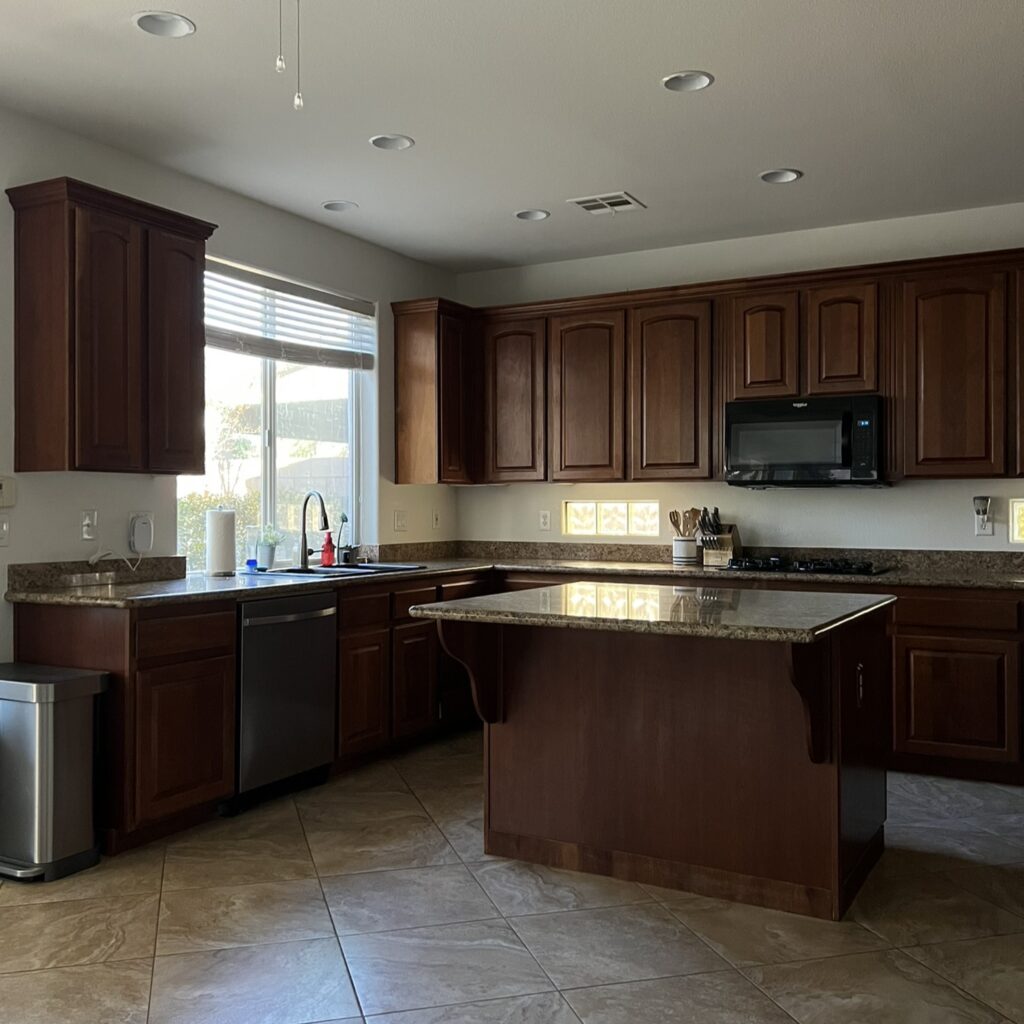
The kitchen at the Roofline Residence was one of my favorite spaces when we first toured this house! I love the layout of our kitchen.
It’s nice to have the kitchen island right in the middle and the sink in front of the window with a view of our backyard:
Once we’re ready to do a full kitchen remodel, I actually don’t plan on changing anything about the layout!
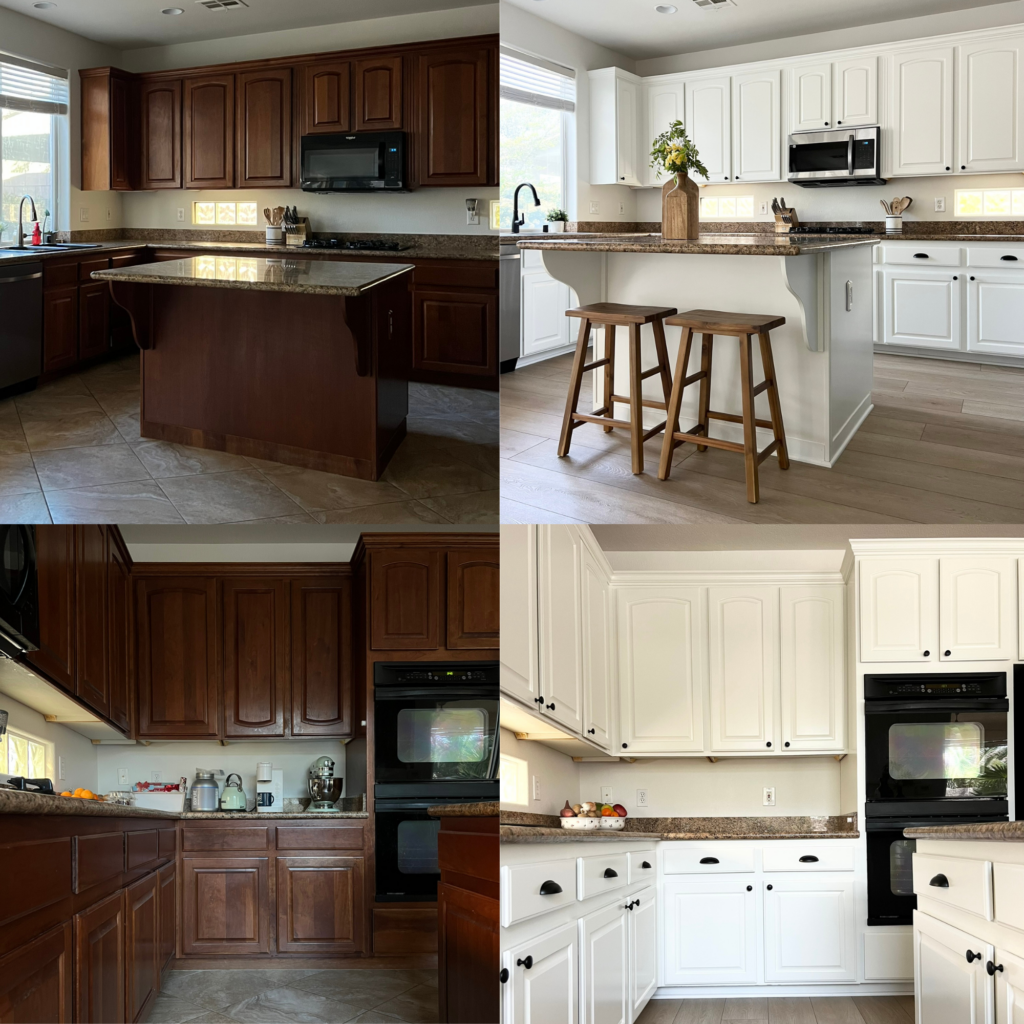
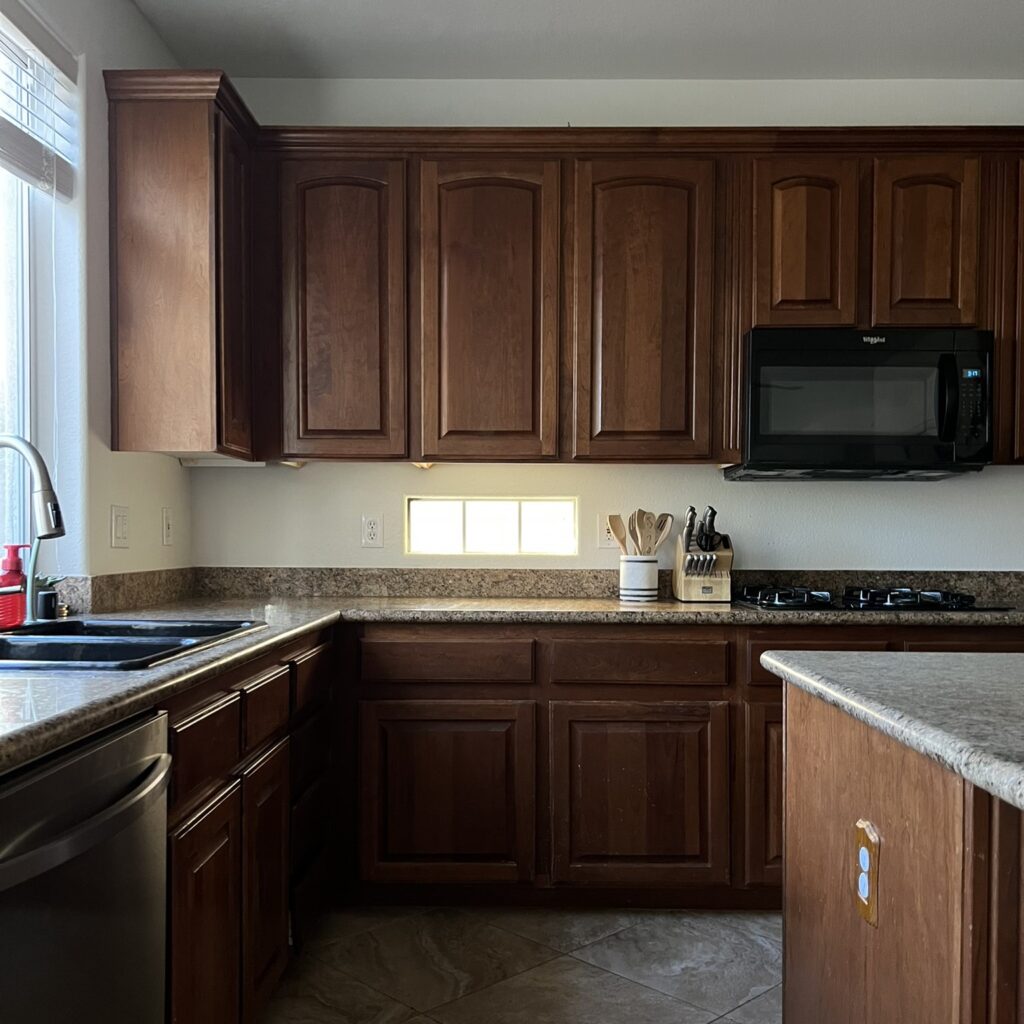
While the layout is great, the kitchen cabinet color and the kitchen countertops were not my favorite:
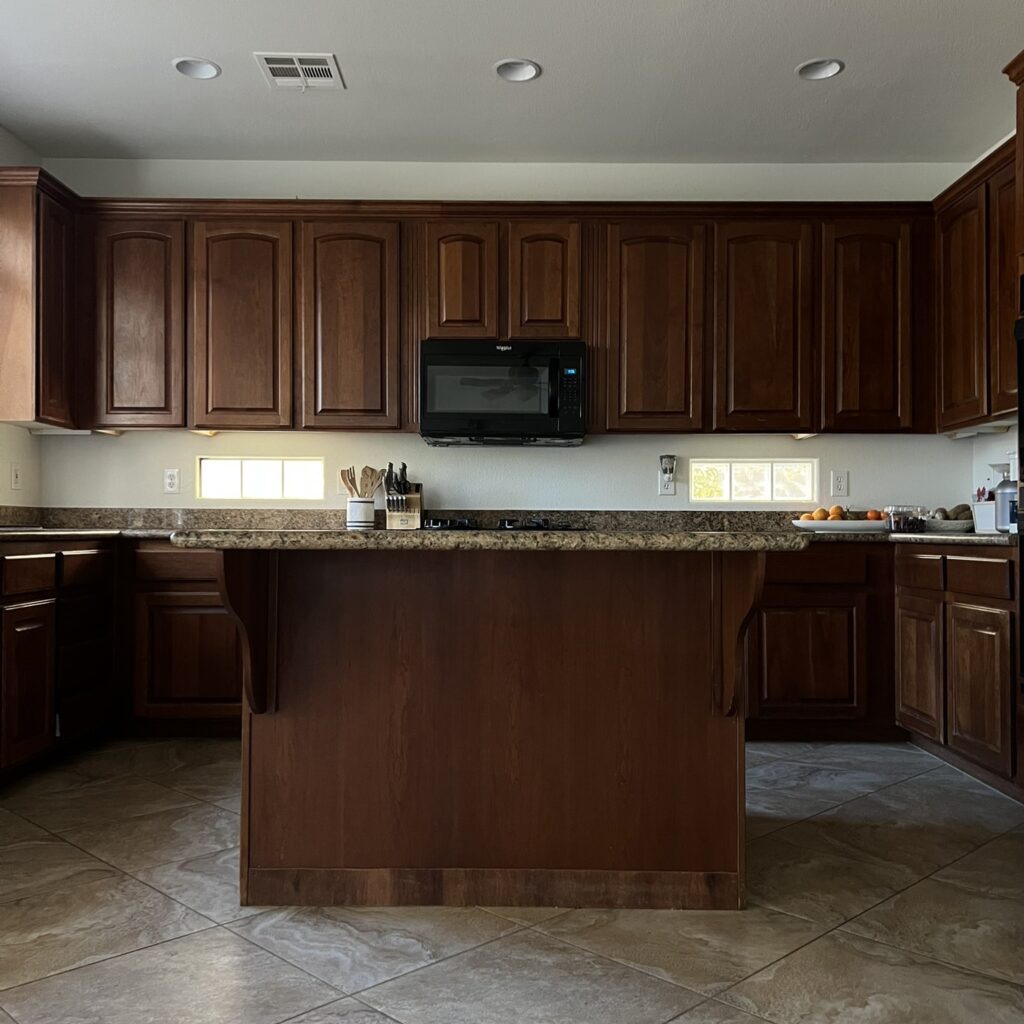
Fun fact: Both the cabinet color and the granite countertops with the beveled edge are very typical for homes built in the early 2000s here in the Las Vegas valley!

A full kitchen remodel was not in our budget at this time, so I decided to do a quick kitchen refresh in the meantime. To maximize our budget, we decided to keep the existing countertops and cabinets.
Here’s how to update kitchen cabinets without replacing them! These are the 3 budget-friendly things I did to update our kitchen cabinets for a new look without doing a full kitchen remodel:
1. Paint kitchen cabinets
Paint is by far one of the most powerful and budget-friendly ways to transform a space!
Our kitchen cabinets were still in good shape but some of the stain started to wear off and fade. There were also a couple cabinets that had some white bleach spots, I’m guessing there may have been a little bleach accident in the kitchen before we bought the house? I thought painting the cabinets would be great way to hide all of those imperfections!
I was excited to paint our old kitchen cabinets but had a hard time deciding on the color because we had to keep the old granite countertops for now. Our granite countertops made this decision challenging because of their busy pattern with multiple dated and earthy colors. With flecks of more than 3 colors, it becomes hard to introduce another color that doesn’t already exist in the granite pattern.
I looked for some inspiration online and most of the updated kitchens with these dated granite countertops had white cabinets or green cabinets. I decided to keep it simple and paint our kitchen cabinets white!
A few years ago, I painted the kitchen cabinets at the California cottage. I still can’t believe how much that transformed our kitchen there:
I used the same painting process in our new kitchen! The only exception was that I didn’t paint the insides of our cabinets because they were already white. That saved a ton of time!
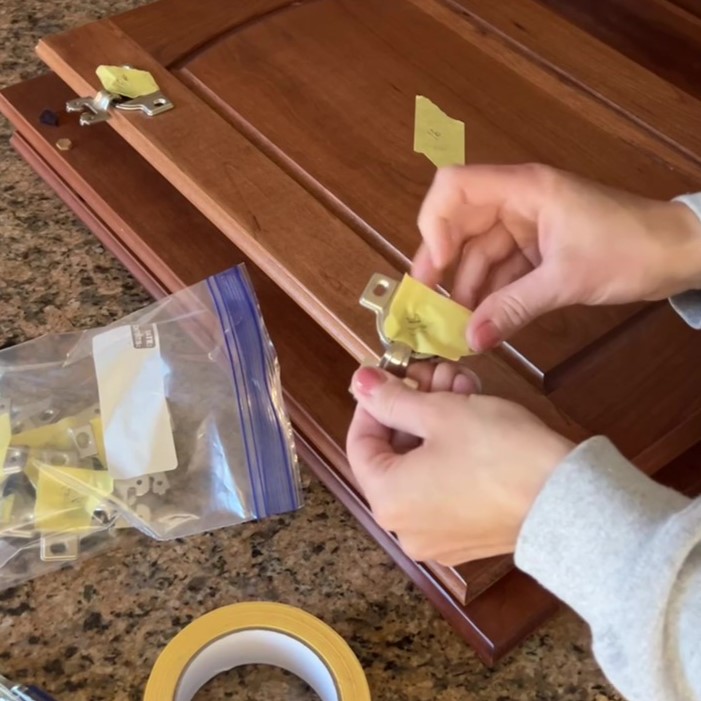
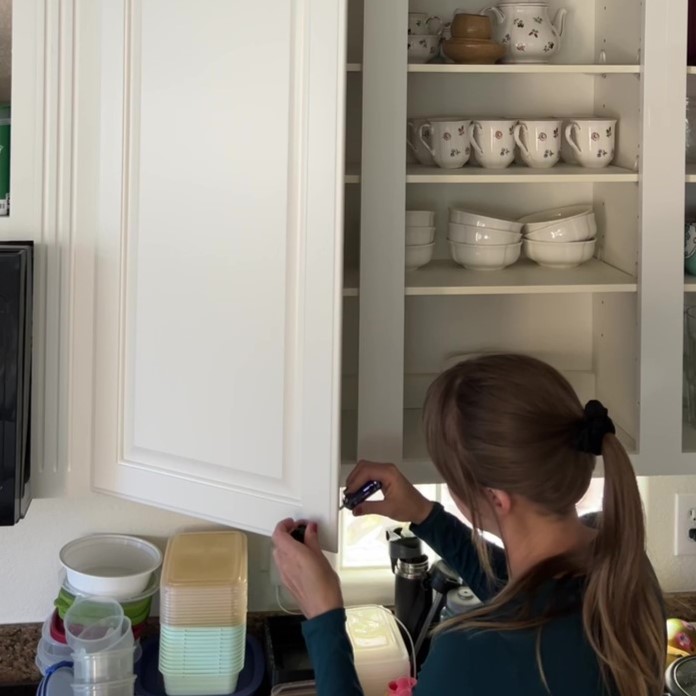
Tip: Always remove all the hardware such as hinges before painting. To make it easier to put everything back together, I used painter’s tape to label all of the doors and hinges:

After all the prep work, I did 1 coat of primer and 3 coats of paint:
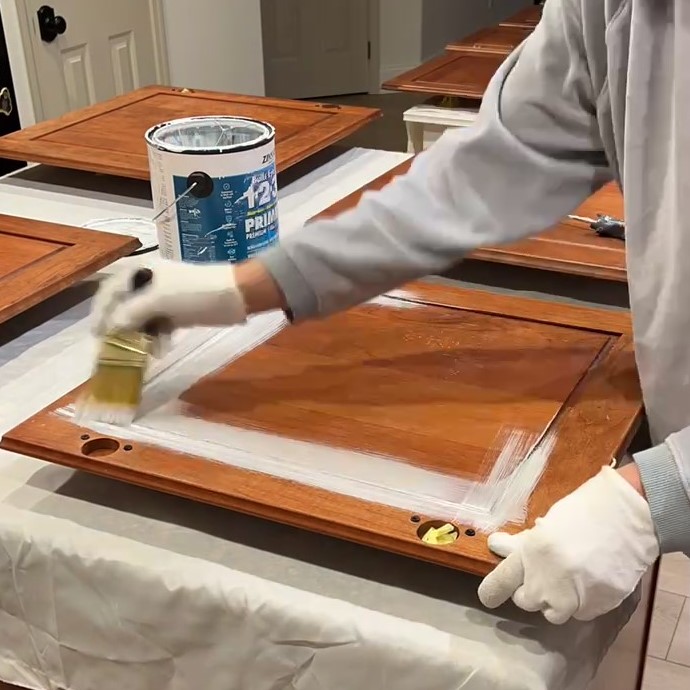

I used one of my favorite Sherwin Williams colors on these cabinets: Alabaster in a Semi-Gloss finish!
You can find all the details about painting kitchen cabinets in my previous post.
2. Install new cabinet knobs
I’m not sure why but our cabinets didn’t have any knobs at all and adding these cute cabinet knobs was one of the things I was most excited about!

I drilled the holes for the new cabinet knobs before I painted our cabinets:
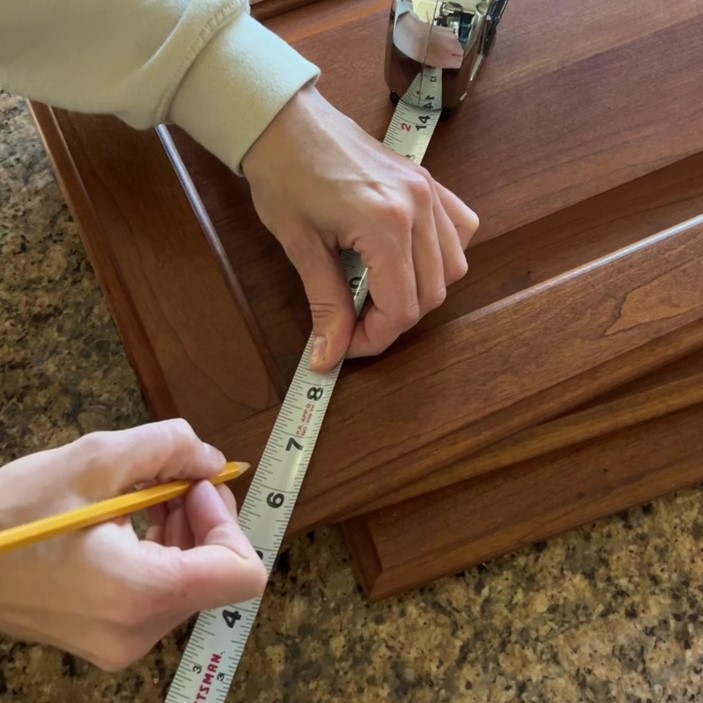

This helped avoid scratching up the freshly painted cabinet doors later!
Adding these black cabinet knobs is not just an aesthetic upgrade but also a practical one! They help open cabinet doors without having to touch the actual door. Thus, avoiding fingerprints and accidental chips to the freshly painted cabinets!
3. Install new drawer pulls
Just like our cabinet doors, our drawers also didn’t have hardware to open them. I found the perfect matte black cup drawer pulls at Lowe’s:

They are beautiful and the perfect size!
I think that adding these matte black cup drawer pulls is such a cute update and makes it so much easier to open up our drawers:

Additional kitchen updates
Kitchen sink and faucet
I also decided to replace our old sink and faucet:

This one specifically was old and impossible to keep clean so I really didn’t like using it. I was also ready to go back to having one big kitchen sink instead of the two smaller bowls, it’s such a game-changer in my opinion!
My husband installed a new stainless steel sink along with a matte black kitchen faucet to complete the new look and design of our kitchen:

We used our existing garbage disposal and my husband just replaced some of the old plumbing under the sink. We have a Lowe’s right down the street from our house and I just looked up any last-minute plumbing parts we needed on their website. Their website showed me exactly which isle and bay to get the parts from at our store. That was super convenient!
I’m so excited about the new sink and kitchen faucet, we will literally use both multiple times a day and they give this kitchen an updated and much cleaner look!
Shoe moulding
We also laid new flooring a few months ago so this kitchen update was the perfect time to finally add some quarter round or shoe moulding to cover the gap between the flooring and the cabinets. I got pre-painted shoe moulding at Lowe’s so the installation was super quick and easy. All I had to do was cut it and attach it to the cabinets with brad nails!
Take a look at the before and after of this simple change:


It really completed the look without much work at all!
Bar stools
After all the time and effort spent on the kitchen refresh, I decided to get a little “reward” in the form of these cute wood counter height bar stools for our kitchen island:

They were so easy to assemble and I love the way they look!
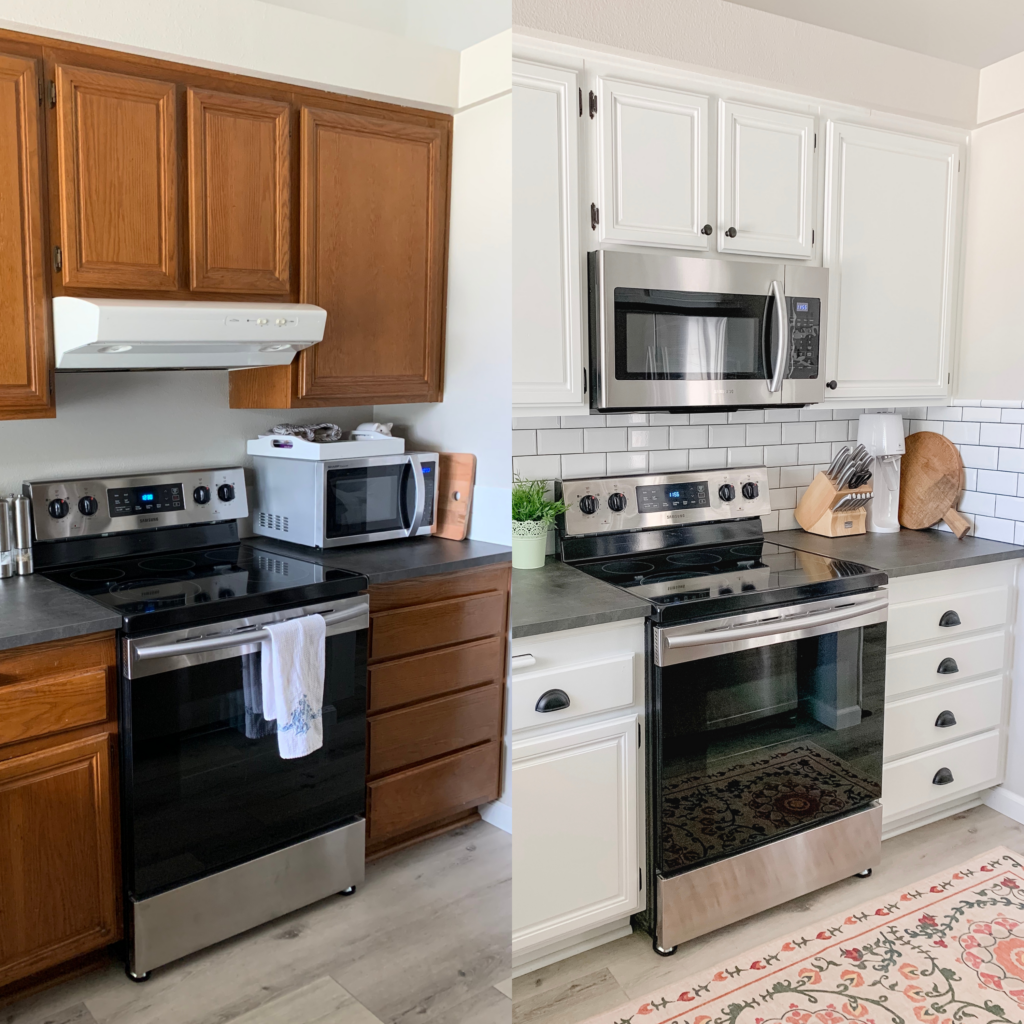
Our updated kitchen cabinets without replacing them
Without further ado, here are our updated kitchen cabinets! I’m so excited about how our kitchen cabinet makeover turned out:


Can you believe the impact of adding new matte black finish cabinet knobs and drawer pulls and painting our cabinets?
Eventually, I’d like to add a pop of color with some fun fabric cushions and covers for the stools and get some nice roman shades and curtains for the windows in our kitchen!
That’s a project for another day though! In the meantime, I’m really excited about my budget-friendly kitchen refresh and I’m so glad I tackled this.
I hope you found this post on how to update kitchen cabinets without replacing them helpful! I would love to see how your updated kitchen turned out if you end up tackling a similar project.
As always, let me know if you have any questions!
Tina

Wow, what a transformation! I’m inspired. Great work, Tina! ♡
Thanks so much, Lindsay!