If you’ve been following along on Instagram, you’ve probably seen me build our DIY electric fireplace!
This DIY fireplace has been on my dream project list for a while. We decided to remove our old (broken) gas corner fireplace and replace it with a new electric fireplace centered on a different wall in our living room.
In this post, I’ll share exactly how I created this new focal point in the living room with a more traditional look by building a DIY electric fireplace!
Note: This post may contain affiliate links, you can find more information in my disclosures here.
Ever since we decided to remove the corner fireplace, I’ve been gathering fireplace tv wall design ideas to create the living room of my dreams! One of the key design elements I wanted to include were fireplace built ins: a fireplace centered on the wall with built ins on both sides.
Let me show you how I built our new fireplace from scratch!
Materials
- electric fireplace insert
- brick veneer
- grout in a cream color
- grout bag
- to build the fireplace structure: studs, screws, drywall, drywall screws, drywall tape, joint compound, putty knife
- to build the mantel: 8 inch MDF boards, 2 inch MDF boards, base cap moulding, quarter round, cove moulding, lattice moulding, 2013LDF convex shiplap, 455LDF dentil crown, wood glue
- caulk for finishing touches
- my favorite primer
- my favorite cabinet paint (color matched to Light Blue by Farrow & Ball)
Tools
Plan/Mock up the fireplace
The first step for me was to measure the space and create a mock-up of the fireplace and the built-ins based on the exact dimensions of the wall:
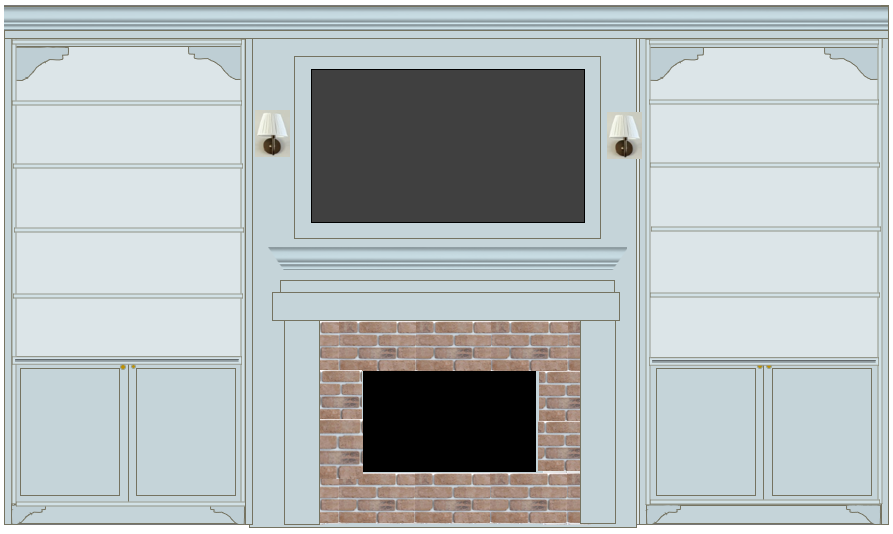
I typically “wing it” when it comes to building things and think through the details as I go but his was a huge project due to the built-ins around the fireplace so I wanted to avoid any surprises!
I created this simple mock-up in Excel and I’m so glad I did this because it allowed me to visualize it and adjust the dimensions and scale of all the elements beforehand.
Prepare the space
Once I had a solid plan and design, the first step for us was to clear out the space and remove the existing corner gas fireplace!
Here’s what our living room and fireplace looked like before:


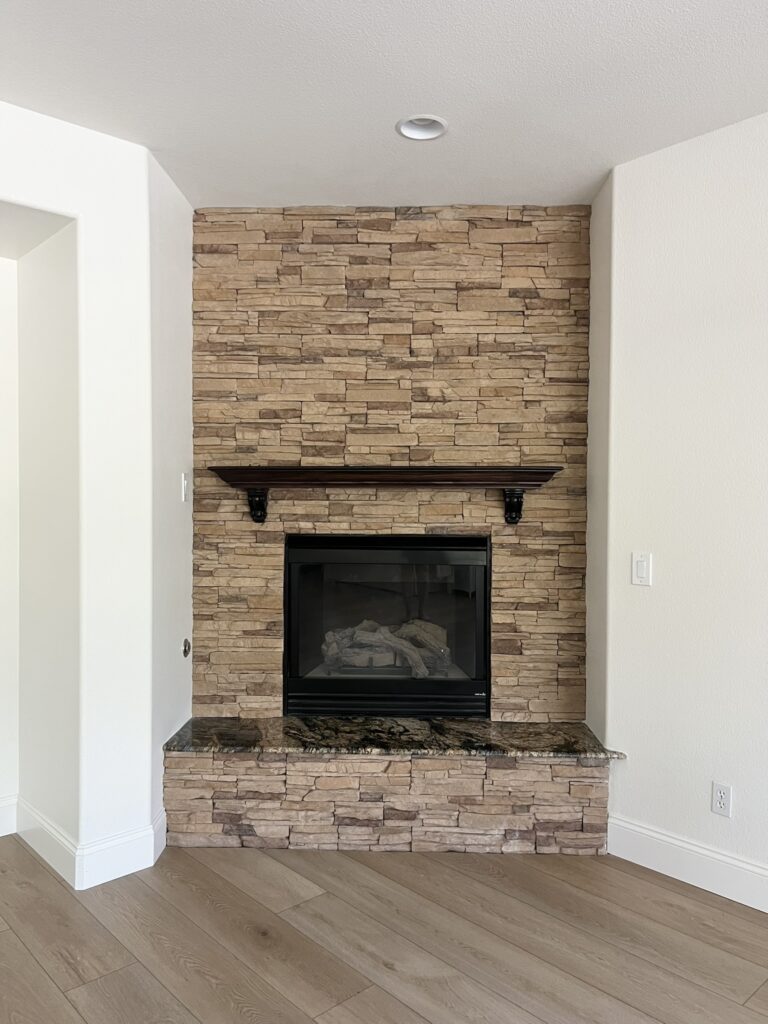
We hired out the removal of the old gas fireplace and I’m so glad we did! Our contractors were fast and efficient, the old fireplace was gone and the hole was patched within just a couple of days.

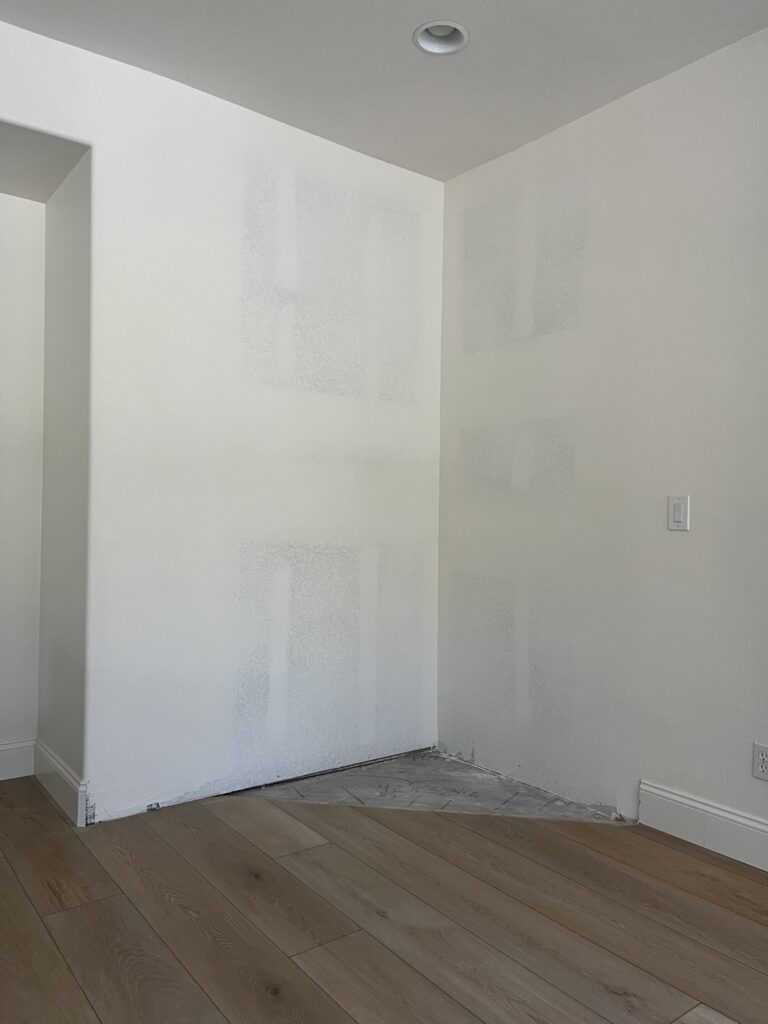
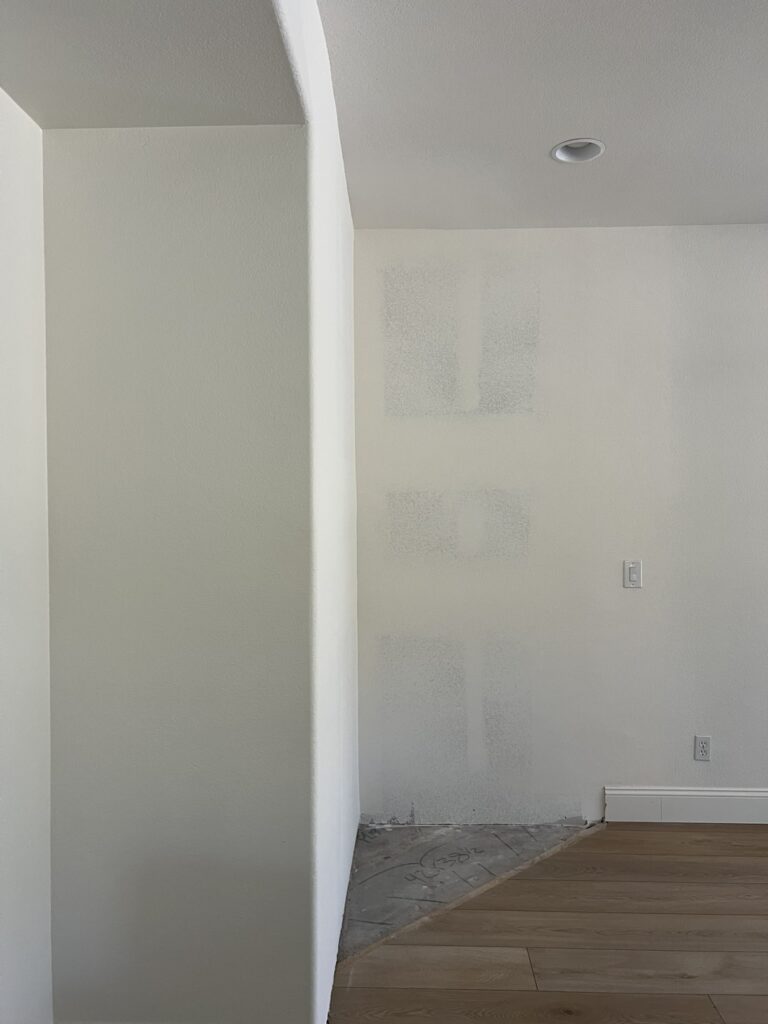
The last part in preparing the space was to remove the baseboards and the flooring!
Build the fireplace structure
The next step was to build the structure for the fireplace out of 2x4s. I built the living room built ins on both sides first:
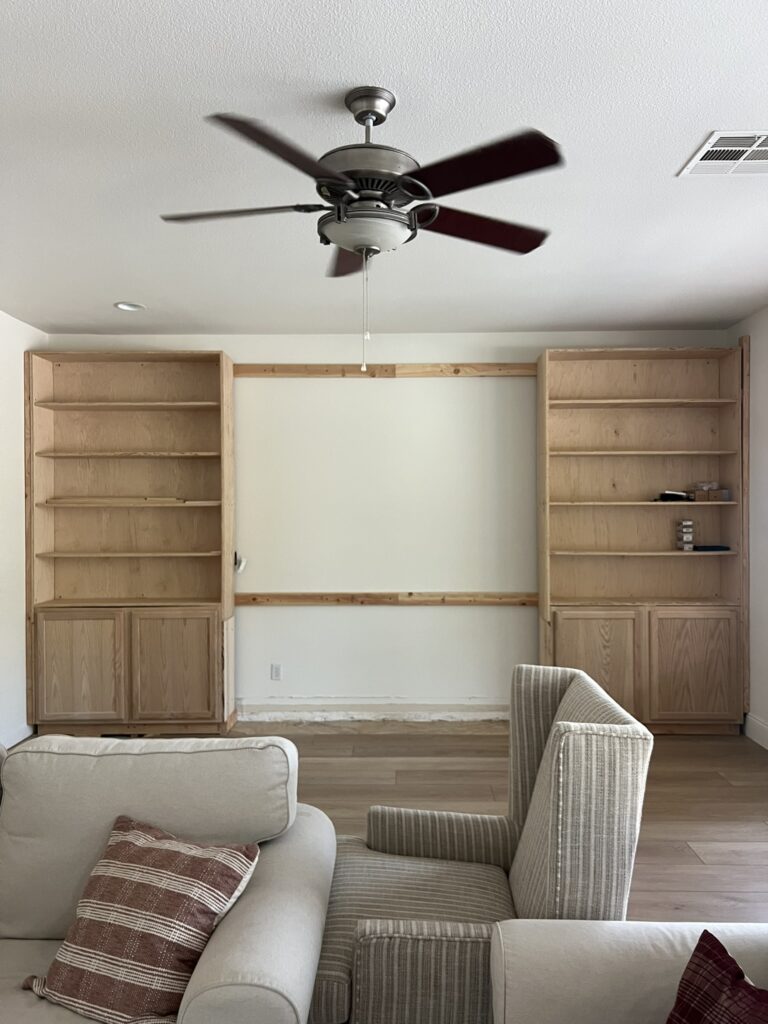
Then, I started with the fireplace portion by building a frame that fit within the opening:
I attached it directly to the built ins!
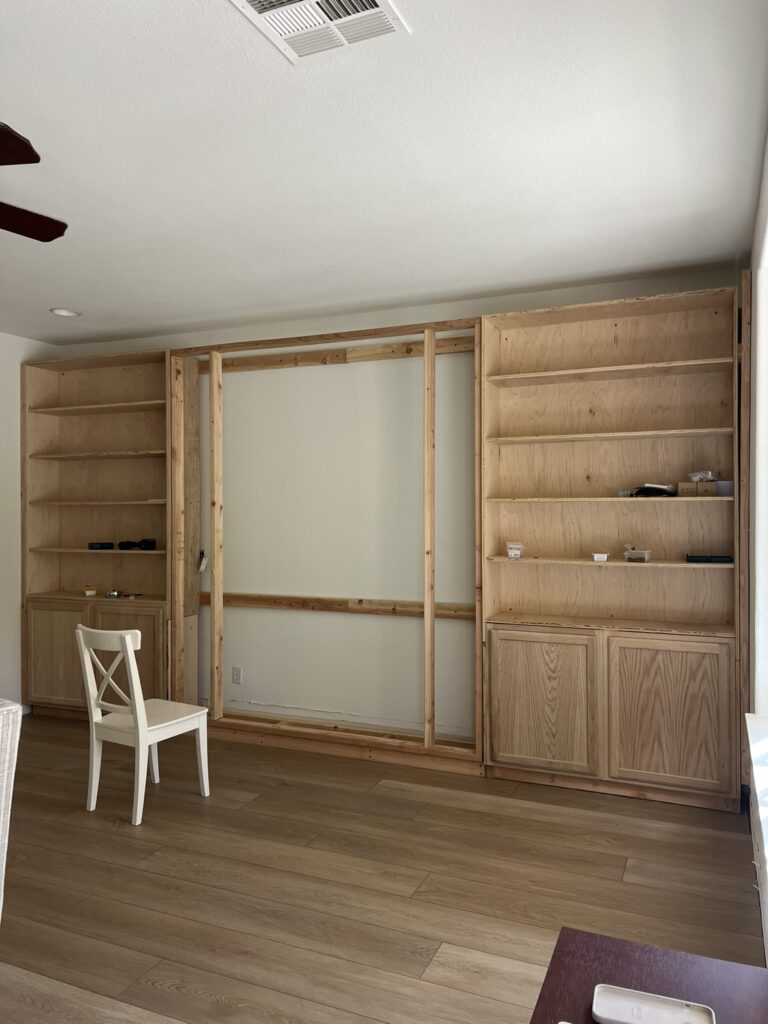
From there, I built out the framing to accommodate our fireplace insert and its dimensions:
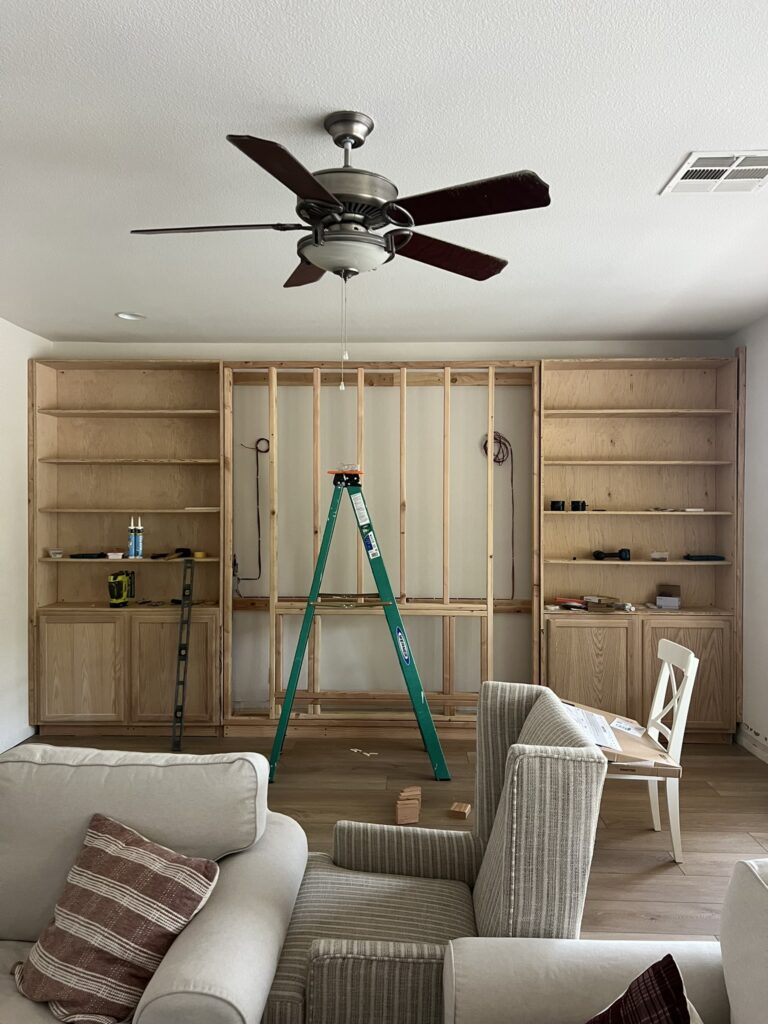
My husband also added the wiring for the sconces and moved the light switch to the inside of the left cabinet:

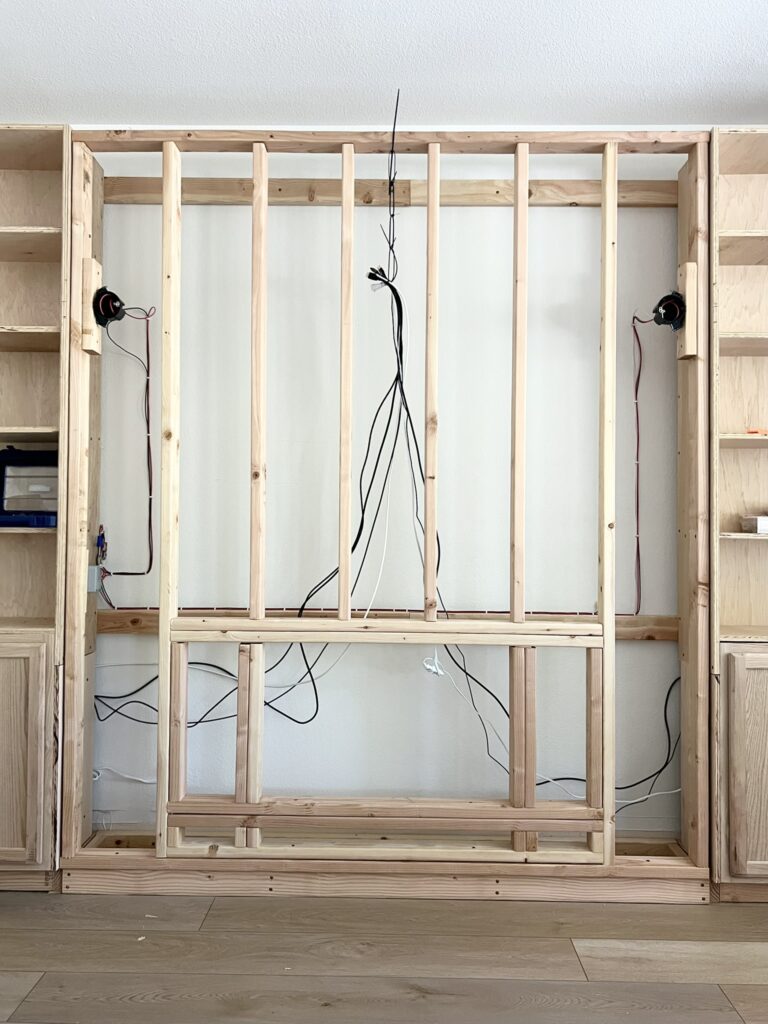
We also prepped all the cables for the TV to go above the fireplace.
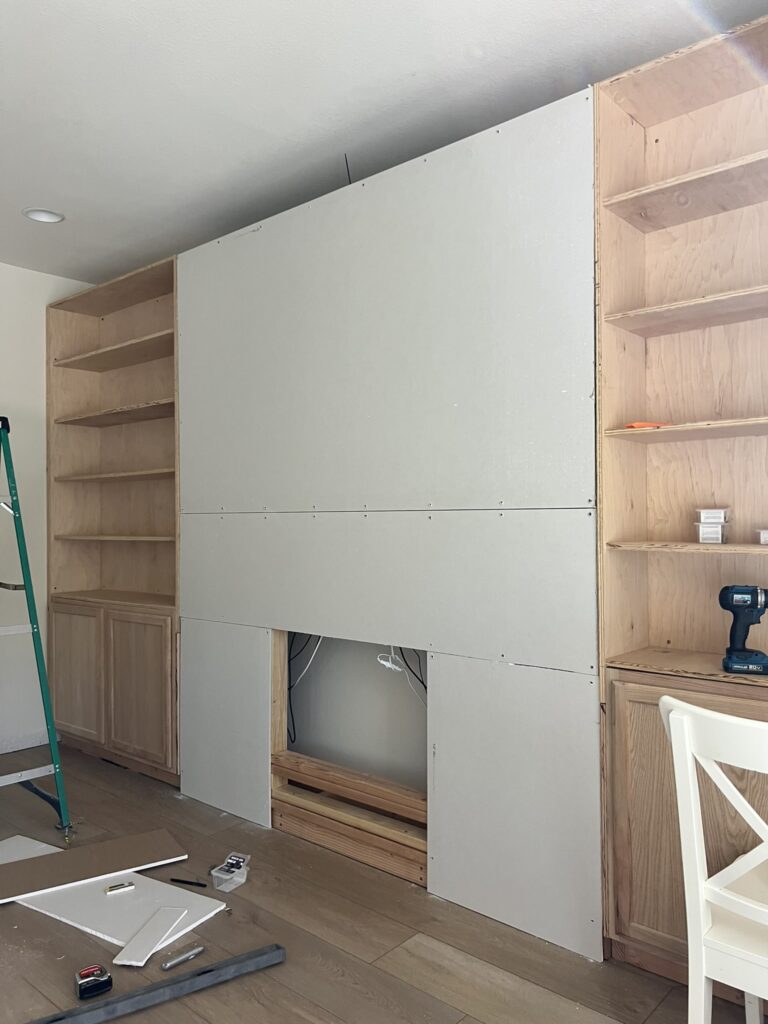
Install drywall
Next, I installed the drywall!
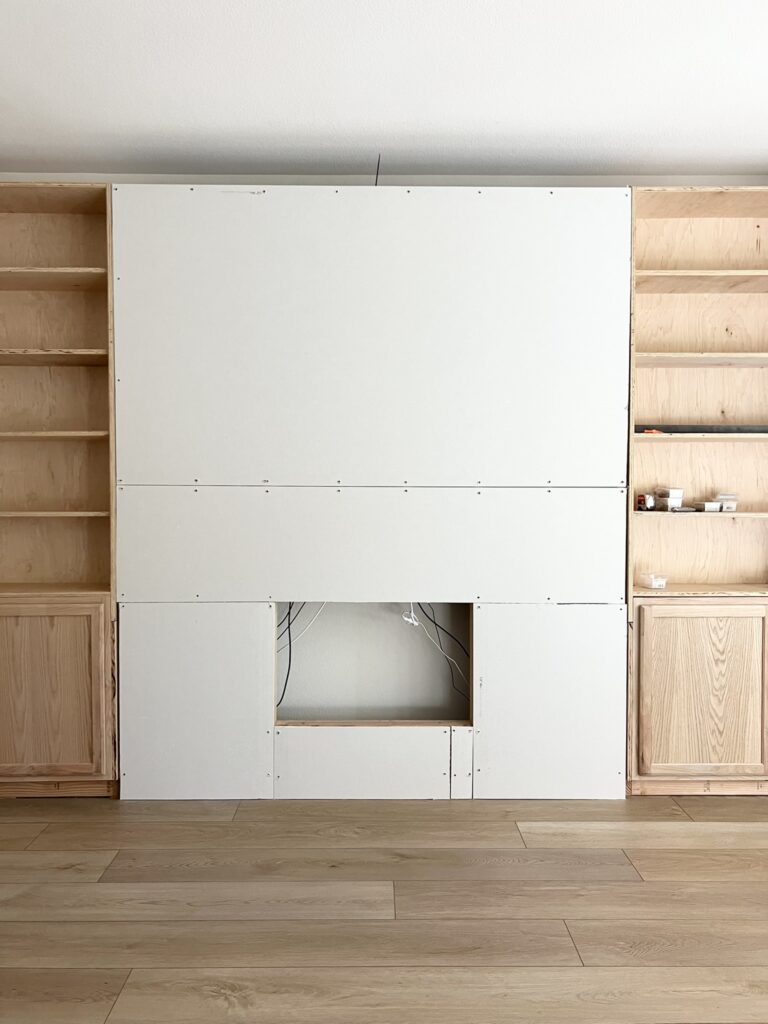
Note: I didn’t add drywall screws to the middle where the TV would go because I knew we would be adding a TV mount. The screws for the TV mount were going to go through the drywall and into the studs so I saved some time on patching drywall screw holes!
I decided to go with drywall over plywood for this part because:
- I like the extremely smooth surface of drywall
- it’s easier and less messy to cut than large sheets of plywood
- drywall sheets are significantly cheaper than plywood
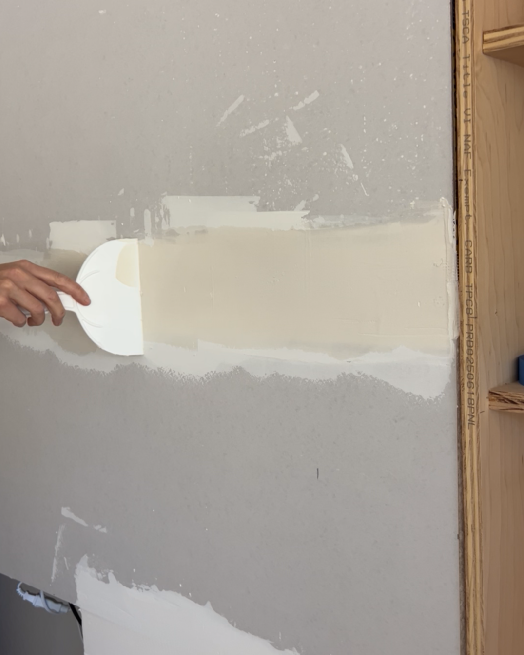
Once the drywall was up, I patched all the seams:
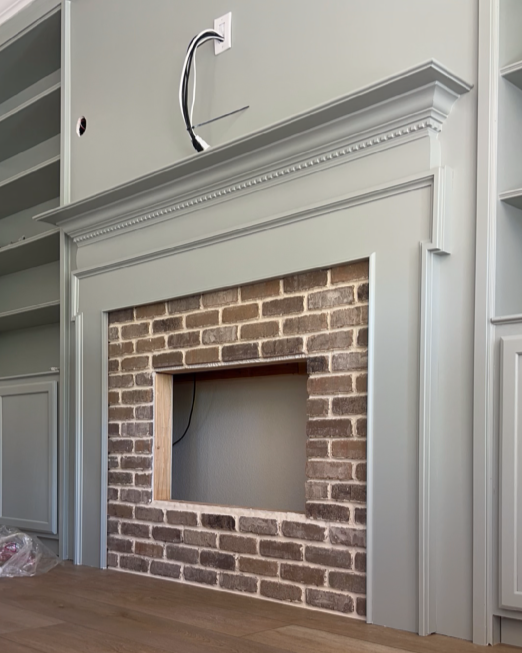
Install fireplace surround
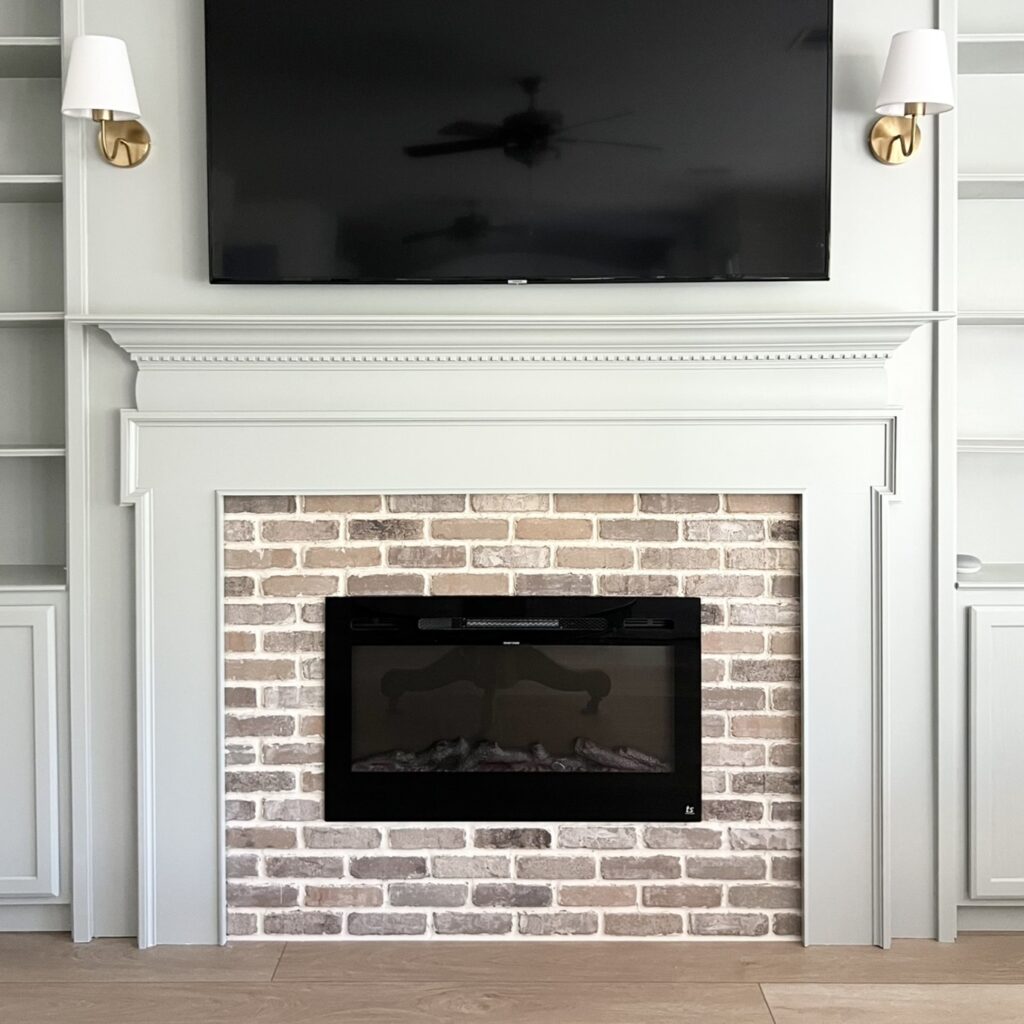
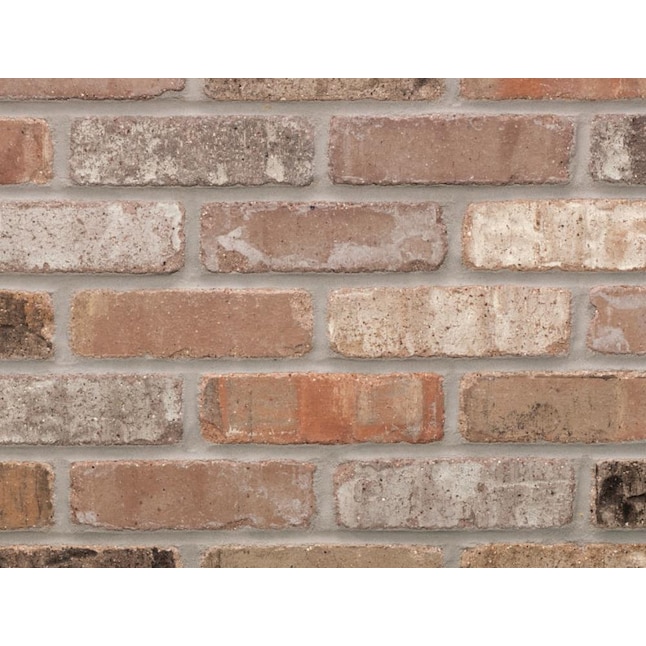
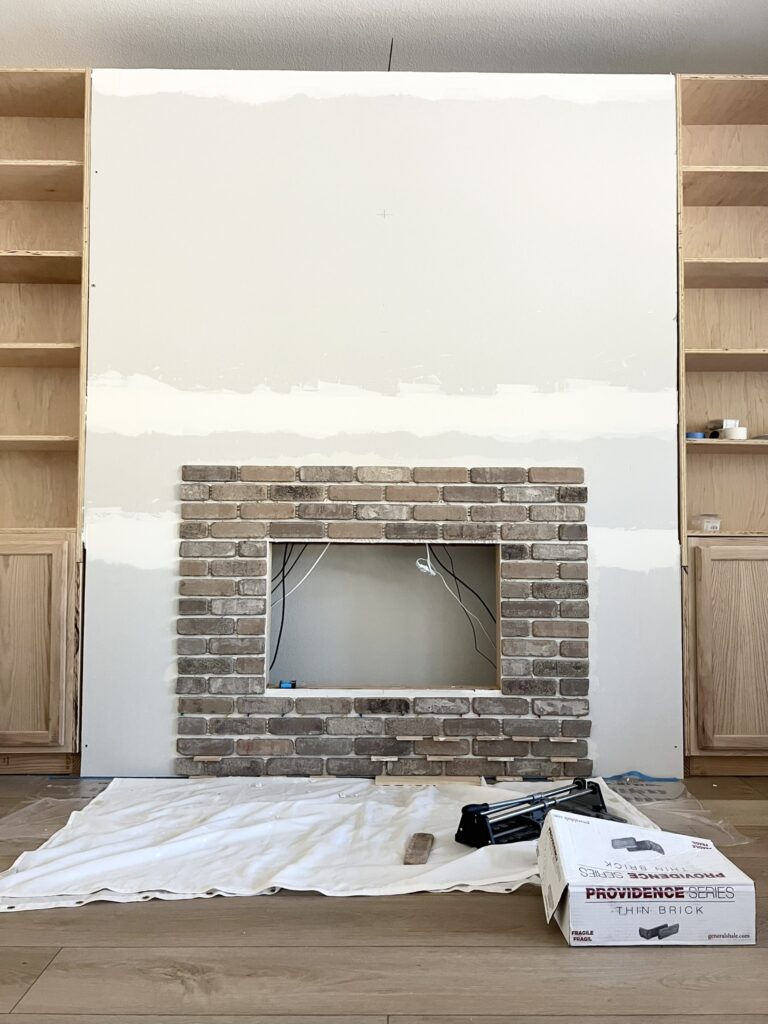
I really wanted a more traditional look for our living room so I decided to use brick veneer on the fireplace surround!
This was actually my first time working with brick veneer and I’m sold! It was super easy to install and I love the way it looks. Several friends and family members have even asked if it’s real brick.
This is the brick veneer I used!
Here’s how I installed the brick veneer!
Installing the brick veneer
I started by planning out the brick placement (similar to how I planned the tile placement when installing shower tile)!
If you’ve been following along over the years, you’ve probably noticed that I’m very particular when it comes to symmetry and a nice finish during my projects.
As with tile during past projects, I tried to avoid any awkward placement or small slivers of brick on any portion of the fireplace.
The planning really helped here!
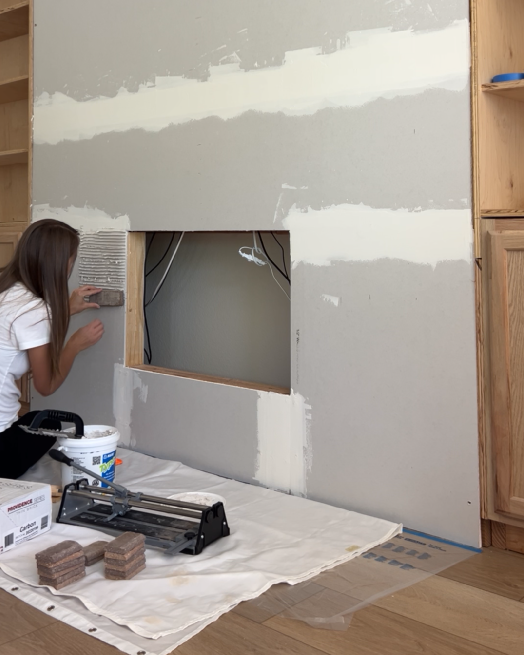
With the first few bricks, I made sure each one was level!
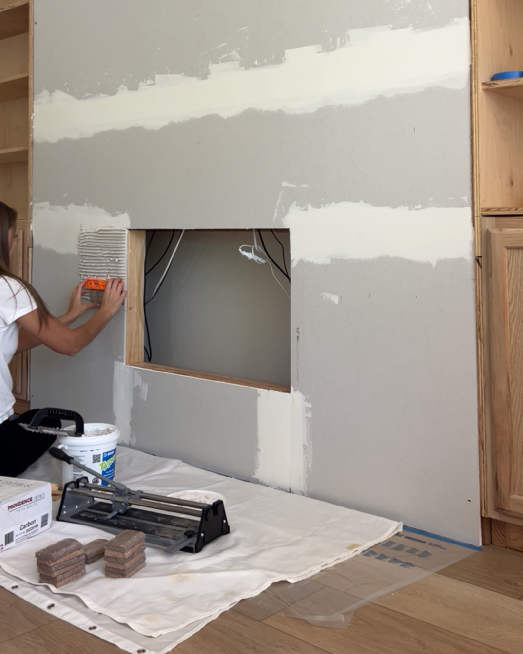
Cutting brick veneer
One unexpected surprise was the fact that I was able to cut the brick veneer with my tile cutter right there in our living room as opposed to having to use our loud and messy wet saw outside.
This was a huge time saver and worked out perfectly because I was able to install the tile during nap time and after bed time!
All I had to do to cut brick veneer was score it …
… then snap it:
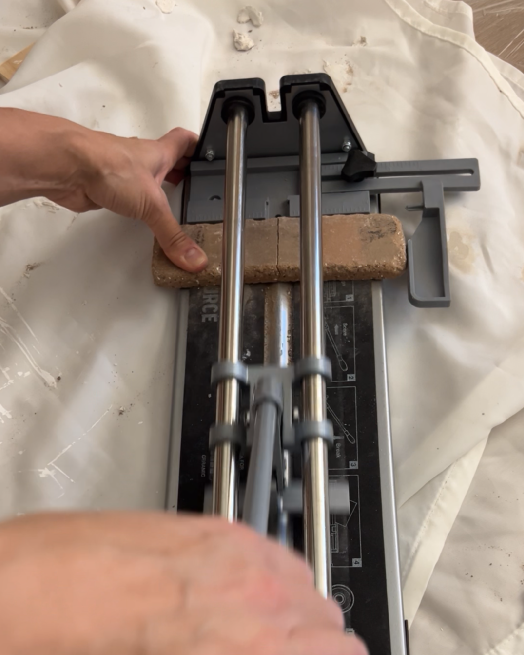
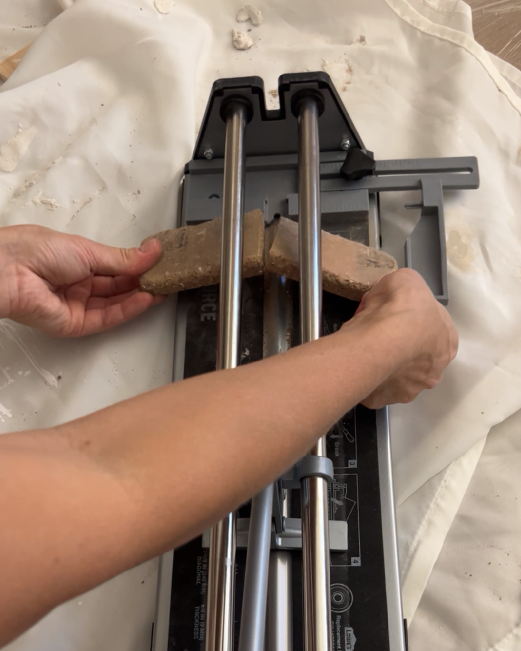
Note: This method might not work for you if you need to cut small pieces off or your cuts need to be extremely clean. I knew the edges would get covered later so it didn’t matter in my case.
Once the brick was installed, the final step for me was to grout:
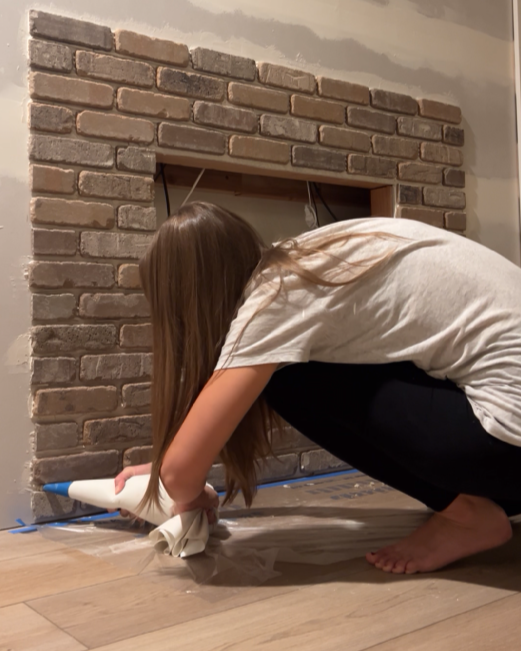
I just used my finger to smooth over the grout line:
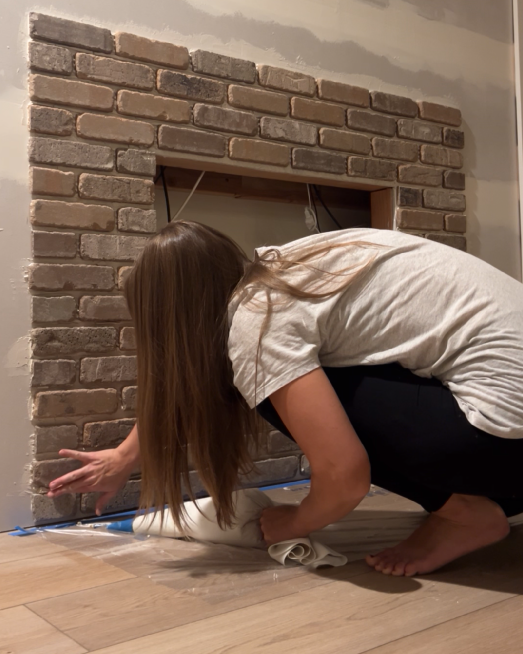
Note: I got overly eager to grout and overestimated how quickly I could apply the grout. I mixed way too much and most of it dried up in the grouting bag before I was even able to apply it. I ended up mixing only small portions like I usually do when I tile!
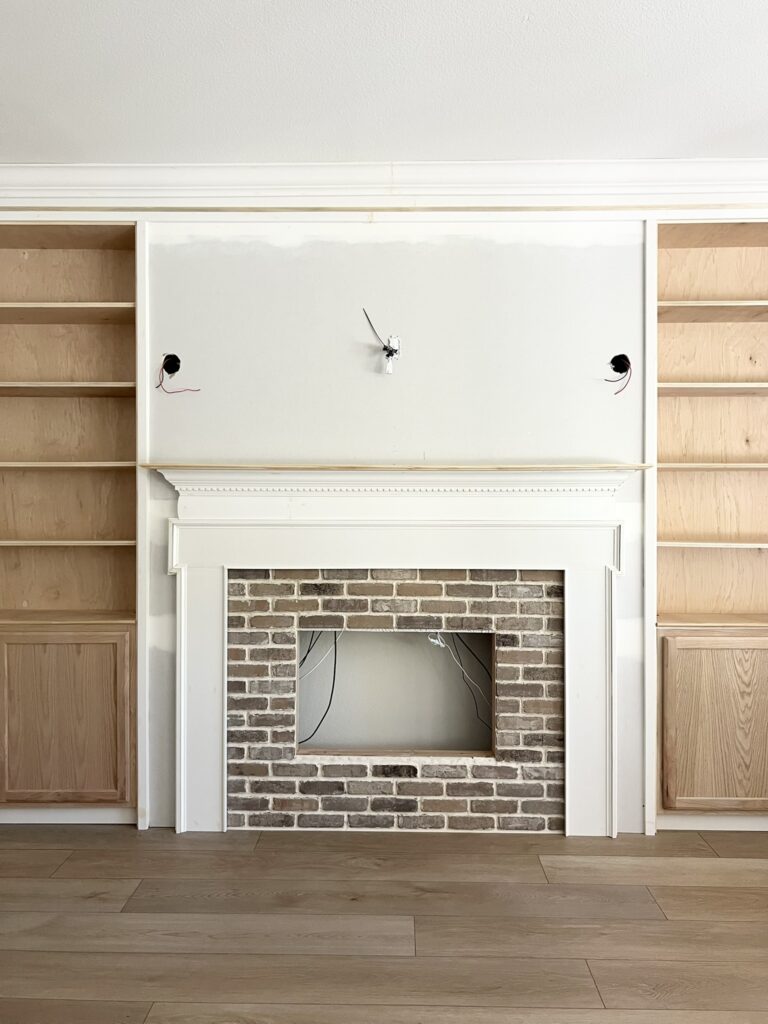
Build fireplace mantel and surround
Once the brick surround was finished, it was time for me to build the fireplace mantel and the decorative fireplace surround.
I wanted a more traditional fireplace in our early 2000s builder grade home. The inspiration for the design came from homes on the east coast and I decided to recreate that look in our west coast home!

I started building the surround by using MDF boards and different types of trim:
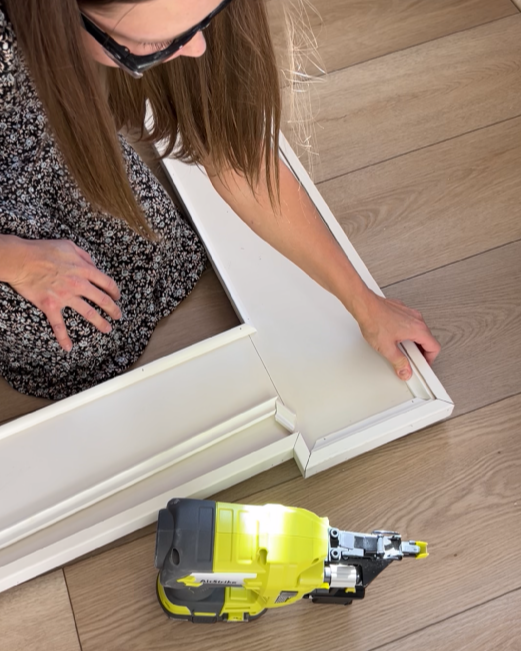
The structure is made from 8 inch MDF boards. The trim closest to me is quarter round, the outside part is 2 inch MDF boards combined with cove moulding.
I built the mantel using an 8 inch MDF board, base cap moulding and dentil crown moulding!
The first step for the mantel was to cut the dentil crown to size and glue it together:

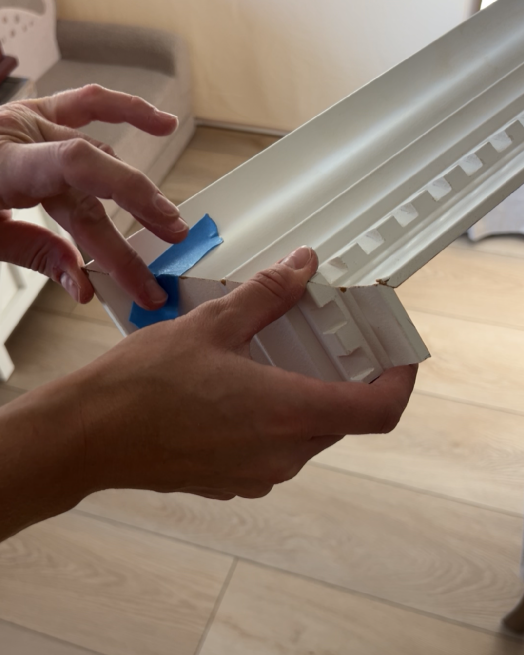
I find this to be much easier and precise than trying to nail the pieces together!
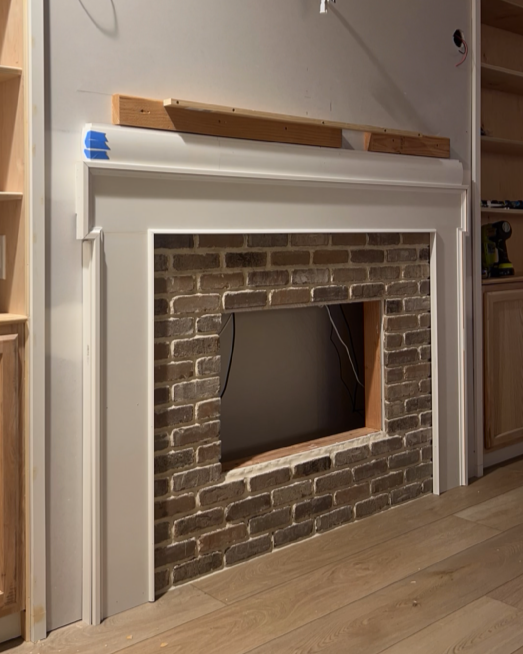
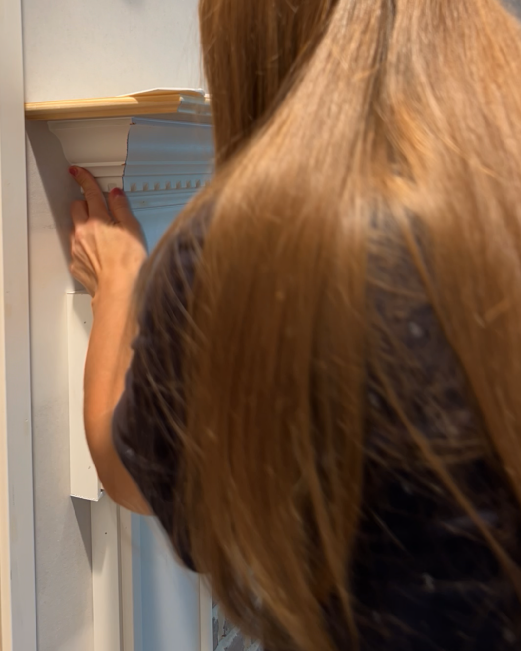
Then, I started attaching all the pieces for the mantel to the wall:

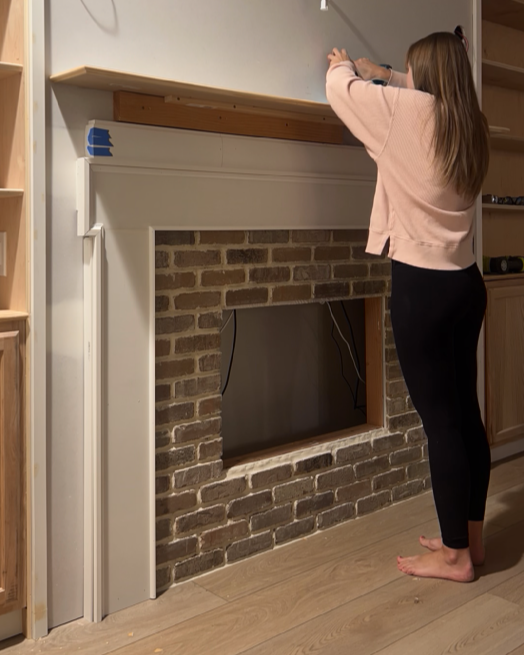
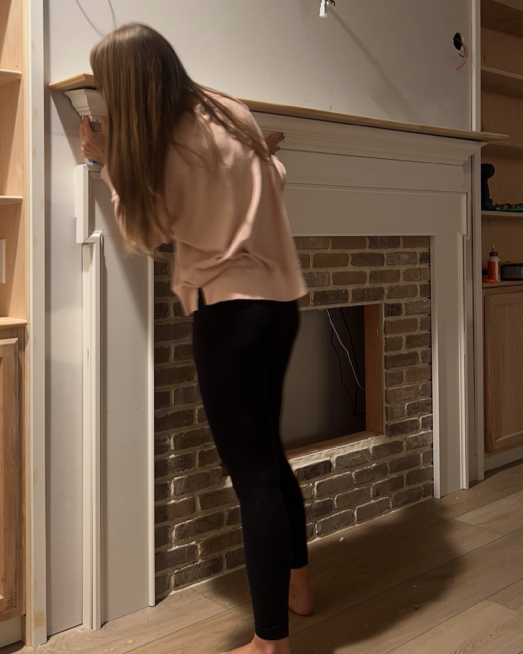
I used my brad nailer to attach the crown:

Then, I added a little more trim for a clean look:
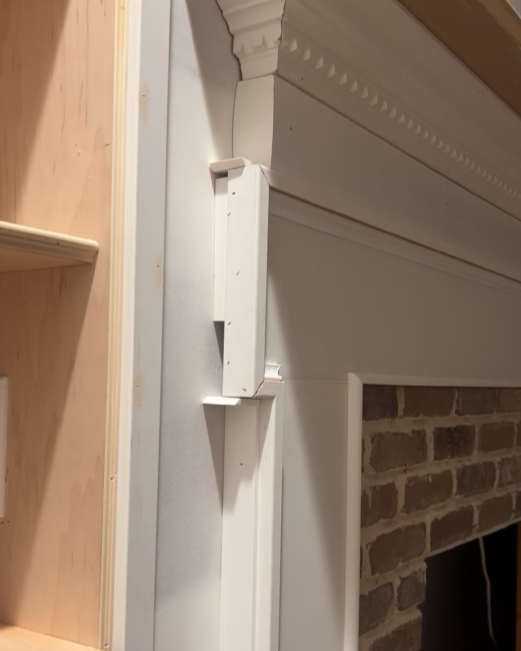


Here’s a detailed look at all the trim I used to build this mantel and surround!
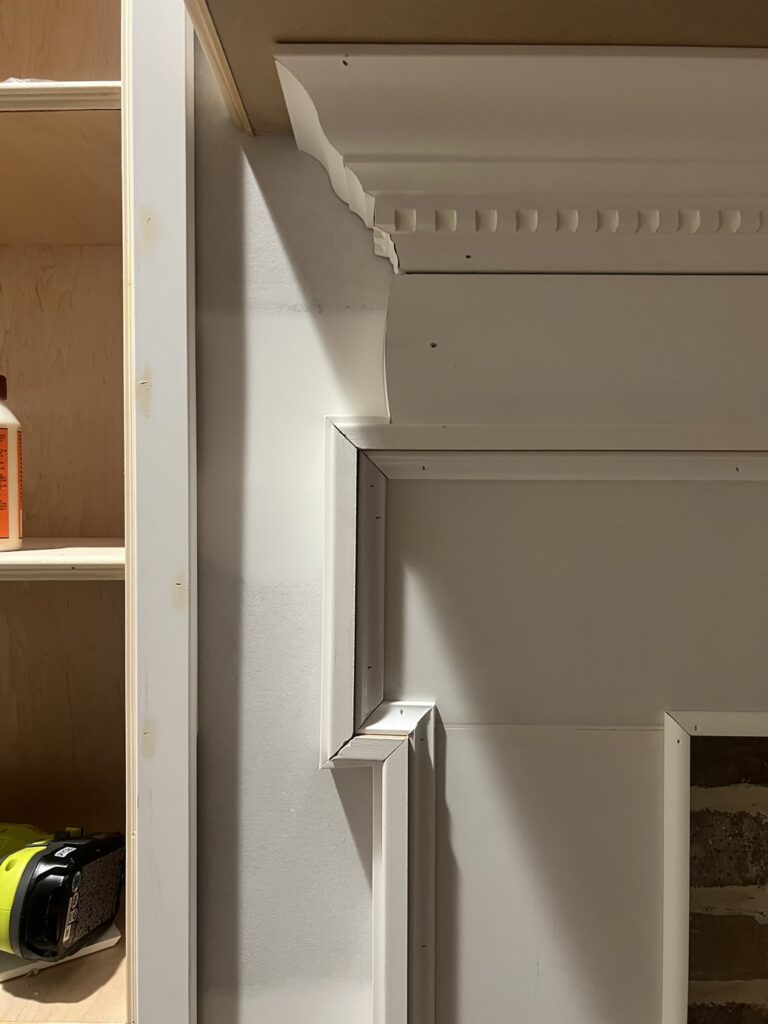
To finish it off, I applied wood filler and caulk where needed:
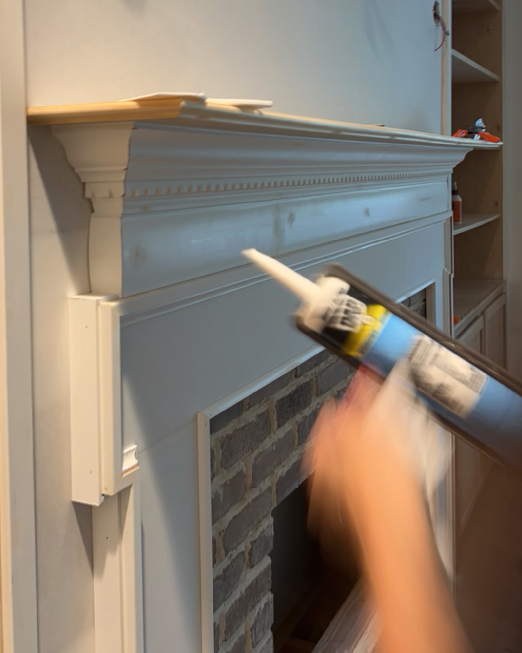

Here is the new fireplace mantel:
I’ll write a more detailed post about how to build a fireplace mantel, stay tuned!
Paint the fireplace
Finally, it was time to paint! As always, I applied one coat of my favorite primer before applying two coats of my favorite paint:

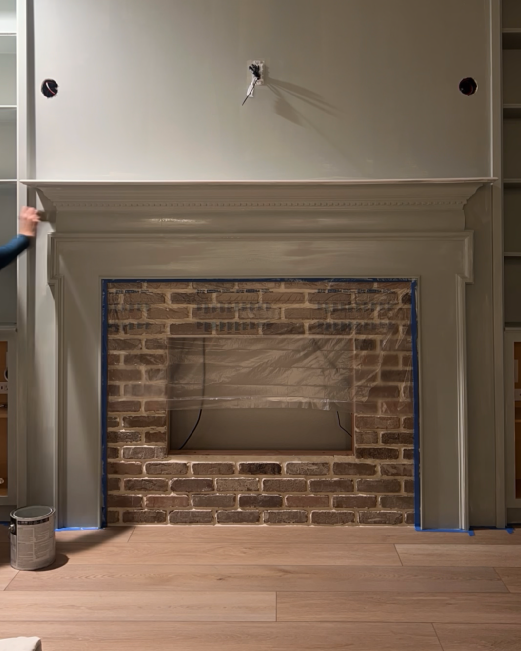
The color is Light Blue by Farrow & Ball (color matched at Sherwin Williams).
Install the fireplace insert
The final step was to install the electric fireplace insert!
It was actually so easy!
All we had to do was take off the glass part in the front and plug it in:
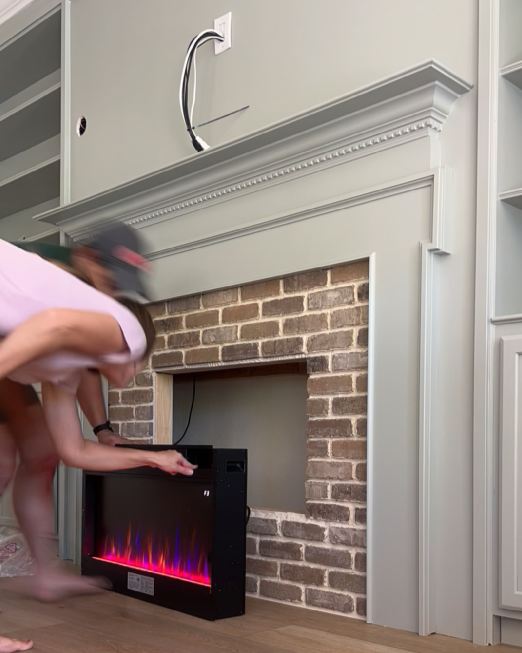
Then, my husband put the fireplace insert into the hole:
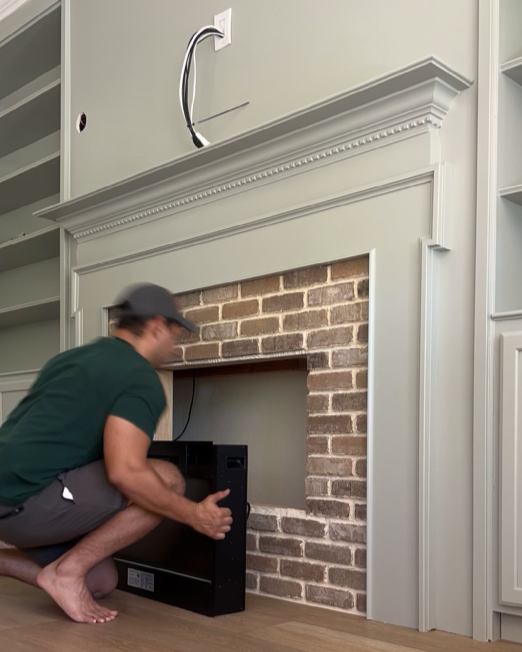
Next, I secured it with a few screws, put the glass part back on and secured that with a few more screws!

Then, I turned it on to test it:

That was it! Easy!

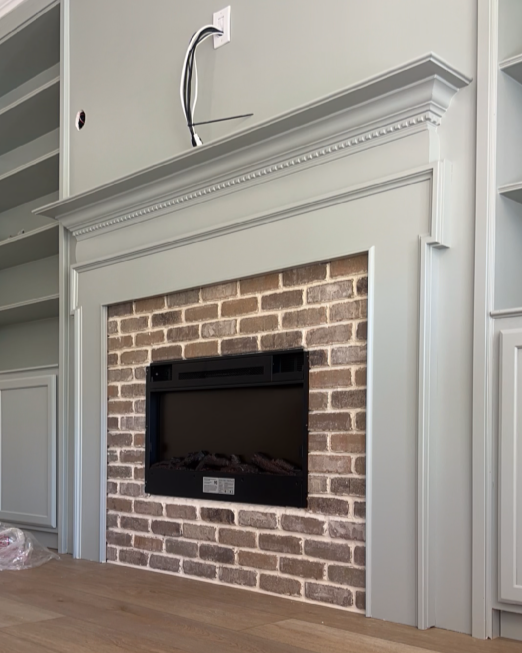
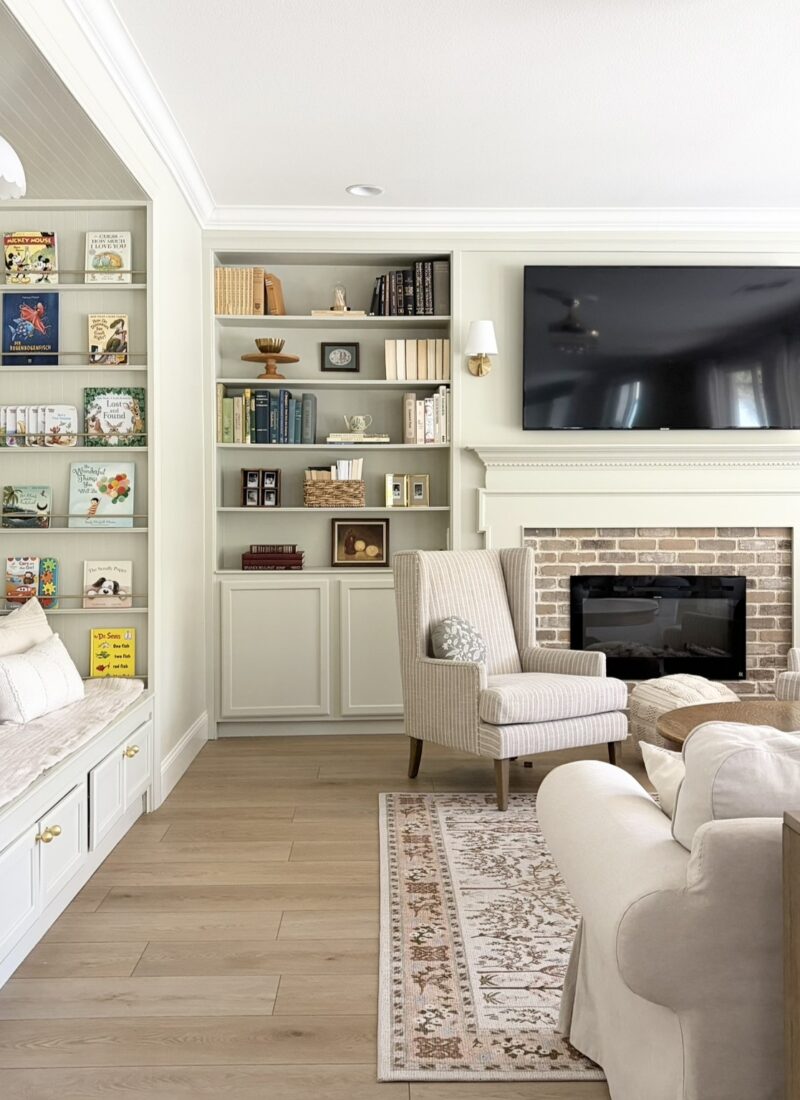
Finished DIY electric fireplace
I’m so thrilled with how our fireplace came out!

I love the traditional look with the dentil moulding and I think it’s the perfect size for the space!

I’m so glad I went with a more intricate design for this:

I hope this was helpful, let me know if you end up installing a DIY electric fireplace in your home!
Tina
Leave a Reply