Have you been considering a checkered floor in your home? I just recently added gray and white checkerboard floor tile in our hallway bathroom. In this post, I’ll show you exactly how I installed our new checkerboard bathroom floor and I’ll also share what to consider while designing a checkered floor!
Note: This post may contain affiliate links, you can find more information in my disclosures here.
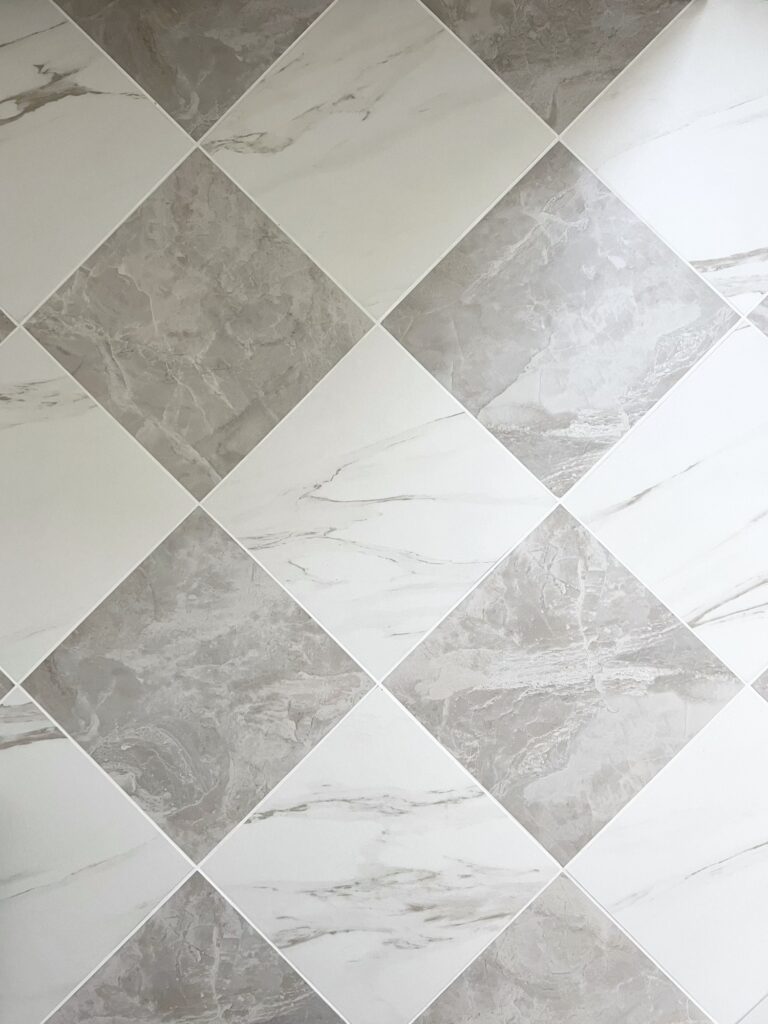
This is the checkered tile we used in our bathroom:
What is a checkered floor design?
A checkered floor design is typically created by alternating square floor tiles in a grid pattern with different colors.
Usually, a lighter tile is combined with a darker tile. This floor design style is also sometimes referred to as a checkerboard pattern.
It has been around for a long time and this classic look has recently gained in popularity again in the interior design world and you’ve probably also come across it on social media a lot.
Where can checkered floors be installed?
There are many spaces that will look great with a checkered floor. However, a checkered bathroom floor is one of the options I’ve seen the most recently! The bathroom is also where I installed our checkered floor.
I really wanted to do something a little different and out of my comfort zone for our hallway bathroom at the Hills House and a checkered tile bathroom floor seemed like a great option! I’m so glad I decided to include it there because I love how it turned out!
Some other popular rooms for checkered floors are:
- Hallways
- Laundry Rooms and
- Dining Rooms.
What are the most common checkered floor colors?
The most common color combinations for a checkerboard floor include white tile.
They are either a grey and white checkerboard floor or a black and white checkerboard floor.
Black tiles create more contrast compared to grey tiles but both checkerboard floor options look amazing when paired with white or off-white.
Another more subtle and unique option is a beige and white checkerboard floor.
In our bathroom, I decided to go with grey and white checkered floors!
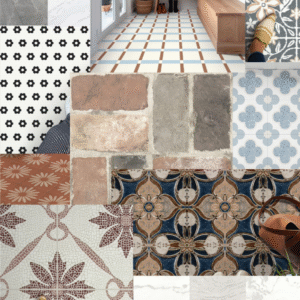
I’ve collected some great options for white and gray checkered tile, white and black checkered tile, white and beige checkered tile and even some unique color combinations like white and green checkered tile as part of a list of 25 beautiful checkered floor options that I’ve curated for you here.
What are the options for checkered floor materials?
There are so many great options for checkered floor tile. If you would like to try out the checkered floor look in one of your spaces but aren’t ready for a permanent commitment yet, checkered peel & stick flooring could be a great option:

Otherwise, marble checkered floors, ceramic checkered floors or porcelain checkered floors are popular options.
Ceramic and porcelain will typically try to mimic a real marble checkered floor.
As beautiful as real marble tile is, sometimes it’s not the best option for high traffic areas as it’s a natural stone that typically requires more care and maintenance than ceramic tile or porcelain tile options. A checkered marble floor also tends to be on the pricier side than some other options.
For our checkered bathroom floor tiles I decided to go with these affordable silver marble glazed porcelain tiles and these bianco carrara glazed porcelain tiles:


I love how our checkered tile floor bathroom turned out!
It mimics real marble checkered flooring but I don’t have to worry much about maintenance of these floors! They were also much for budget-friendly at that price point than a real marble checkerboard floor.
All of this combined made them the perfect choice for our bathroom!
I’ve also curated a list of 25 beautiful and affordable checkered floor options, feel free to check it out.
What checkered floor tile size is recommended?
Tiles come in countless different sizes. A checkered floor with small tiles will have a different look than a checkerboard floor with large tiles.
The most important thing to consider when deciding on the size of your tile is the size of your room. Smaller tiles are frequently used in smaller spaces, but using larger tiles in a smaller space like a laundry room can create a more dramatic look.
A good rule of thumb regarding sizing is that you should have at least three whole tiles fit in each direction of your space.
One of the most common sizes used in checkered floor tile installations are classic 12″x12″ tiles.
I actually used these 12″x12″ tiles for our grey and white checkerboard floor in the hallway bathroom and it’s a relatively small space at about 40 square foot.
What are the most popular checkered floor layout options?
When it comes to layout of checkered tiles, there are two main ways to lay a checkerboard floor in: a grid pattern or a diamond pattern. For our bathroom with checkered floor, I decided to go with a diamond pattern!
If you would like to learn about the different layout options (not just for a checkerboard flooring design), check out my post about tile patterns.
My checkered floor installation
Now that we got some of the common questions about checkered floors answered, let me show you what our bathroom looked like before!
Here’s a picture of the bathroom that I took the day we closed on our house:

I have no doubt that someone put a lot of thought into designing this bathroom back in the day. It’s actually pretty impressive that the shower curtain, drapes and wallpaper match!
However, carpet in the bathroom is a decision I will never understand. I knew I’d be remodeling this bathroom at some point but didn’t have a solid plan right away. All I knew was that the carpet had to go – right away!
We removed the carpet, put down some Peel & Stick tiles, removed the wallpaper (I have a post on how to remove wallpaper if you’re curious!) and left this bathroom alone while we worked on the rest of the house. At least it was functional and I didn’t have to look at the carpet anymore, ha!
Here’s a picture of the temporary Peel & Stick floors before I pulled them up to get started on the new checkerboard floors:
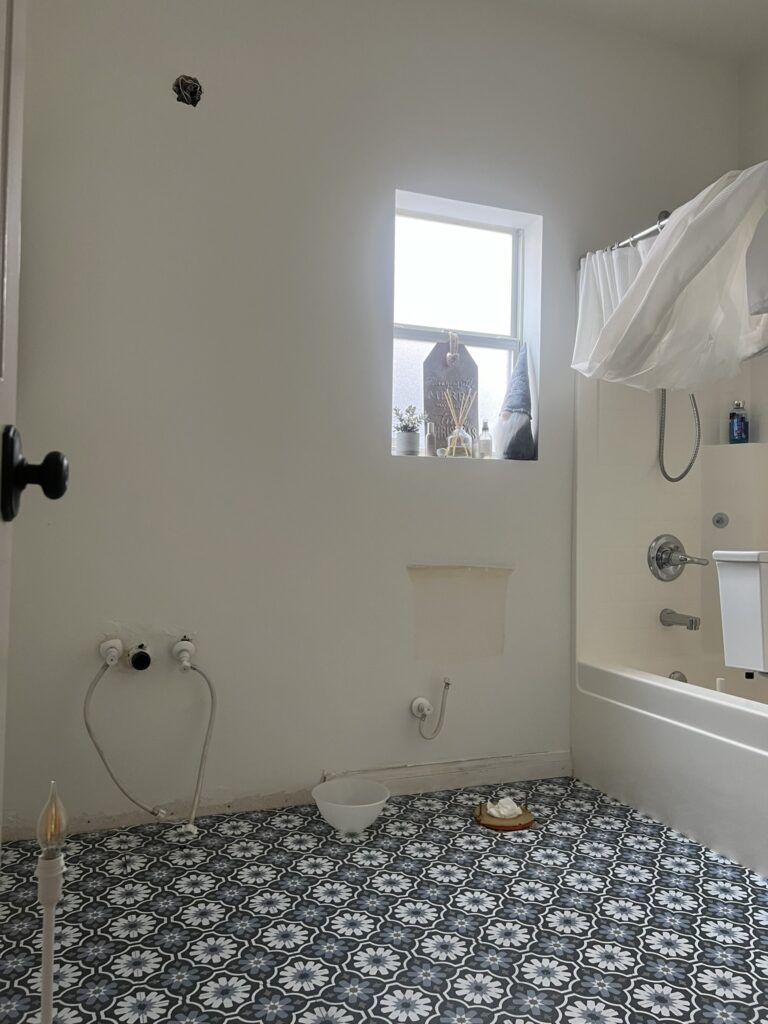
Now that we got the before pictures out of the way, let me show you how I installed our checkered bathroom floor!
Materials
Tools
Step 1: Design checkered floor
The first step is to design and plan the new checkered floor. That includes making decisions on the checkered floor:
- Colors: For my project, I was considering a black and white checkered bathroom floor or even a beige and white checkered bathroom floor but ultimately I decided to go with a classic style grey and white checkerboard floor for our bathroom after bringing home a few flooring samples.
- Materials: As I mentioned above, I love the look of a marble checkered floor but knew I wanted to use a material that required less maintenance so I decided to use a porcelain tile that mimics the look of marble. It’s also more scratch-resistant which makes it a better option for us in a high traffic bathroom.
- Tile Size: Our bathroom is about 8′ x 5′ so I decided to avoid using some of the larger tile sizes and instead went with a standard 12″x12″ tile size which ended up being the ideal choice based on our bathroom size.
- Layout Option: I made the decision to go with a diamond pattern for the layout option in our bathroom.
- Grout Color: I wanted a clean and bright checkerboard look so I decided to go with my favorite white grout color to finish it all off.
I spent countless hours looking through the endless options for the right gray and white checkerboard bathroom floor tiles.
If you like how ours turned out, you can just skip this step and just order the marble-look porcelain tile I used online, ha! It actually comes in a few different color options and one of them looks a lot like white marble:

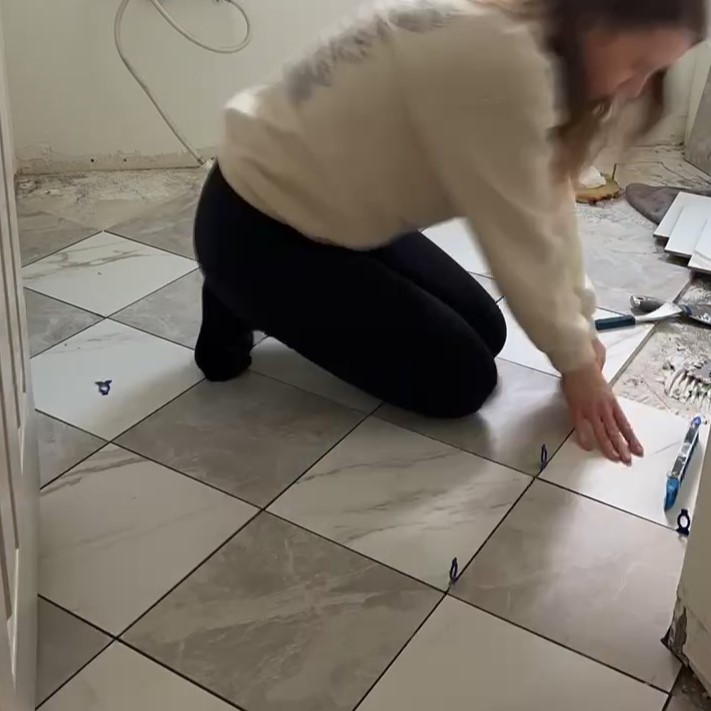
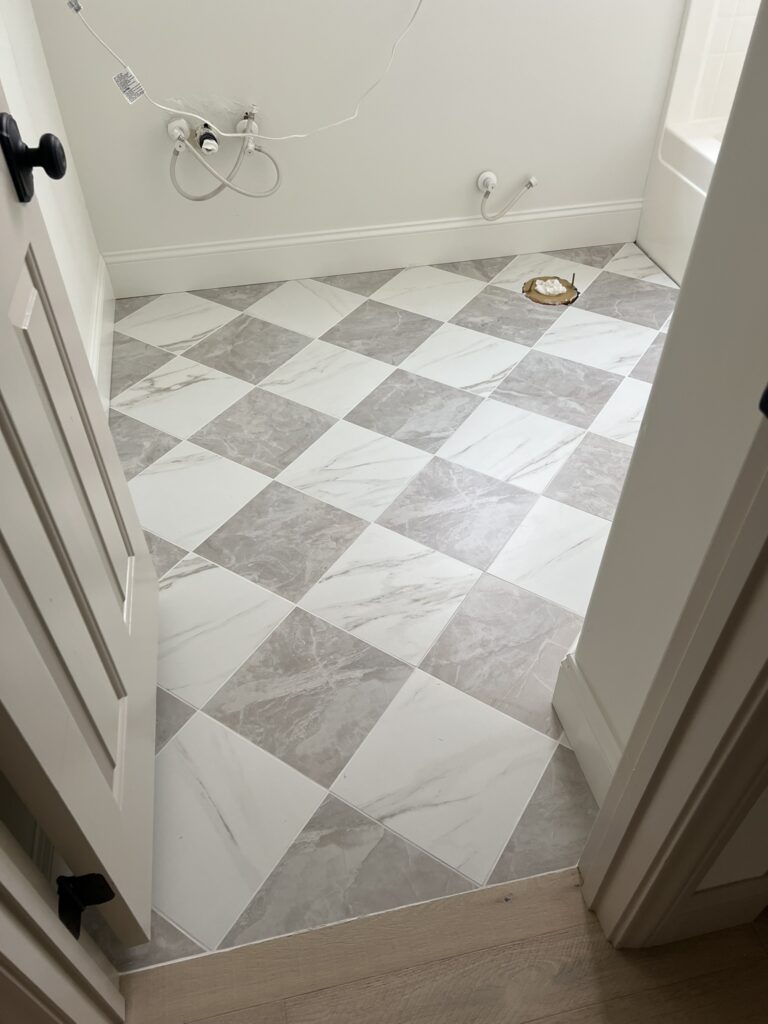
Step 2: Plan and dry fit checkered floor
Before starting to lay any tile, I like to look at the space and plan placement of my tile and also decide what I want to do around any obstacles.
In my bathroom, I wanted to avoid tiny slivers of tile around the parameter of the bathroom. I did a quick dry fit of the tile and made some adjustments to the placement to make sure I wouldn’t end up with any awkward cuts.
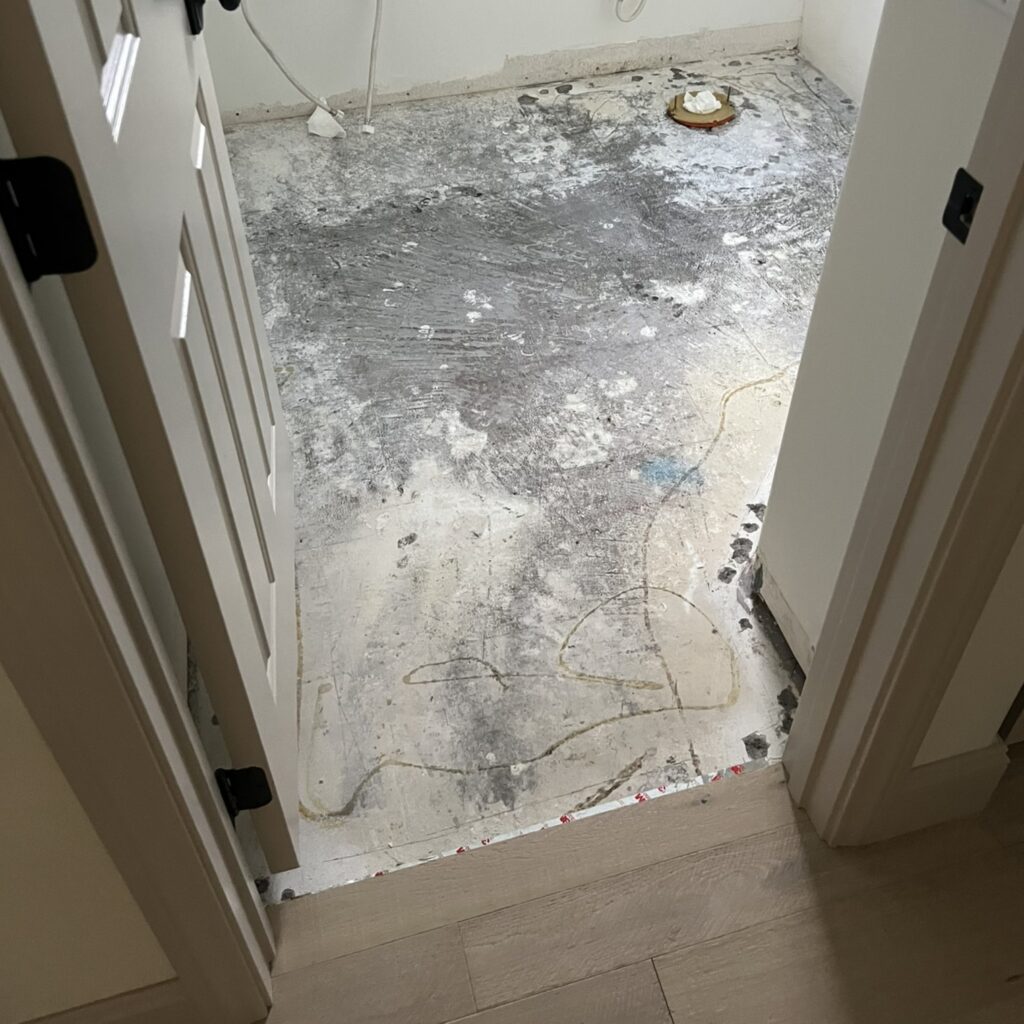
In the picture below you can see that the gray tile won’t be perfectly centered on the doorway (the center is indicated by the pencil) but moving it over just a tiny bit avoids awkward slivers along the wall.
To me, that is a worthwhile tradeoff!

Step 3: Tiling the bathroom floor
I HIGHLY recommend taking your time with the first few tiles and not rushing the process. I believe the first few tiles are the most important because the rest of the space depends on it! Ensuring those first few tiles are perfectly level and placed correctly is key to get that perfect checkered pattern.
Note: Depending on your subfloors, the climate you live in and other factors, the floor prep needed before tiling might vary so it’s best to find out what’s needed before starting this project!
Applying mortar
Tip: I only applied mortar to a small section of the floor at a time so that I could take my time tiling without having to worry about the mortar drying out.
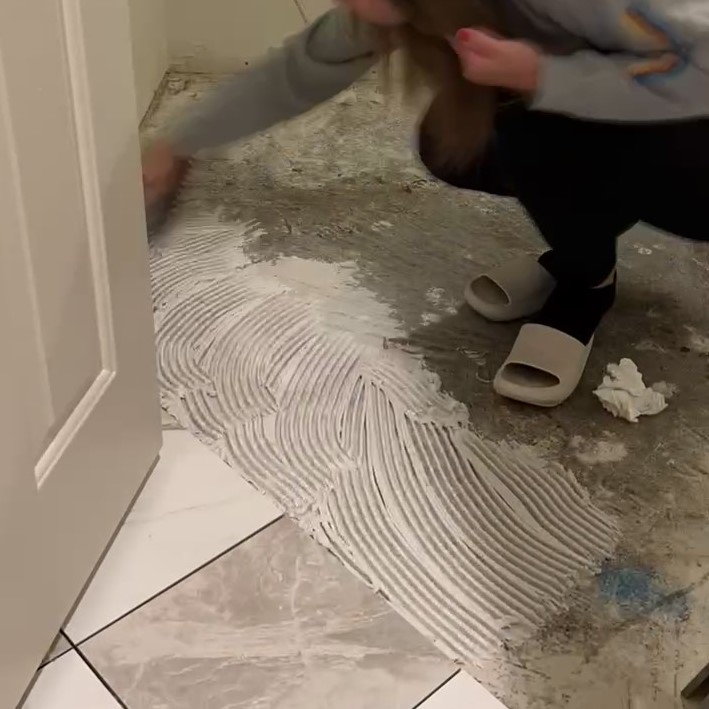
I used my trowel to apply the pre-mixed mortar and create the notches. Then, I used spacers to lay the tile. I applied a little bit of pressure to adhere the tile to the mortar:
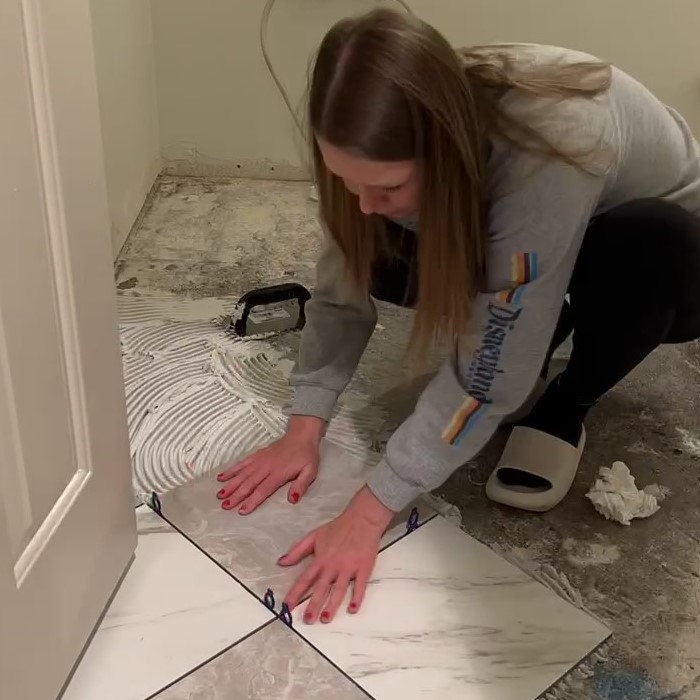
I used a level for each tile to make sure it was perfectly level and to avoid lippage. Whenever needed I applied some light pressure to level out the tile:
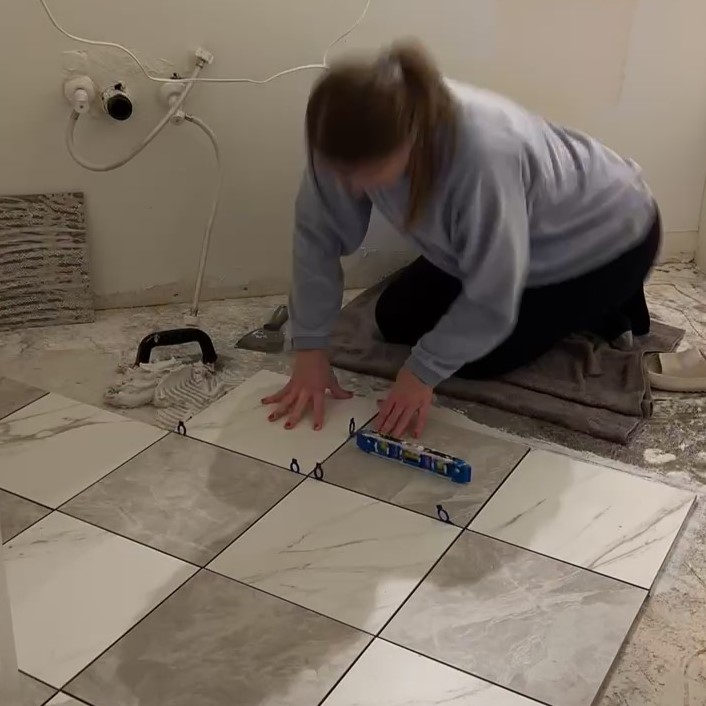
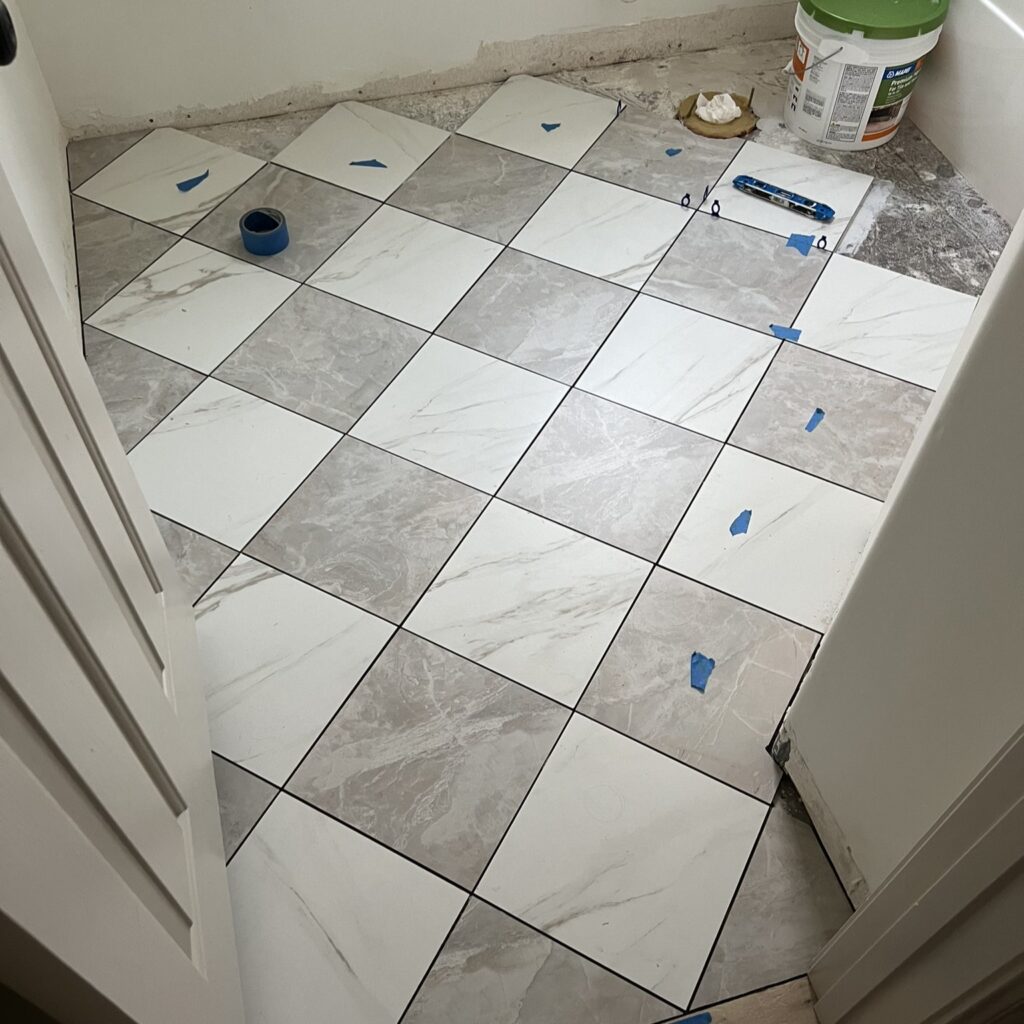
I was also working in sections, laying one section of square tiles each day or every few days so that I could walk on the floor to access the next section:
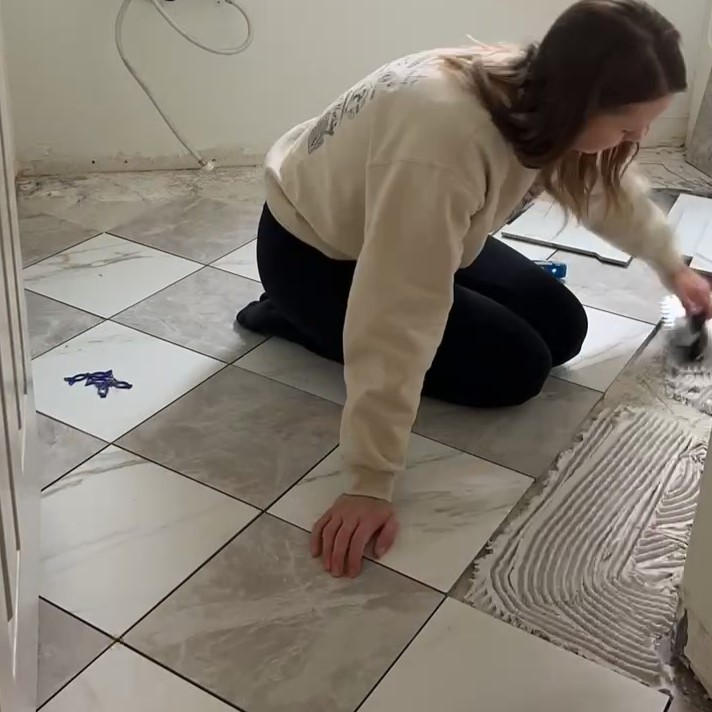
I also marked the freshly laid tiles with painters tape to make sure I didn’t accidentally step on them before the mortar was dry:
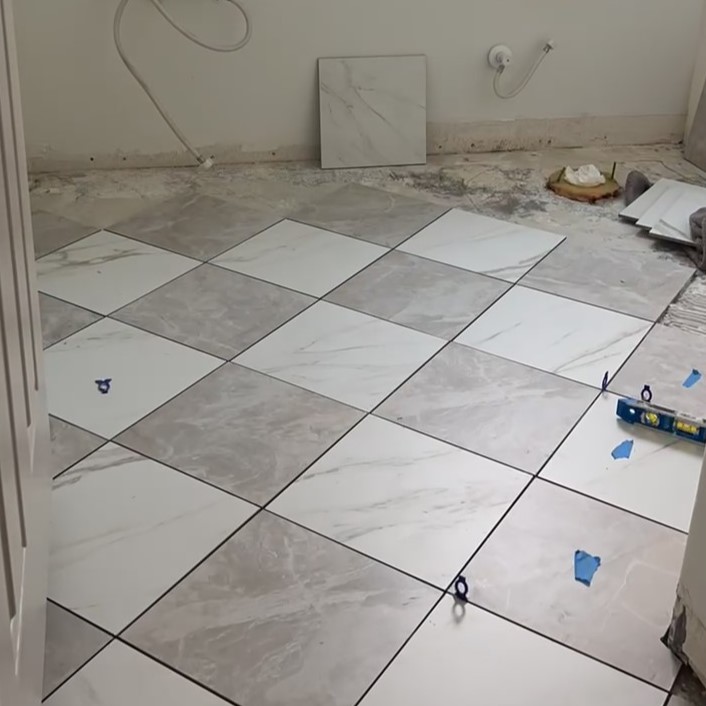
It might be a good idea especially when working in a small space!
Cutting tile
This was my least favorite part of the project!
I typically use a score and snap tile cutter, which is less messy than a traditional wet saw and I can use it indoors.
The score and snap tile cutter cuts tile by scoring the tile with a little wheel first and then pressure is applied to snap it. I described the process in more detail here.
However, because I was using larger porcelain tiles for this project, I had to use my wet tile saw and it’s so messy and loud! Just something to keep in mind.
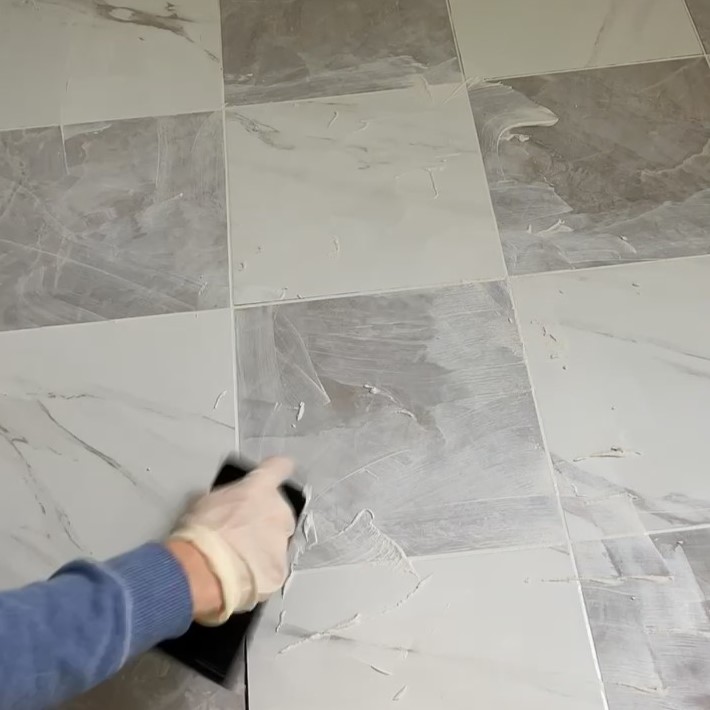
Step 4: Applying grout
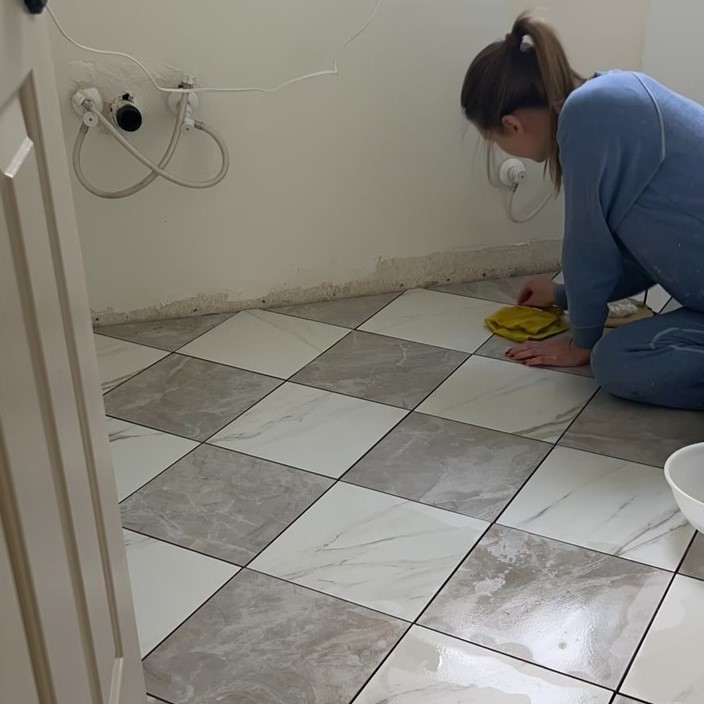
Before applying the grout, I cleaned the entire floor thoroughly:
Then, I used Mapei Ultracolor Plus FA grout in my favorite color Avalanche for my checkerboard tiles. I’ve tried a few grout colors in the past and this it the closest one I could find to a true white.
I mixed the grout in small batches so that I could do one small section at a time.
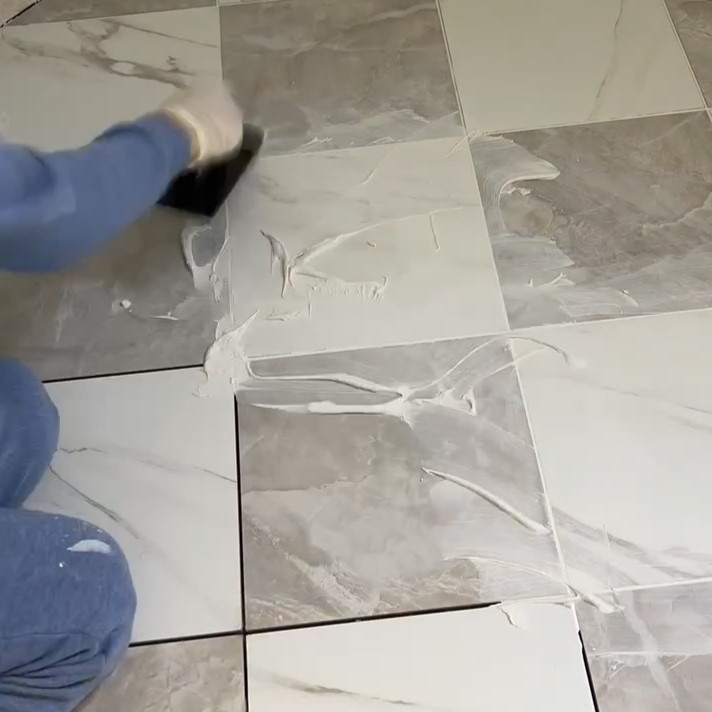
I applied the grout with a grout float and let it sit according to the instructions:
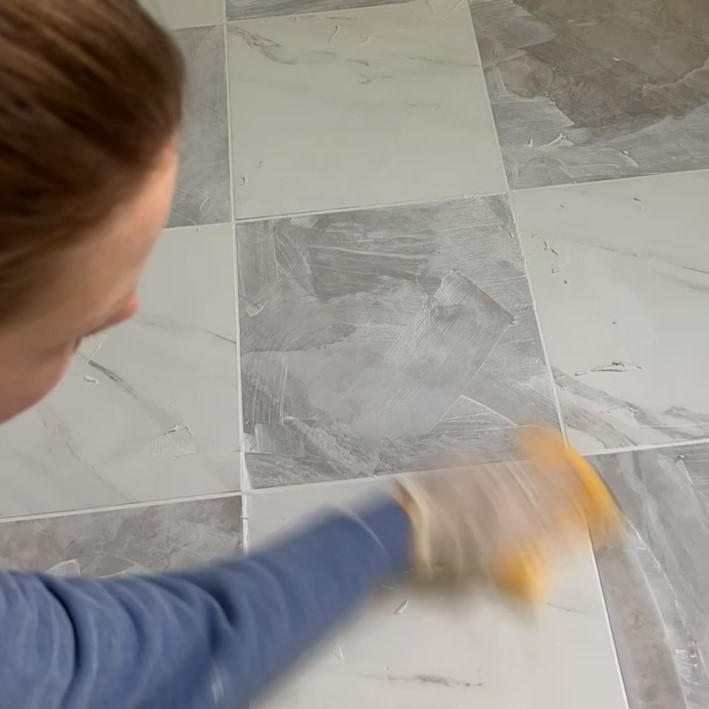
Then, I used a small bucket with water and a grouting sponge to wipe off the excess:
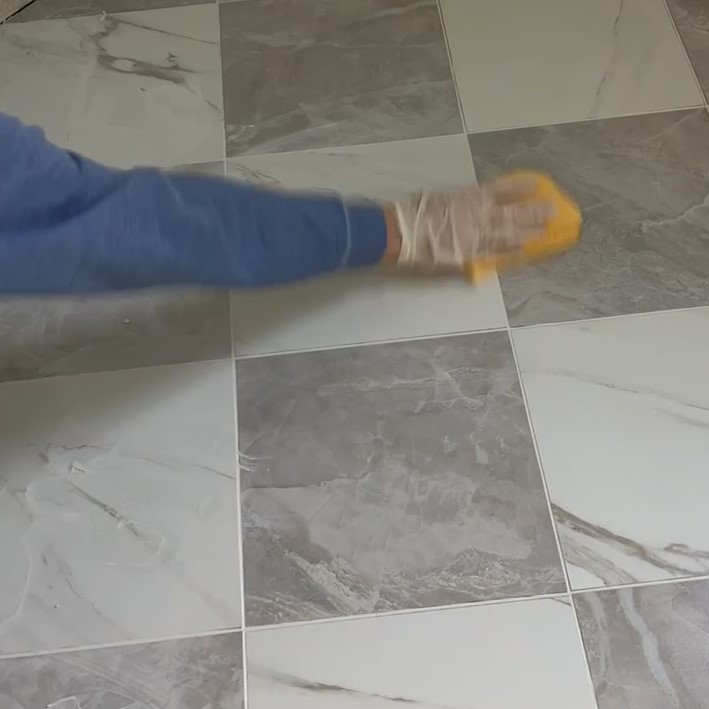
After letting the grout dry, I removed any remaining grout haze with some water and a microfiber cloth. I find that those work really well for the final clean up!
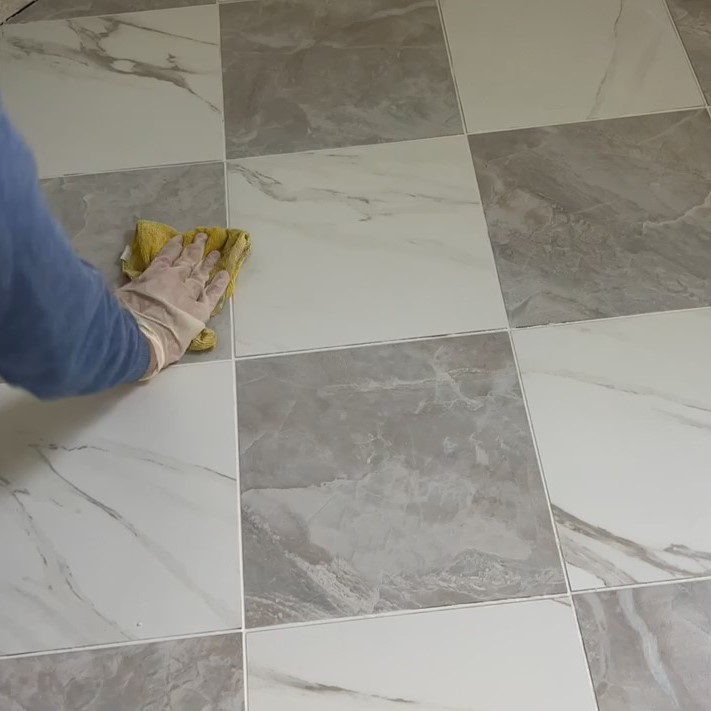
I’m always so amazed to see the difference once the grout is finished!
Here is our checkered bathroom floor before grout:

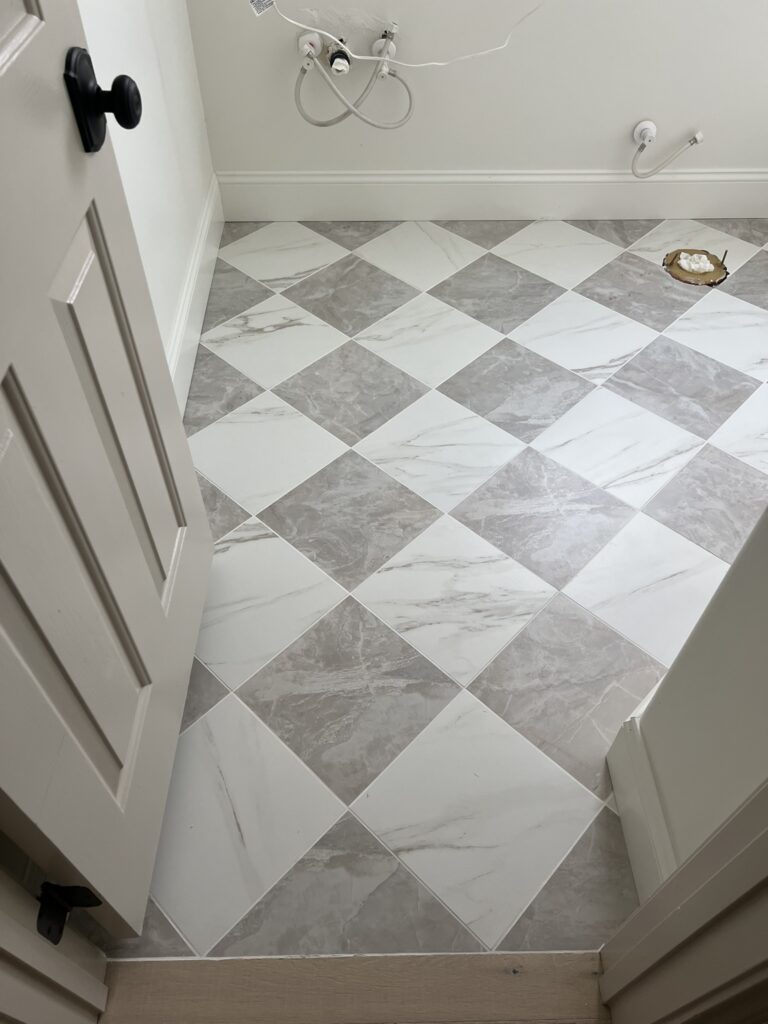
Here is our checkered bathroom floor after grout:

I love the way it looks with the bright white Avalanche grout!
You can also kind of see in this before and after of our checkered tile floor bathroom that a darker grout color would make the checkered floor look completely different.
You can definitely go with a gray or dark gray grout that would highlight the grout lines more to still achieve a classic design but more moody look!
Step 5: Adding baseboards
This was one of my favorite steps during this project because it’s pretty easy and it just makes such a huge and satisfying difference!
I added the same 7 inch baseboards we have throughout the rest of our house but painted them white (SW Alabaster) like our walls to better match the checkered bathroom floor. I have a detailed post on how to install baseboards, feel free to check it out!
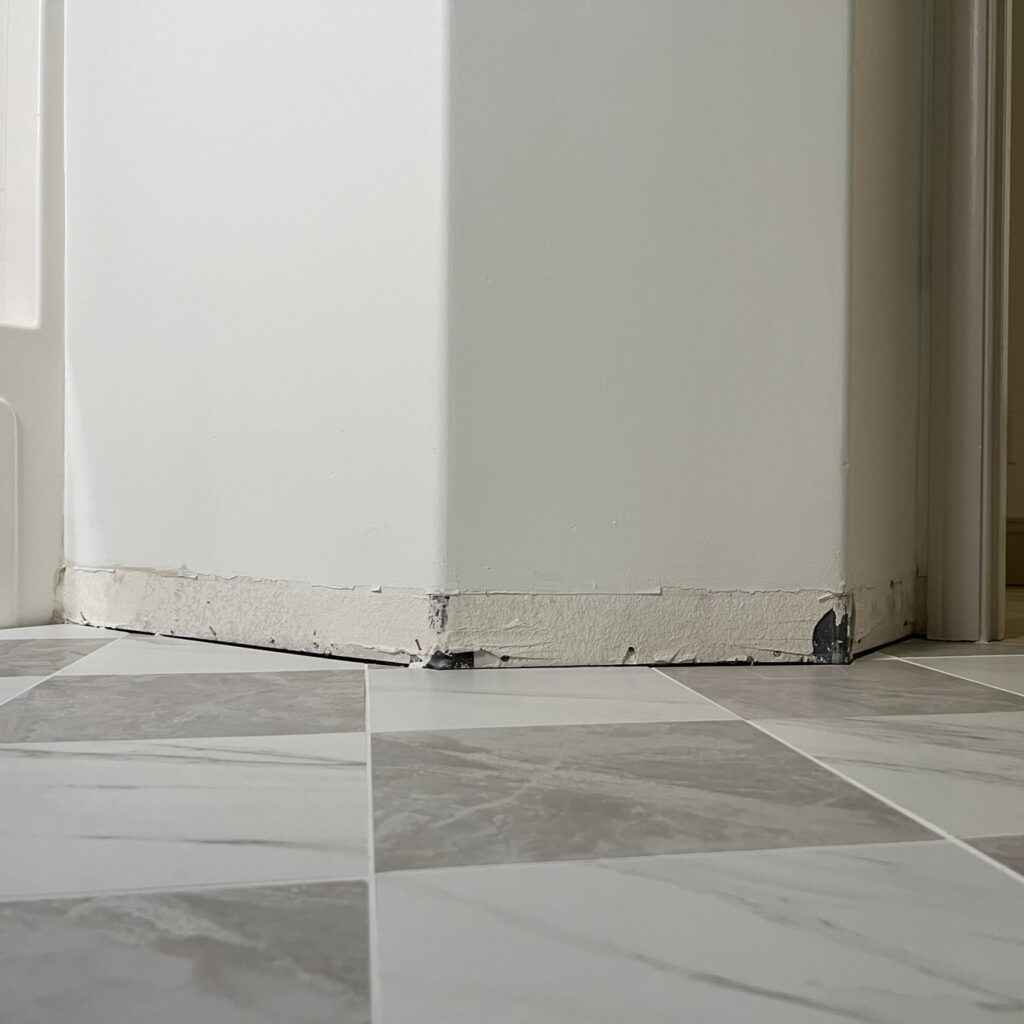
Here is one of the corners of the bathroom without baseboards:
And here is the same corner with baseboards:
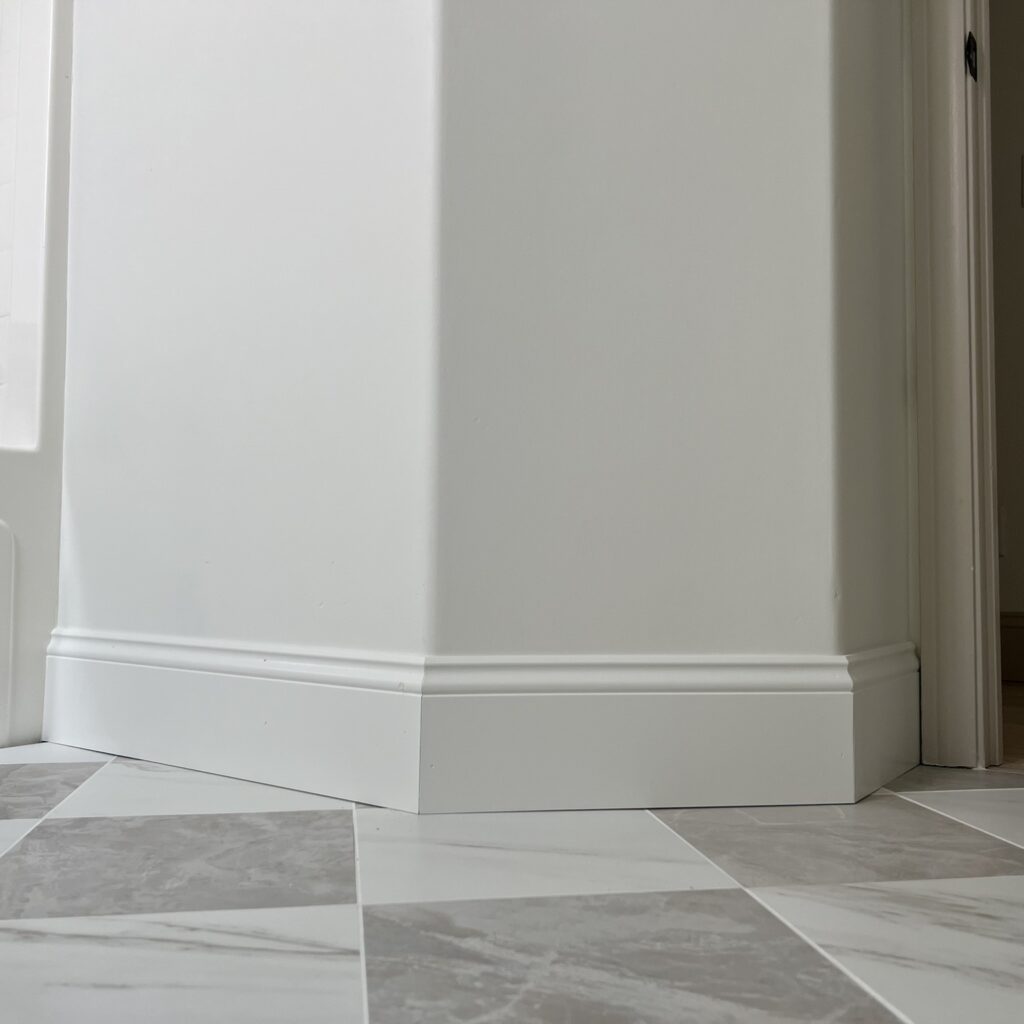
I love how the new white baseboards really complete this bathroom with checkered floor!
Finished checkered floor
Seeing the progress of my projects is always so satisfying to me so I made sure to take some pictures along the way so you can see the progress, too!
Here’s the checkered floor without grout:
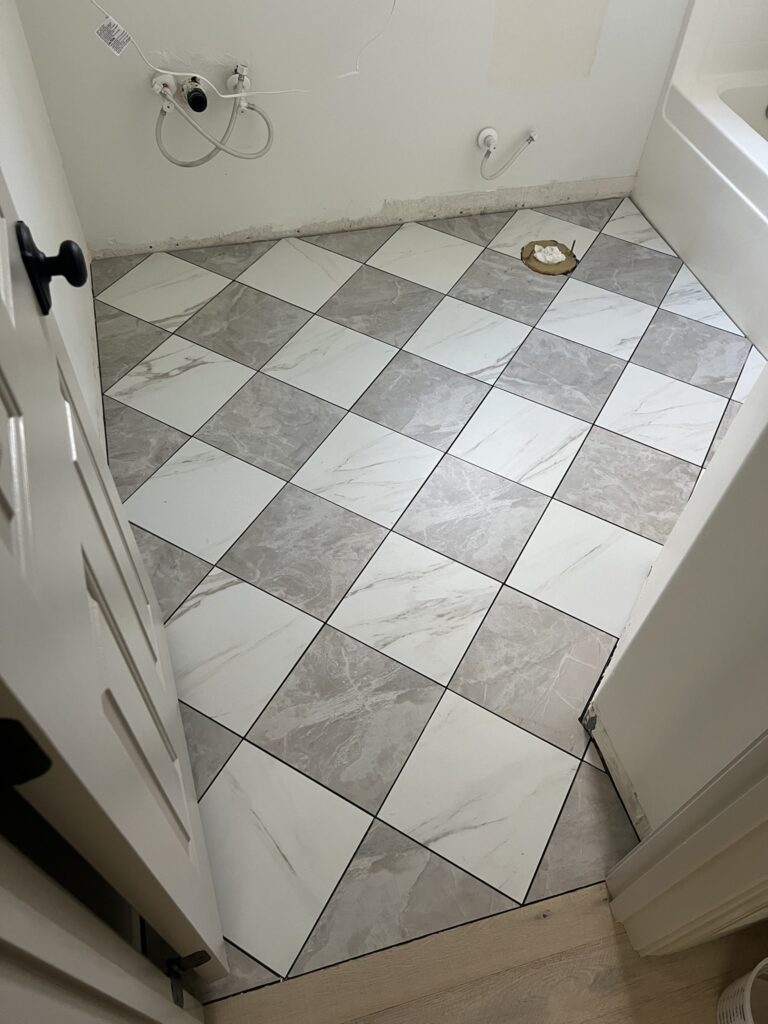
Here’s the checkered floor with grout:
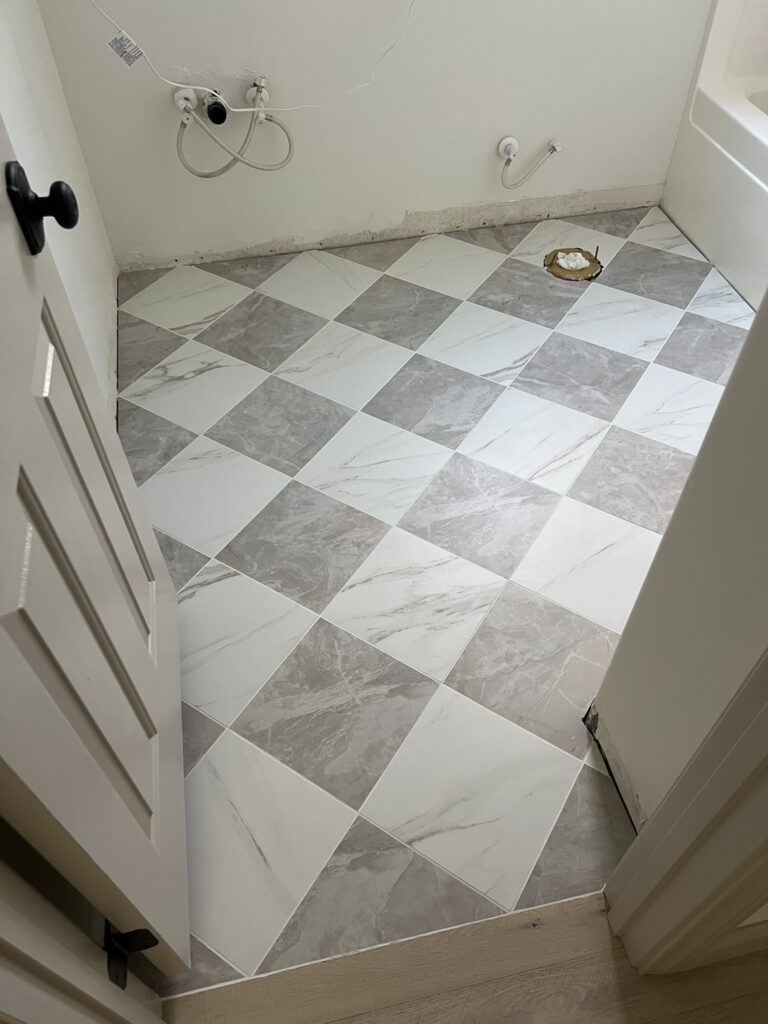
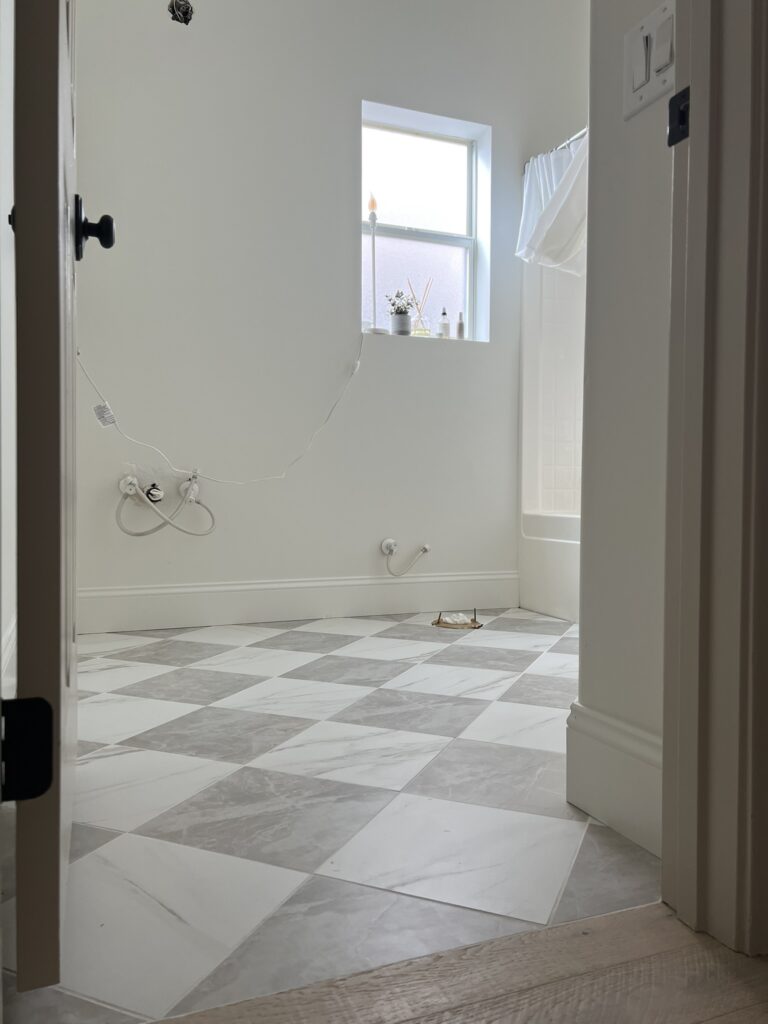
And here is the checkered floor with grout and new baseboards:
Note: The bathroom is still missing the quarter round along the bathtub which I’ll add soon.
I really love how our faux marble checkered floor turned out! It love the more matte finish for a more timeless look, it was actually pretty hard to find the perfect tile that didn’t have a glossy finish.

I’m so happy the old carpet is gone and we have these awesome checkered bathroom floor tiles instead – what an upgrade! I think the marble tile look is perfect for this bathroom.
There’s plenty more to do in this bathroom in addition to these new tiles so be sure to check back in on the updates, I have some fun plans for this one and I saved some of my inspiration here if you’d like to take a peek!
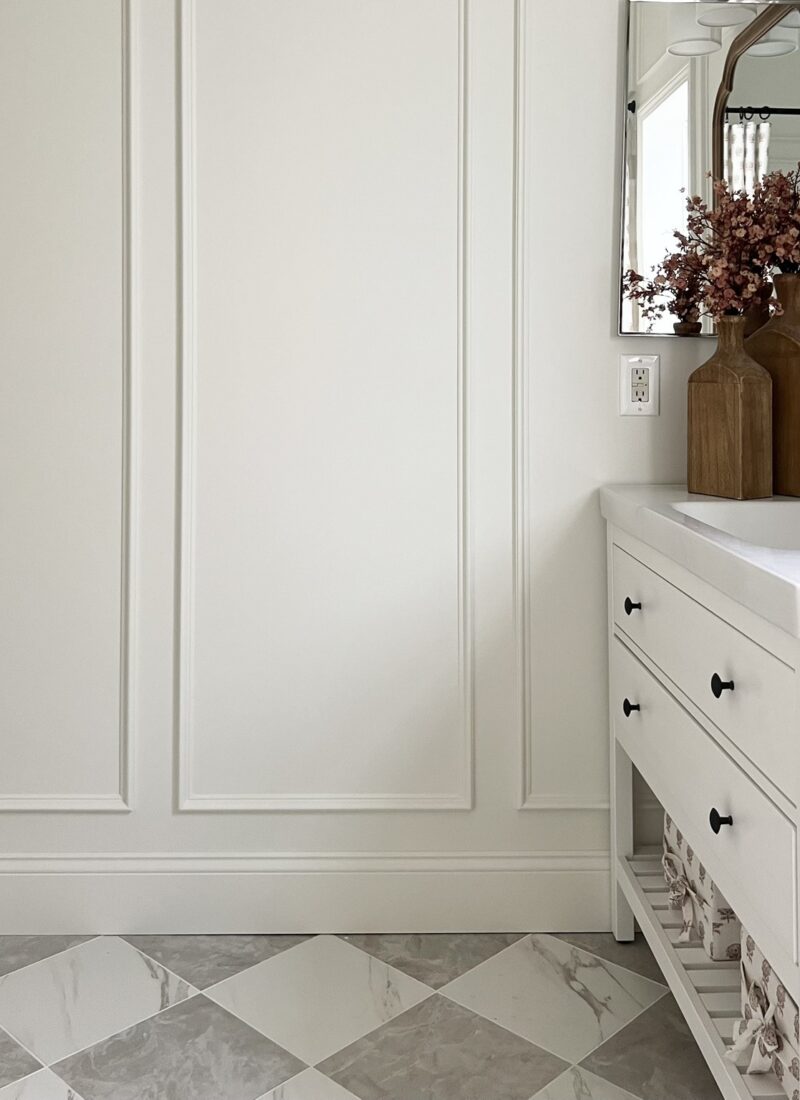
Update: The hallway bathroom is done and you can find the full bathroom reveal here!

I especially love how the picture frame molding turned out!
As always, let me know if you have any questions!
Tina
This post was originally published in April 2024 and has been updated.

I love your floors! Can you tell me what the paint color is on your door?
Hi Susan,
Thank you so much! The color on the door is Accessible Beige by Sherwin Williams and the sheen is semi-gloss.
I love this! I ordered samples of this flooring and it’s very shiny /glossed. Your photo looks more matte. I am curious what it is actually like?
I bought the same tile from Lowe’s and unfortunately the “silver” batch they sent me looks nothing like yours (they’re so beige) and are very poor quality.🥲
Must’ve been from a different dye lot.
Yours look great! Just wish I could find tile to achieve the same look without having to buy marble.
Hi Vida, I’m so sorry to hear that! They do come in three different colors (white, gray and beige) so I’m wondering if they may have sent you the beige on accident? I just double checked the tile I ordered vs the one I linked just to make sure and they are the exact ones I ordered (the Silver Marble and the Bianco Carrara colors).
I agree with you, it’s so hard to find that marble look. I spent so many hours looking for an affordable option that wasn’t marble!
Tina
I just purchased them from Lowe’s and am on the same boat 😩 they look nothing like the silver pictured
Hi Madeline! I’m so sorry to hear that 🙁 Maybe try ordering it again? I’m wondering if there are different batches and the color is not consistent between them?
Anyway you could link the tiles again? The link is broken and I can’t find them on the Lowe’s website
Hi Marilena, the gray tile I used is sold out right now but hopefully it will get restocked soon! I’ve created a post with other alternatives for a similar look here: https://hausandhand.com/25-beautiful-and-affordable-checkered-floor-options/
Hi there!! I ordered a sample of this tile and it is super shiny/glossy. Is yours? It doesn’t seem like it from the photo but wanted to check 🙂
Hi Haley, thanks for reaching out! I’m surprised the sample you got is shiny/glossy and I’m wondering if they sent you the right tile? The tile I installed and linked in this post has a satin/matte finish. Let me know if you have any other questions!
Tina
What a wonderful post and your space looks amazing! I’ve been searching for this same look for our kitchen remodel! Do you think this exact tile combination would work in a little larger space as a kitchen? Are they easy to clean? Thank you so much!
Thank you so much! I think this tile would be great for a kitchen remodel. It’s really easy to clean and the pattern itself is very forgiving even when it’s not perfectly clean!
Thank you Tina for sharing the tile info. I ordered the sample and it came in a ceramic wall tile sample (glossy). Then when I ordered the actual 12×12 it was listed as porcelain like what you showed in the picture. So I was a little concerned as well. However I’m so pleased with what will be installing. It was so difficult finding the same tile in different colors to create this look and I would have still been looking if it weren’t for you sharing!
Hi Anna! I’m so glad to hear that you like the tile you ordered, I would love to see pictures of your floors once they’re done!
Where were you able to find the tile you used for the checkerboard pattern in the bathroom. I’m building a new house and using that in my laundry room but I’m having trouble sourcing the tile. Thanks!
Hi Tonya! I linked the exact tile I used in the Materials section of this post. Let me know if you have any questions!
Where can I find your baseboard? I can’t seem to find this type of baseboard.
Hi Melissa! I got mine at Avanti Door Group in Las Vegas, the description for it is 328MUL-6. You might be able to find it with that description at your local door/trim store or online.
Love your floor! Did you seal the grout? I always worry about it getting dirty. Thanks!
Hi Amy,
Thank you so much! I didn’t, the grout I used is an all-in-one grout so it’s really convenient.
Tina
Hi Tina,
Your floor is so pretty that I had to order the same tiles for my laundry room!
I do have a question….what size spacers did you use?
Thanks!
Hi Nancy, thank you so much! I used 3/32 spacers for mine!
Hi, I just laid the tile your recommend and love them. I was wondering where you bought your vanity? Trying to find something that goes well with the tiles.
Hi Ashley, that makes me so happy! We used the IKEA HEMNES vanity, you can find more details about the bathroom with the checkered tiles here: https://hausandhand.com/hills-house-hallway-bathroom-reveal/
Are those peel and stick frames on the wall? Thank you!
Hi there! I shared all the details including the materials in this post: https://hausandhand.com/diy-wall-trim/
I also noticed that the “grey tile” is way more “beige” than what your picture shows. However, on a positive note…I still love the color combo and there is still grey veining in the beige tile. I would love to send you a picture of what ours looks like in progress. We are also doing it in sections at a time, as it is our Laundry room and have to move the washer and dryer as we go. Let me know if there is a place I could send you photos!
Hi Tiffany, I would love to see a picture! Feel free to send it to [email protected].